
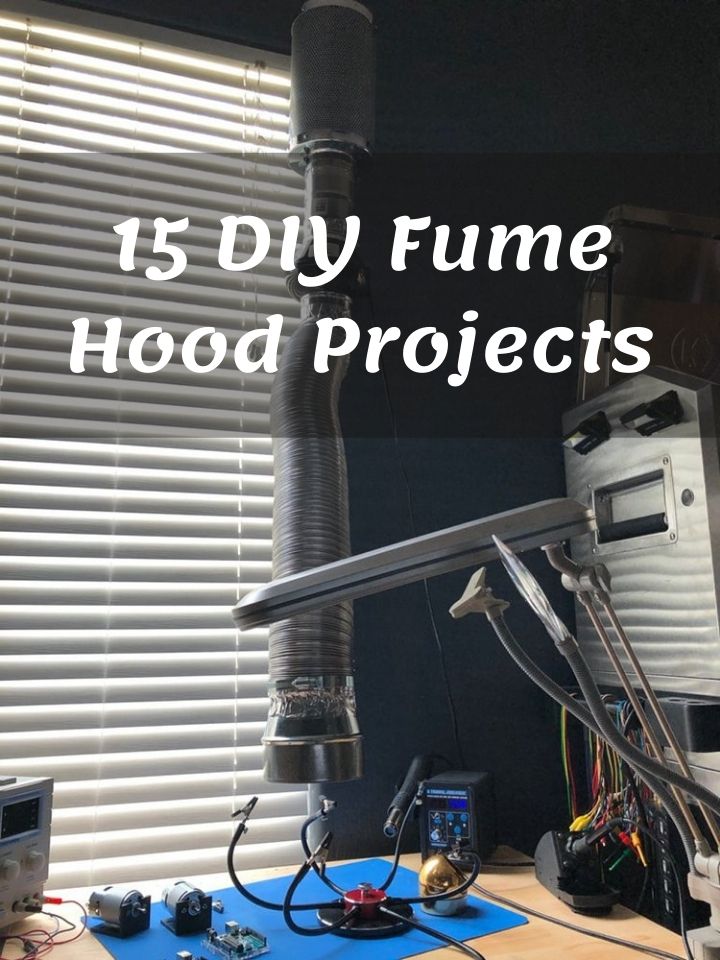
A DIY fume hood can be an affordable and effective way to safely handle all of the dangerous materials that may end up in your home or garage workshops. When you find yourself reaching for a respirator to avoid hazardous fumes, it may be time to take a look at a fume hood.
We have put together 15 different projects, each having a different approach to making a DIY fume hood. Check out all we have listed, make your pick, and start the building process.
Table of Contents
1. DIY Fume Hood
To get started with this fume hood, you need to bring the size of the fine hood you want. Thus is 4feet wide ( you can change this to suit your preference) and 36 inches tall. The first part of the fume hood is the main box made with ¾" thick wood, 4 pieces screwed together at the corners.
The next part is the bank made from pieces of ¾" plywood. After this, another box made from ½" wood gives room for air to flow behind the fume hood. Another part is the frame wood that makes up the front of the fume hood.
2. Homemade Chemical Fume Hood
This homemade chemical fume hood is a three-sided wooden box with a lid on it. The top is a platform made from reclaimed wood, and it looks nice after some sanding and staining. On the top, the creator installed an exhaust fan.
Because it will be dark inside the fume hood, you need some LED light strips to light up the box. Install an outlet strip on the top to plug the exhaust fan. The fume hood size is 2 feet by 2 feet square (you can customize the size to fit what you want to use the fume hood for).
3. How To Make A Fume Hood
You can make this fume hood with no proper measurement and no template. Just get into the work and do it as you see fit. But notwithstanding, a guide such as this will help a lot. For this particular fume hood, the frame was made from several 2×4s screwed together. Then, the creator covered the structure with plywood pieces.
On the fume hood, cut a hole and install the blower fan and tubing. Fit a ring light inside to light up the fume hood. After this is done, install the door, and your fume hood is ready to be used.
4. Building A Fume Hood At Home
What do you think about building a fume board with a cardboard box? It's fantastic, right! In this video, the fax box and the fume hood itself were made from cardboard boxes. Start with the fan; measure the inside of the box and cut four pieces of wood that will fit into it as the fan support. The wood pieces are joined together with predrilled holes and screws.
Attach two pieces of wood across the back of the pieces as extra support to screw on the fan. After this, cut a big hole at the bottom of the cardboard box wide enough for the fan. Fit the wooded square sbd the fan such that the fan is showing from the big hole.
5. Portable Fume Hood DIY
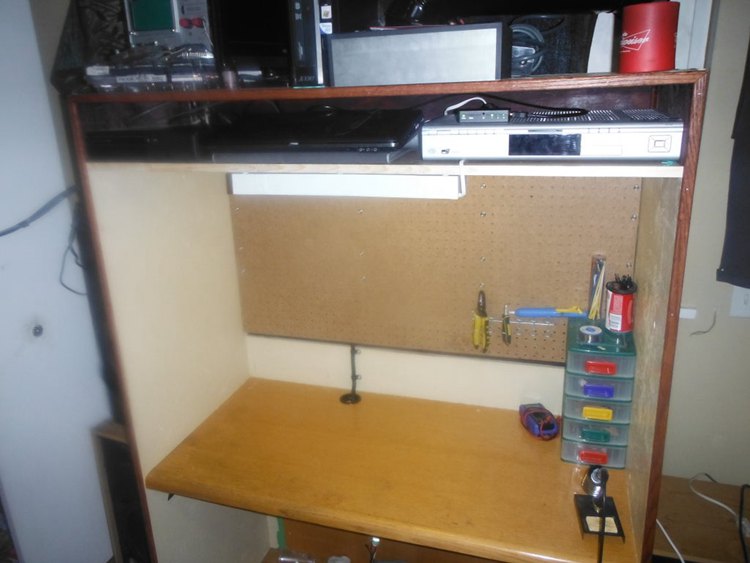
Make your portable fume hoop using a few upcycled materials. The creator made the whole fume board from an old desk, and he made the fan box from a salvaged squirrel cage.
To achieve this, you will need a long list of materials and tools, including cordless drill, soldering iron, under cabinet fluorescent lights, exhaust ducting and dryer vent, pegboard, masking tape, and miter saw. Once you gather all these materials, start cutting down the boards into pieces for the fume hood. On the two side pieces, cut out two holes for the handhold/handle.
6. DIY Small Fume Hood
Build this small fume hood for your small project that evolves smoke or fumes. The fume hood is a wooden enclosure with a clear plastic window. It was built on a cart to make it portable.
After the box is done, what is left is the installation of the electrical outlet and a place to vent the fumes. Some of the materials used include a range hood, cart, assorted fastener, duct tape, wire nut, plexiglass (other transparent materials can work well for the front face as well), and a power cord with a plug.
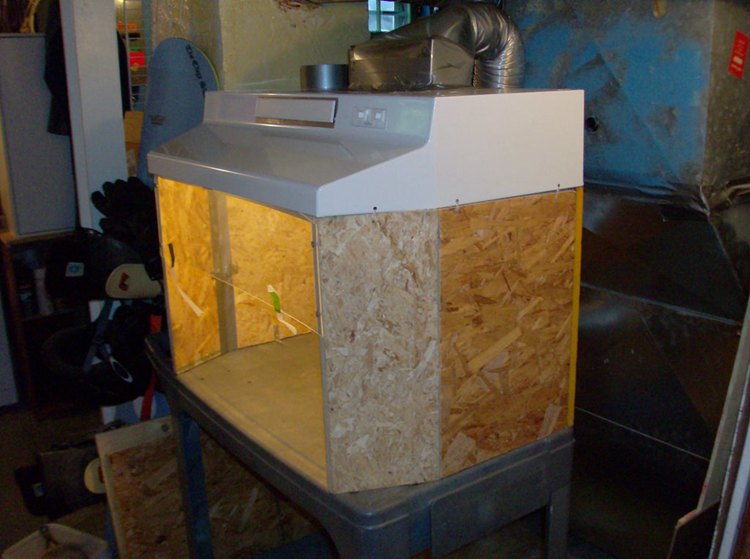
7. Cheap 3D Printer Fume Hood
When you recycle some materials for this fume hood project, the cost becomes minimal! Here are some of what you need a circular saw, drill, jigsaw, screws, ¼” plywood, pieces of wood, a piece of plexiglass or any transparent plastic, fan or a blower (115V AC 7W fan), parts, of PVC/ABS pipe, dryer vent hose. After getting all the materials, the next step is to create the frame using plywood.
8. DIY Fume Hood With Foot Pedal
One good thing about this fume hood is that the design can be adapted for under desks, on a stand, or hung from the wall, just in any way you like. You can complete everything in 1hour and the total cost is between $85-$110. From
9. DIY Low Budget Fume Hood
This low-budget fume hood was made from a few household materials. The creator made the fume box from a cardboard box joined together by silicone sealant. You might need to add extra silicone to the edges to keep the air from leaking out. This is because it is an air intake hood and not the other way round.
10. How To Make A Soldering Smoke Absorber
Watch this video tutorial on how to make a small soldering smoke absorber. The box is made of cardboard. The fan box is enclosed in a square box, and another four pieces of cardboard are attached to the square at angles. A long tube was attached to the fan box to take the smoke out to the other end of the fan box.
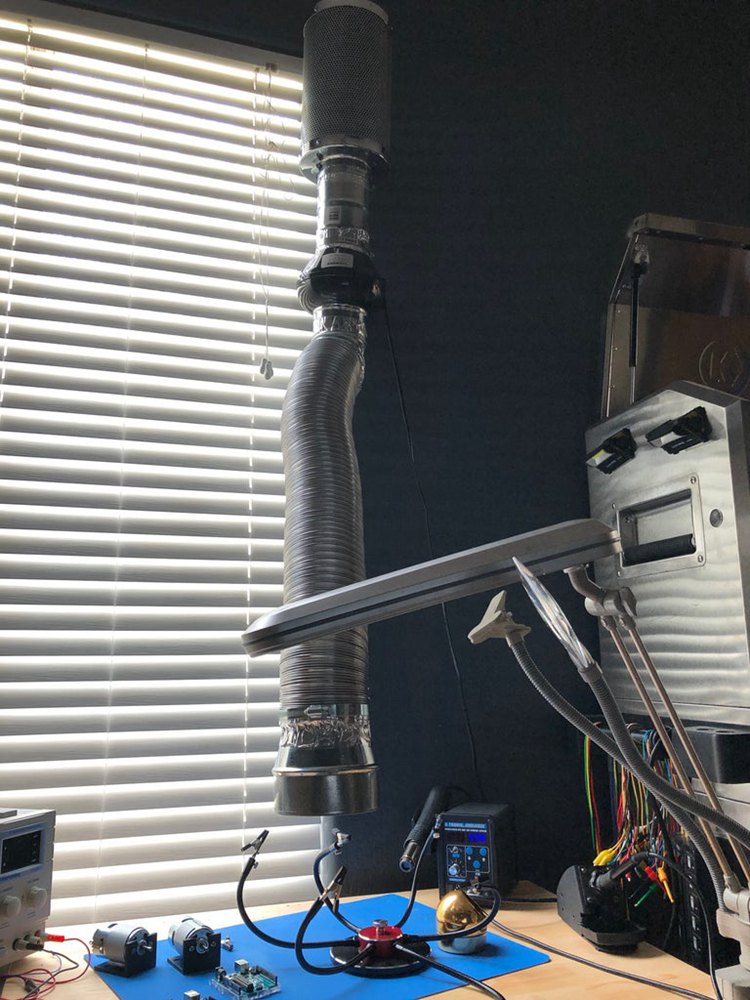
11. DIY Fume Hood
Learn how to build a DIY soldering fume and smoke extractor fan. Here are some of the supplies you need for the fume hood: hairdryer, vacuum cleaner, hose pipe, clips, funnel, tape, and an adjustment bar. After the materials are ready, the next step is to tape the hairdryer to the switch.
12. Solder Fume Extractor DIY
The first thing you need to do to get this solder fume extractor is to enclose the fan; cut four pieces of plywood to cover the top, bottom, and the sides of the fan, leaving the front back if the fan is out. Join the wood pieces together with wood glue and nail and hammer for extra strength. Cut a bit for the back of the fan box for the tubing. Check out other steps below.
13. Welding Fume Hood Extractor
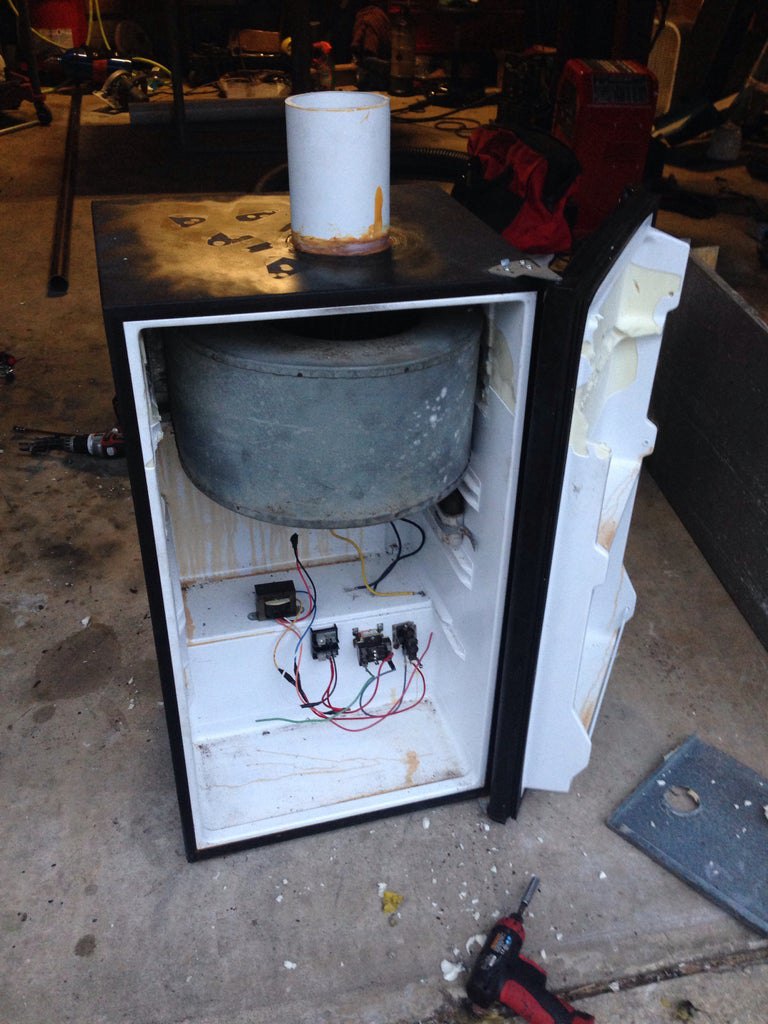
Learn how to make a welding fume hood with these couple of supplies: air handler, mini-fridge, 4" PVC pipe, drainage hose, and power switch. Once you have all these materials ready, the next thing you need to do is to disassemble the air handler.
Remove the blower motor and other electrical components required for the fan to work and discard other parts. After this, prepare the mini-fridge; remove the compressor, coil, and interior details. Be very careful while doing this, so you don't get hurt. Now, the next thing you need to do is reassemble the new system and install the electrical components.
14. Fume Extractor DIY
All you need for this fine extractor is a power supply with a fan, active carbon impregnated foam, some bracket to hold the power supply in place. Yet started, disassemble the lower supply and remove the fan and the switchboard. Discard every other component except the car/body. Make two holes on the board for the wires that will be connected to the fan.
15. DIY Solder Fume Extractor
If your work involves some kind of chemical and you don't want to breathe that in, then you need to make fume extractors where you will do all your work.
You will need a fan (12-volt panaflo with DC brushless and 0.6 amp), a grill, a power supply with kettle lead type, a simple on/off switch, and an active carbon impregnated foam, and an intake port got from an old computer. The intake port allows hot air to be taken out. Then, to house everything, you need a 3-liter plastic box with a lid.
Conclusion
Fume hoods are essential pieces of laboratory equipment that allow for the safe handling of hazardous chemicals. However, the cost of commercial fume hoods is often prohibitive for individual workers. Check out the DIY projects above and make a DIY fume hood for your workspace without having to spend a fortune.


Ask Me Anything