Instead of throwing, abandoning, or breaking your old dining table for firewood, why not bring it back to life? And what better way to do it than to refinish it, so that your table's aesthetics will improve 100 fold. Thus offering a retro feel and artistic appeal to your room.
In this post, I'm going to discuss the process of how to restain a table. But before we dive in, you need to take note of the essentials to make this project successful.
Table of Contents
Essentials For Restaining Your Table
The process of Restaining consists of slightly tedious tasks that require lots of tools, materials, chemicals such as:
Wood Stripping Chemical
This chemical will soften the old table finish so that scraping it off would be easy. And it also reduces the risk of damaging the table.
Vacuum Cleaner
Once you're done Re-staining your project, you should clean up the debris with a vacuum cleaner.
Eye Goggles
While you're working on your project you need to protect your eyes from debris that could strike your eyes while you chip off the old finish or use the power sander.
Respiratory Mask
Given that sawdust will be filling the air while your sand wood, you need to protect your lungs. So it's best to make use of a respiratory mask.
Lacquer Thinner
This chemical is used for removing residue or wax remnants from the previous finish, usually after removing them with a sandpaper or power sander.
Drop Cloth
This helps to keep your floor from getting stained.
Sandpaper
Hand sandpaper would be great for work that requires adding a little extra detail. However, it does not make the job any easier compared to what a power sander can do.
Power Sander
This machine is perfect for swift finish removal.
Wood Sealant
Adding wood sealant to your project will make its surfaces more scratch-resistant.
Safety Gloves (chemical resistant)
Since you'll be handling loads of chemicals throughout the process, it should be in your best interest to put on safety gloves. So that you. Don't get burns, irritations, or allergic reactions along the way.
Wood Stain
This is paint that'll be used to refinish your table.
Paint Brushes
The brushes will be used to apply the paint.
Clean Water
You need a bucket of clean water to wash out any mistakes.
Clamps or Glue
It's quite hard to work on a shaky table. So it's best to clamp them down or glue them to the ground for stability.
Factors That Determine If Your Table Is Ripe For Restaining
- The finish begins to chip off
- Faded out patches appear on the finish
- The finished surface is sticky
- Watermarks are present on the finish, usually in form of rings
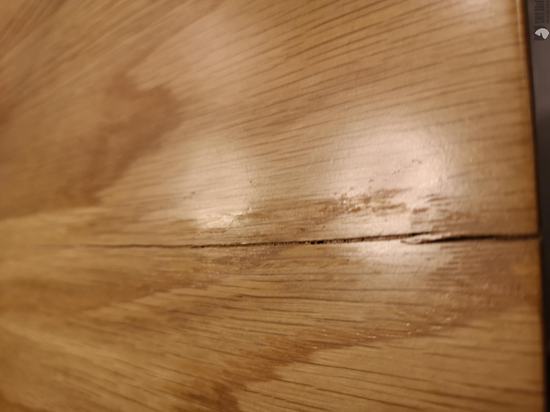
- Crack marks on the finish as well as the wood
7 Steps for Restaining Your Old Table
1. Clean The Table
Before Re-staining your table, you should ensure that it is clean, especially if the table was carried out of storage. Where it would develop smudges, grime, and thick dirt pile up. And the best way to clean the table is with kitchen soap and warm water.
Make sure to scrub carefully with a sponge and paint brushes if you can find dirt build-up within the edges or carvings of your table. Once you're able to scrub down all the dirt, wash the table down again with more warm water. Then dry the table with a dry rag and cease work on the table for a while.
2. Evaluate The State Of The Table
Now that the table is clean and dry the next step to take is to evaluate the state of your table. By looking out for anomalies that demand the use of wax filling and scrappers. Such as cracks, dents, chips, rings, and stains. So you can be aware of the materials, chemicals, and tools you'll need to make repairs to your table once you've extracted the finish.
3. Remove The Old Finish
There are two ways you can go about removing the finish off your table. You could do it the manual way, which involves the use of coarse sandpaper or you could make use of finish striper chemical.
- Using Sandpaper
The idea is to strip the finish off by rubbing sandpaper or applying a power sander onto it. This process should carry on until your wooden table feels smooth enough. However, there could still be some remnants of the old finish visible on the table surface. At this point, you should switch your sandpaper or power sander with fine-grit. This would decimate any leftovers.
- Using Stripper Chemical
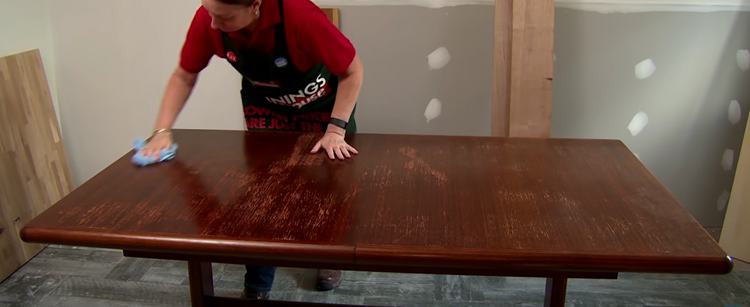
A much easier method for removing the old finish is by applying the Stripper chemical. How does it work? After applying the chemical, it will begin to weaken the old finish till it softens and wrinkle up for an easy scrap. So, once you've scraped most of the finish, gently add and spread lacquer thinner all over the table surface. This will ensure no residue or wax will be leftover.
How To Use Stripper chemicals
- Apply safely onto the old finish with paint brushes that possess natural bristles
- Let the chemical sit for 30 minutes (or any time limit mentioned on the container/instructions)
- If it still doesn't soften, apply the chemical once again
- Scrape the old finish
- Let it dry
Note: Because you're handling chemicals, make sure to wear protective gear such as eye Goggles and anti-chemical gloves before you begin this step. And ensure you've placed a drop cloth to prevent the chemical from reacting to your floorboards.
4. Apply Sealant
After removing the old finish and leaving the table out to dry, the step to take is to apply wood Sealant. Why? It would help with smoothing the surface of your wooden table and ensure that it is evenly stained. How do you apply the sealant? Pour onto the table surface of your table that you want to stain with a thick coat of Sealant and spread it around with a paintbrush. Then make use of a dry piece of cloth or rag to clean off excess Sealant.
Leave the sealant to dry up after some time. And then sand the sealant dried surface down a bit until it's smooth (using fine-grit sandpaper).
5. Apply Wood Stain
The Table is now dry enough to apply wood stains. So get your paintbrush and make long and even strokes on the table's surface. Once you're able to cover all the designated areas of the table, leave it out to dry (as it could take up lots of hours). At this point, you should be able to get your preferred color of the stain. If not, then you can always darken it with another coat of wood stain.
To improve the quality and durability of the wood stain, you have to apply wood Sealant once again. If your table is highly used furniture then you should consider applying more coats of Sealants (at Most 3 coats).
Wood Staining vs Painting: Why Is Staining Better
Style
Wood Staining offers your wood project or table a more stylish appeal than the paint over the surface. Because the stain would seep into the wood thus causing the wood's natural pattern to be visible.
Wear and Tear
Over time, paint on wood will peel off naturally because it's applied over a wooden surface. It is different for stains as it absorbs into the wood, so there's no chance of peels or flakes.
Too Absorbent
Painting your wooden project won't require more than one stroke to achieve the perfect color because paint rests over the surface. As for Staining, if you happen to stain over hyper-absorbent parts of your wooden project you might not achieve the desired hue. This would cause you to apply more wood stains.
| Wood Paint | Wood Stain |
|
|
Rescue Your Table…
Re-staining your old table is like bringing it back to life after a very long slumber in a dark and dusty enclosure. Not only is this such a pleasant experience, but also safe for your wallet. Because it beats scouring the nearest furniture store for that expensive wooden replacement. So with the information we've provided, you should be able to successfully resuscitate your old table or keep your family's heirloom intact.



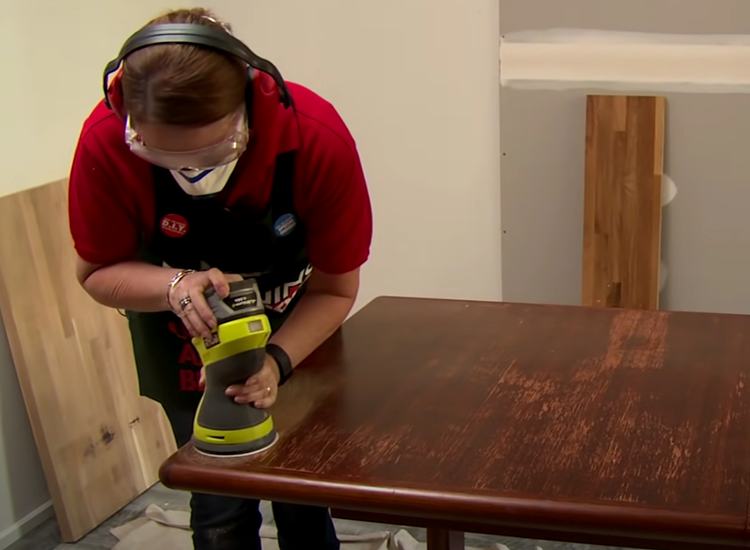 The idea is to strip the finish off by rubbing sandpaper or applying a power sander onto it. This process should carry on until your wooden table feels smooth enough. However, there could still be some remnants of the old finish visible on the table surface. At this point, you should switch your sandpaper or power sander with fine-grit. This would decimate any leftovers.

Ask Me Anything