
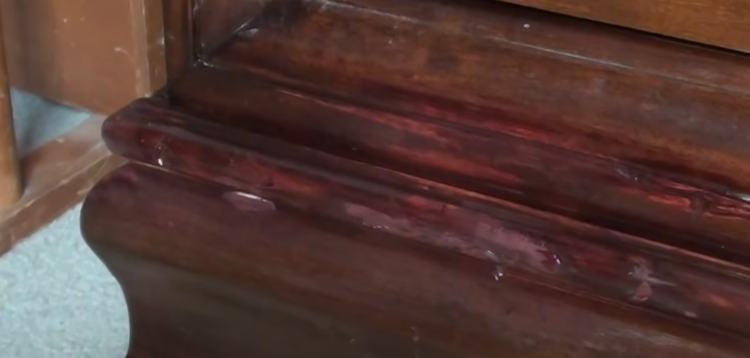
To this day, wooden furniture is still being used in homes due to the eye-catching appeal and nostalgia that they provide. However, such beautiful pieces are prone to severe damages such as scratches. Which could in turn cause the room to plummet in terms of appeal.
When in such a situation, owners sometimes ignore the problem till they have to do a more rigorous repair. But it shouldn't have to be like that, as there are ways to fix the problem now. So read on as we delve into how to fix deep scratches in the wood table.
Table of Contents
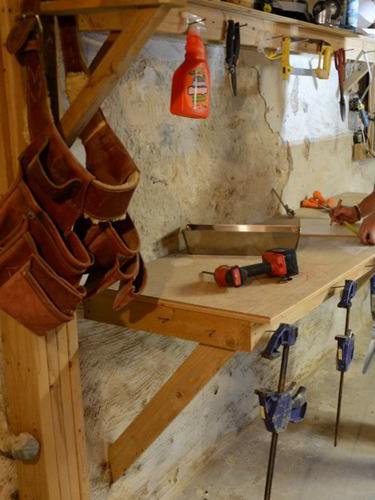
Tools And Essentials Needed For This Project
| Dish soap | Q-tip |
| Putty Knife | Warm water |
| Clean cloth | Mineral spirit |
| Wood fillers | Paintbrush |
| Sandpaper | Safety Gloves |
Steps On How To Fix Deep Scratches In Wood Table
1. Prepare The Project
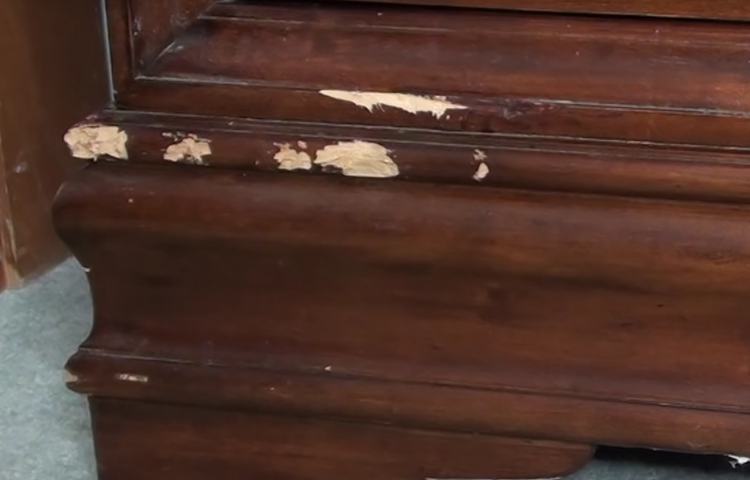
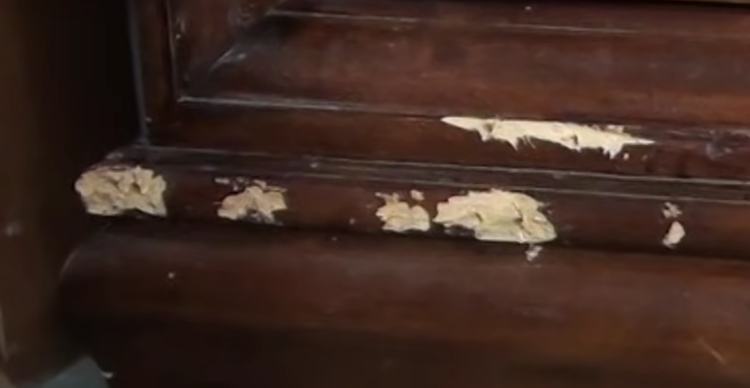
Before you begin any sort of improvement on your wooden project, you need to ensure the project is in a proper state to be worked on. And you should do this by cleaning the whole project and areas around which you wish to work on. Especially if the project was abandoned in a dark room left to accommodate dust and probably more scratches.
So what you'll need is a bucket of Container of warm water, dish soap and a sponge or price of rag. Make a soap solution, then dip the sponge or rag into it and rub your wooden project clean. Especially around the areas of scratches that need to be fixed. You need to make sure there's neither dust nor grime build-up from the leftover salt and pepper and crumbs that end up seeping into the cracks.
Sometimes the sponge might not be enough because the deep crack could be quite narrow. So it would be a lot of product to make use of Q-tips as they're small enough to clean through the cracks. Once you've rid the scratches of all forms of grime and dust, let your project dry out for a good while before taking the next step.
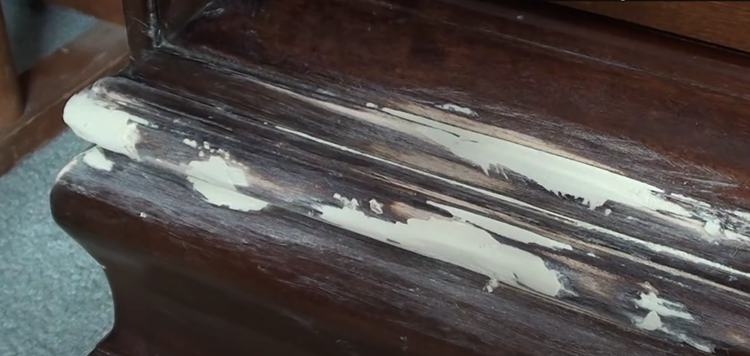
2. Treat The Scratches
If your table was previously sealed with polyurethane, it's best to rub off the scratch and around the area of the scratch with mineral spirit. So that the spot can be stained later on to rhyme with the color of the table. After treating the scratch, you should wipe it once again with a piece of rag before leaving it out to dry.
If the scratches are deep, a small hole with a drill bit in the broken area will help make the wood filler adhere more tightly.
3. Try To Fill Up The Scratch

Now that the scratches are well treated and dried up, it's time to fill them up. But with what? Wood Fillers of course. This special product helps to mend holes and scratches present in the wood. It's a gooey substance so you'll need your Putty knife to scrape out an appropriate amount to apply onto the scratch or hole.
Also, keep in mind not to apply wood Putty. The Difference between wood Putty and wood filler is that wood Putty is applied after over the finish. While wood filler is meant to handle holes in the wood.
| Wood Putty vs. Wood Filler | |
| Wood Putty | Wood Filler |
| Made of plastic chemicals and oil-based compounds | Consists of wood particles and fibers mixed with a binding agent |
| Won't harden | Will harden |
| Applied after over the finish | To repair the wood from the inside.Because it hardens, it helps the wood maintain its integrity |
Note: make sure the filler is stainable. This will enable the scratch or gouged spot on the table to match.
4. Dispose of The Excess Filler
You can't get the exact quantity of wood filler for the hole or scratch on your table. So it's expected that some excess filler will end up on the table as well. At this point, you should make use of your putty knife to get rid of the excess wood filler.
Now that the table is free of excess wood filler, you should let the filled-up scratches and holes dry up (for at least 30 minutes). Before you begin the next step.
Please read the instructions for your wood filler carefully as it will tell you exactly how long it will take to dry completely.
5. Sand The Treated Area
By now the filler should be dry enough to work on. Also, while touching it you should notice that the filler does not rhyme with the surface of your table in terms of both height and texture (which is to be smooth). So what you need to do is get your safety gloves on and sandpaper or power sander to smoothen the surface around the scratch.
Note: sand in a manner that allows the scratched or gouged area of the table to match in terms of grain direction.
6. Apply Wood Stain
At this point, the scratch or gout may be fixed but the task is still incomplete. As the eye souring color of the wood filler would not match with the table's overall hue. So if your table was initially stained, it would be best to apply the wood stain of similar color with the table to the scratches and gouged spots. That way, the table would be uniform in terms of hue.
Note: wood stain only works on Stain-able wood filler.
7. Apply Sealant
If you prefer to add a little more color to the surface of your table then you should consider wood Sealant. How do you apply it? Get your paintbrush to smear the sealant onto the whole table surface to give it a uniform finish.
Different Types Of Wood Fillers
There are four types of wood fillers you can find in today's market which are great for fixing tables. All of which possess unique advantages and disadvantages. The list includes:
Stain-able Wood Filler

![]()
This type of wood filler allows the scratch or gout to match the general color on your table. Another advantage is that the filler can be easily sand smooth.
However, due to the inorganic ingredients that make this type of wood filler, it's given off an irritating odor. Apart from this, this type of wood filler takes a while to dry up (at least 30 minutes).
Solvent-Based Wood Filler

![]()
Solvent or latex-based wood filler is also suitable for fixing gouged spots and scratches on your table. And it's easy to sand this filler smooth.
However, it's not one to get stained. As they come in various colors. So you may need to find the right hue that's similar to your table's color. Or you could simply paint over it.
Epoxy Wood Filler

![]()
This filler is a lot more rigid than the rest because it's a plastic-like substance. This feature allows for nails or screws to borrow through and fasten parts. Which is great for tables that have bolted regions of the table affected by gouged spots.
The downside to using this type of filler is that it's harder to smoothen with sandpaper. This means you have to be conservative with the amount of Epoxy wood filler you spread into the scratch and gouged spots.
Water-Based Wood Filler

![]()
This is somewhat the best option of wood filer for a table repair. Why? Because it takes at least 15 minutes to dry up, which is less compared to other wood fillers. You can smoothen it easily with sandpaper. If the project requires thin wood fillers, you can get that from the Water-based filler because you can make it thinner by simply dissolving it in water.
Another advantage is that you can easily get rid of the excess with a simple wipe from a sponge or rag that was dipped in soap water.
How To Make Home-Made Wood Filler
Maybe you don't have wood fillers in hand and you're just looking for a quick fix. Or maybe you haven't found the filler that rhymes with the nature of your wooden table in terms of color and general appearance uniformity. Whichever the reason may be, both situations can be solved with a homemade wood filler.
Method One (using wood glue)
You can make a homemade wood filler with wood shavings, sawdust, and wood glue. This mix is much stronger because the wood glue offers more strength to it. This making it slightly hard to sand down smooth.
Method Two (using Lacquer)
This method involves mixing sawdust and shavings of the same type of wood that the table is made of. And then adding Lacquer to the mix to make it pasty. Once you spread it over the scratch or gout, it will work as to how normal wood filers are made. It's even easy to sand down.
Save Your Furniture And Your Wallet…
Larger scratches and big gouged spots are a result of smaller ones. So further neglect would only lead to irredeemable damage that will plummet your table's appeal. Thus causing you to spend on another which will most likely be too pricey. So with a little bit of time, cheap materials, and our simple instructions or guide, you should be able to save your table and the cost that comes with replacing it.


Ask Me Anything