
Did you recently get an ear piercing? Are you worried about properly caring for it? Look no further! We know how cleaning a piercing can seem complicated, especially when you get one for the first time.
The risk of getting your wound infected is why we have compiled these top 11 tips to clean an ear piercing.
Table of Contents
Tip 1: Don't Clean Instantly
The best idea of cleaning an ear piercing is to give your ear a break for at least a day before picking up your ointments. Touching the ear instantly after getting it pierced will be painful and uncomfortable.
Tip 2: Incorporate The Cleaning Process in Your Routine
To ensure that you don't forget to clean the piercing, you should make it a habit by including it in your routine tasks. Keep your cleaning supplies next to your toothbrush or other toiletries to stay reminded. The important thing is that you clean your piercing 2-3 times a day.
Tip 3: Wash Your Hands Properly
Before you touch your piercing, remember to wash your hands properly. Use warm water and antibacterial soap to make sure that there are no germs on your hands.
You should also do whatever possible to avoid an infection.
Tip 4: Use Sea Salt to Clean Your Piercing
A sea salt solution is ideal for cleaning your piercing. You can find a saline solution online. Use a clean swab or a cotton pad to apply the saline solution.
It can safely get rid of dried discharge and enhance blood flow. These qualities will aid your piercing wound to heal faster.
The spray is easy to use and will work well with all skin types. However, if you are trying to clean the cartridge area, you need to use a Q-tip for better application.
If you want, you can make a sea salt solution yourself.
- Add ¼ teaspoon of sea salt to 1 cup of water. If sea salt is not available in your area, you can use regular salt.
- Just add 1 teaspoon of salt into 1 cup of water.
Remember that iodized salt and pink Himalayan salt have impurities, so you should steer clear of them.
You can also use the antiseptic solution that your ear piercer might have suggested or provided to you.
Tip 5: Follow Proper Steps to Apply the Cleaning Solution Effectively
- Pick a clean, dry cotton pad, cotton ball or Q-tip.
- Start by spraying your cleaning solution on one of the three items you will be using to clean your piercing.
- If you have stored your solution in a bottle, dip the cotton in to soak it. Or, in case it has a smaller opening, place it on top of the bottle and quickly flip it over to dampen it.
- Clean the area around the piercing by gently dabbing
- To reach the piercing properly, place your thumb on the earring post behind your ear. Place your forefinger underneath your earring on the front and use your thumb to push it forward gently.
- Now you can access the piercing itself and dab the solution-drenched cotton on the area to get rid of the germs.
- Similarly, to clean behind your ear, hold the post and gently pull it back to reveal the back of the piercing.
- If you are using an ear swab, make sure to use the other side of the swab to clean the back. In the same way, use a new cotton ball or cotton pad to prevent an infection.
- Dab this area gently to clean off any discharge.
- Repeat this process on the other ear. Again, use a new cotton ball/pad or swab for each side of the piercing.
- Discard the used cotton and wash your hands well with antiseptic soap.
If you are still not sure how you are going to clean them correctly, here is a video that we think might be helpful to you:
Tip 6: Don’t Forget to Clean Your Earrings
- A grave mistake you can make is taking out your earrings too early. You need to wait for 6 to 8 weeks before you take them out. Otherwise, your piercing will close before you know it.
- After 6 weeks, you can finally clean your earrings. Remove them and use a cotton swab soaked with rubbing alcohol to wipe them clean. You can use this opportunity to clean your piercing as well. Use the same procedure as the one we mentioned above.
- Put your earrings in after they dry up. It is best to keep your earrings in for at least a year before removing them for an extended period. However, the healing time may differ from person to person due to the different skin types.
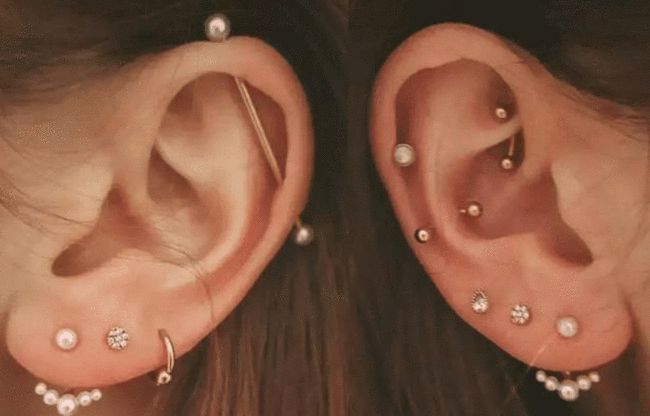
Tip 7: Be Careful of What Earrings You Wear
- Don't substitute your earrings with a cheaper set anytime soon. The gold or titanium you have been wearing is purer than other metals and won't cause an infection. However, you may replace them with a different skin-friendly set of earrings.
- It is better to avoid white gold as well because, in most cases, it's mixed with nickel. If you have sensitive skin, white gold may cause an allergic reaction.
- You may also wear medical-grade plastic in your piercing. According to Medical Ear Piercing Clinics, this plastic is safe to use and has no history of causing an infection. Medical grade Titanium is somewhat similar. It will not leak any Nickel in your piercing and is recommended to wear.
Tip 8: Remember What NOT to Do
- Don't touch your piercing unnecessarily. The only time your hand should be on your ear is when you are cleaning it. Your fingers carry most of the germs on your body, so you must keep them away from your ears to avoid an infection.
- Don't let any other item touch your ear either. When you let your hair down or aggressively put on a shirt, be careful not to pull your earring. Hair and fabric can often get caught in your jewellery.
- Lay flat on your back instead of sleeping on your side. The reason for this is that the weight of your head can press your ear hard against the pillow. Your fresh piercing can bruise or bleed from irritation. You can also risk getting an infection from the bacteria on your pillowcase and sheets. You should also change your sheets often as they'll probably come into contact with your ears while you sleep.
- Don't use alcohol as it will dry out your ear and make it feel raw.
- Don't use Hydrogen Peroxide, either. It will scab your ear up and delay the healing process.
- Avoid putting Neosporin on your piercing. You use it on wounds to close them up, and that's not what we are going for here. We don't want our piercing to close while we have an earring in it. Only use it if you have an infection or if your doctor recommends it.
Tip 9: Beware of the Risks
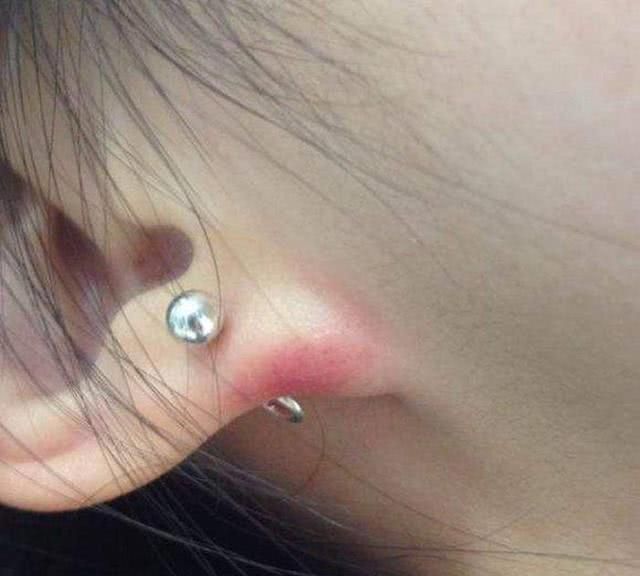
Here are some signs of infection:
- Fever
- Bleeding
- Yellow discharge
- Earring getting stuck in place
- Redness
- Swelling
- Soreness
- Tenderness
- Itchiness
- The area around the piercing feeling hot
If you develop any of these symptoms, apply sterile saline to the infected area. If the signs persist, get an appointment with a doctor to avoid spreading the infection.
Tip 10: Know How to Deal with an Infection
If your earlobe is infected and has the earring in place, apply a warm compress for 3 minutes.
Do this 4 times a day to improve blood flow to the ear. Insider suggests cleaning your infection with a sea salt solution and apply an antibiotic cream like Bacitracin.
Don't remove your earring in case of infection. It will just spread out the discharge and blood, and the infection may spread. Your piercing may also get filled up with pus, causing the hole to close.
Tip 11: Reach Out for Help When You Need It
- See a physician if the swelling, bruising, or soreness persists weeks after getting your ears done.
- If you have a cartilage infection, you must seek urgent medical help.
- If your infection keeps getting worse, see a doctor to prevent scarring and deformities.
Final Words
In short, you need to take extra care of your ears if you want those piercings to last. Remember to clean them three times a day and keep your hands off them unless you want to deal with pus and yellowish discharge!
You should get the only product you'll be needing to keep the infections at bay. Be sure that you reach out to a doctor if anything comes up.
Don't forget to comment down below and tell us what you think!


Ask Me Anything