This wonderful, colorful, nostalgic lighting installation can be done by yourself. This helps brighten your home, adds decor specially and uniquely. Even in business places, it serves as a clear advertising tool. Not stressful at all to create.
Thought of doing this yourself? I have put together 10 DIY neon sign projects, patterns, or methods. It requires little or no artistic or DIY skills. You will be thankful that you stopped by. Let's begin!
Table of Contents
1. How To Make A DIY Neon Sign
You can fashion your neon sign. These classic neon signs are composed of flexible sealed glass tubes filled with inert gas. In making this DIY project, you need few tools and you have to follow these easy step-by-step directions. The first step is to draw your design on paper, the idea is to draw your design as accurately as possible and the exact size or fonts. The materials needed for this job include 16 gauge metal wire, 5mm EL wire of your chosen color, glue gun, etc.
2. DIY Neon Sign With EL Wire
EL wire is used in DIY craft to create your neon sign. Simple and easy, the perfect ingredient for this magic is your electroluminescent wire. You will need 3x3 white acrylic, cardboard marker or dry erase marker, painter's tape, etc. Firstly print out your words to fit the acrylic, figure out where you will need to drill holes to make your words, etc. The link below elaborates more on these directions.
3. DIY Realistic Neon Sign
Here is a super bright realistic faux neon sign. I recommend this for a bright sign. In making this project you get a rigid board like 5mm MDF or plywood as your base. Print out your sign or letters in your desired fonts. Use a drill of the same diameter. Here the creator did not use EL wire but rather he created his LED. Afterward, you form your letters. Viola your neon sign is ready to mount.
4. How To Create A DIY Neon Sign
A neon sign is simple for decorating your home. For an impressive project, this DIY comes in handy, perfect for weddings or parties. You need a pen, paper, EL wire, MDF board which you have to cut to the size you want the sign to be, a hot glue gun, etc. Make sure you draw your design on the board first. The link above gives a more explicit detail of this work.
5. DIY Neon Sign Decor
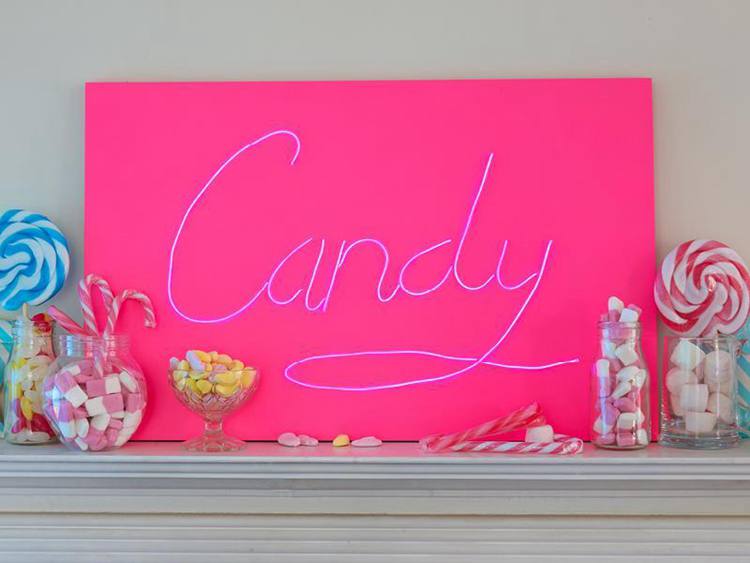
This neon sign is simple and easy to create. You don't need to be a professional to create this magic. First, you need a large piece of paper, which you have to trace out your word or phrase, secondly, make sure you have enough wire to fit your word.
Another tip in making this is to ensure your wire is bendable to come out in the desired shape. The creator used a T90 14 solid. Thirdly, bend the wire to the shape of your word and cut any excess. The creator used EL wire, the length was 3meter long. Take your wire and slowly glue it to the design. You could use a glue gun or super glue or even both. Your neon sign is ready.
6. LED Neon Sign With Acrylic Backer
This is another pattern of making a neon sign with an acrylic baker. You need a bubble cut clear acrylic backer. Firstly you make your neon channels by tracing your designs on the board. The tip in making this is to ensure that you trace your letters appropriately and in the necessary fonts in which you desire.
Afterward, the installation process begins. You install with your wire according to each letter traced out on the board. Use glue to hold up the back ends together for a perfect job. Voila.
7. DIY Neon Sign Under $60
Here is a customized neon sign, homemade and super cheap containing all colors you will need to decorate that home or business place. In making this DIY project, it can be done in two ways. The creator made an explicit distinction on how to do any of them, for instance, you could map out from your computer. Super easy and all fun.
8. DIY Neon Sign
Passion is what a good neon sign is all about. The designs for this work are explicit, make what suits you. The creator called this winky lux neon sign. This is super easy and very beautiful. In making this you measure your floral tiles, that is the length in which you want it. You need wire, zip ties, white acrylic paint, a hot glue gun, measuring tape, etc. I recommend this for a simple DIY. It can be used to decorate your home or your favorite spot.
9. DIY Neon Fallout Sign
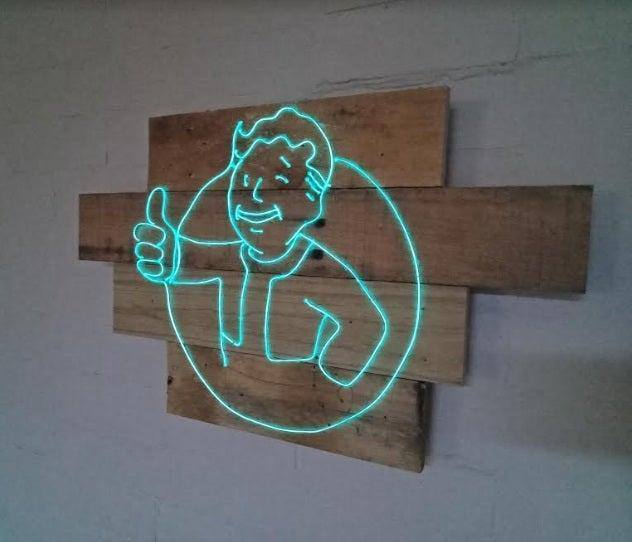
An inexpensive but simple design you can do at the comfort of your home. Can be done in multiple colors. The creator used a 5meter board, 4x pieces of pallet timber. In creating this you prepare your background. The creator used the four pieces of pallet timber and joined them by screwing them into smaller pieces of wood. Afterward, trace your design into the background.
10. DIY Ghostbusters Neon Sign Tutorial
Here is a simple DIY, a bit complex to build but super impressive. This is recommended for a more advanced project. In making this it requires some level of skills which include knowledge about coreldraw, laser cutting, and soldering. Things needed for this include a k40 laser cutter, a sheet of a black or transparent acrylic soldering iron, a copy of the core laser ( corel draw 12), etc.
Conclusion
There you have it, 10 ways to make a DIY neon sign, all the projects listed on this page are pretty much basic in their making process and very easy to follow. Feel free to contact us via the comments section if you need any help. Thanks for stopping by!







Ask Me Anything