
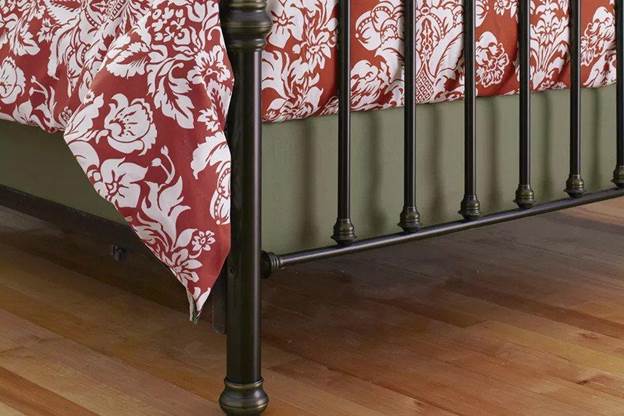
A box spring is a different type of bed that consists of a strong wooden frame that is covered in cloth and contains springs. In this article, I have included 15 DIY box spring plans that you can DIY from the comfort of your home.
It doesn’t matter the size of bed you have, we considered major sizes and have put together some of the best plans. Are you ready to build? Let’s begin!
Table of Contents
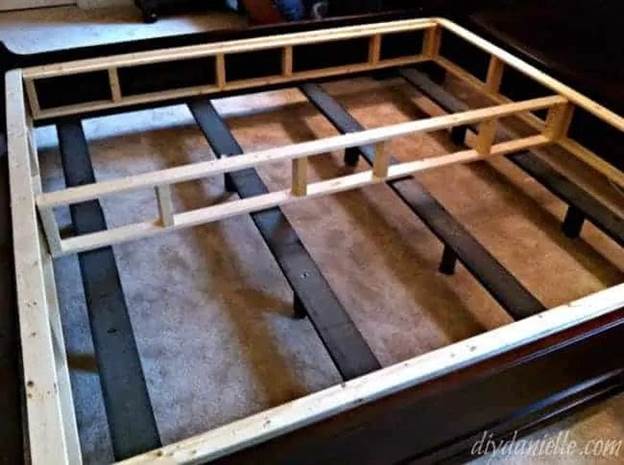
1. How To Build A Box Spring
Building a box spring is a thing of joy; it’s way better than buying one from an online store. The materials used in this video guide is for a 9-inch tall queen size box spring. It is easy to build and take your worries away as it lasts even longer than the one you might buy from a store. You will be making this yourself; you will need a box spring with wood glue, some brand nails, and plywood that will turn out excellent and efficient with less money spent.
2. DIY Box Spring
Do you own a Queen size bed? This guide will show you how to build a DIY box spring for your bed. It is super easy to build and you only need two tools to do so. You need 3 to 12 pieces of wood for this project. (For the dimensions and cut size, check the video for more information). In addition to that, you should check the video also for the tools and where to buy them as well.
3. DIY Box Spring Under $20
Buying a new box spring will cost over $100 so you can save that money and start building a simple box spring that will cost you only $20. That's great, it means you saved about $80 plus for yourself. The size of the wood is up to you, depending on how large your room is, and the space that will be left after you measure the portion of your box spring will occupy. After you dine with the measuring, get your wood and start building.
4. Building A Box Spring
Firstly, you need to draw a simple design for your box spring be, you can check the video to see what the creator drew or if you have a design in your mind that can work too. This box work bed was made for a baby so it's going to be small, so if you have a child that needs a small box spring for his/her mattress, then this guide will work great for you. The making process is pretty much easy to follow.
5. DIY Box Spring
This is a great way to save money instead of buying a box spring for hundreds of dollars. Within 30 minutes or less, your box spring will be done and ready for your mattress. Although the creator noted for a box spring kit instead of buying plywood and building from scratch. Check the link in the guide to see where he bought his kit at a cheaper rate. After buying this box spring kit, what was left was assembling it which didn't take time at all, that was the easiest part.
6. $15 Bed Frame
The first step that doesn't seem so important at the beginning but is necessary for the end is measuring your box spring. This helps you know the kind of materials to buy that will go with it. You need some wood boards, a drill, screws, and a few other useful tools. The making process is simpler and easy to build, good for anyone with a beginner skill level.
7. DIY Pallet Wood Bed Frame
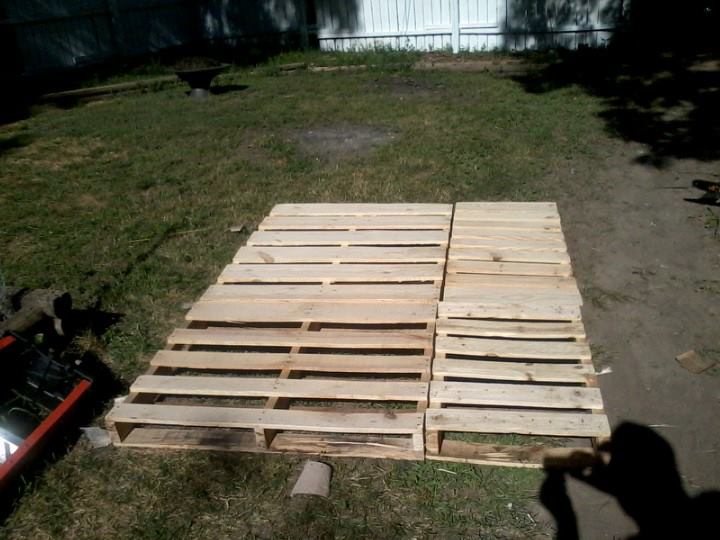
For this task, you'll be using pallet wood for your bed frame and box spring. All you need is to use any pallet wood you have around, measure the width and length of your mattress, then start to build. The pallet good doesn't need nails, stress, or bolts, just lay them next to each other and place your mattress. It's relatively strong and it won't move around under the mattress.
8. DIY Box Spring Cover
Here is a guide that will teach you how to build a box spring cover for your bed. If you have a bed that lets your box spring be visible for anyone to see, then you need a box spring cover. Fortunately, this guide deals only with how to make a box spring cover. You can't have to worry about everyone seeing your box spring and the kind of wood you used to make it. It's easy with just 3 simple steps, measure, cut, and staple the cover to the box spring.
9. How To Make A Tidy Box Spring Cover
The previous box spring cover might not have given you what you wanted this one should do the trick. Also, if the previous guide was a bit expensive this one should be a lot more inexpensive, it will cost you only $35, and with scissors and a staple gun, you should be done making this box spring cover in 2 hours or less.
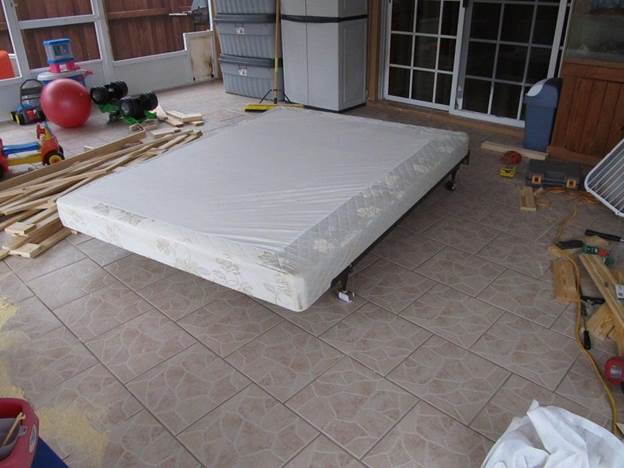
10. Queen Size Box Spring DIY
With this video tutorial, you're going to be building a queen size box spring for just $110. This might seem quite expensive but compared to the price of a new box spring that will be sold online that's a whole lot more expensive, this price is fair enough. The making process is seamlessly easy and relatively fast. It's a queen-size bed, but you'll be done in no time and it will still come out looking great.
11. How To Fix A Squeaky Box Spring
With this video tutorial, you can fix all the squeaky sounds from your box spring. It might be made of wood but still give you the squeaky old sound anytime you lay on it. Thanks to this guide, you’ll simply need a few materials to fix the squeaky box spring sound for good. For tools, you will need a WD-49 spray, a guilty knife, and a stapler.
Now, with your WD-40 spray in your hand, take the box spring out and remove the cover If there is any, then spray the WD-40 solution anywhere you see a joint on the box spring. Also loom for cracks on the wood and spray into them. Allow the spray to work into the wood and your box spring should squeak no more.
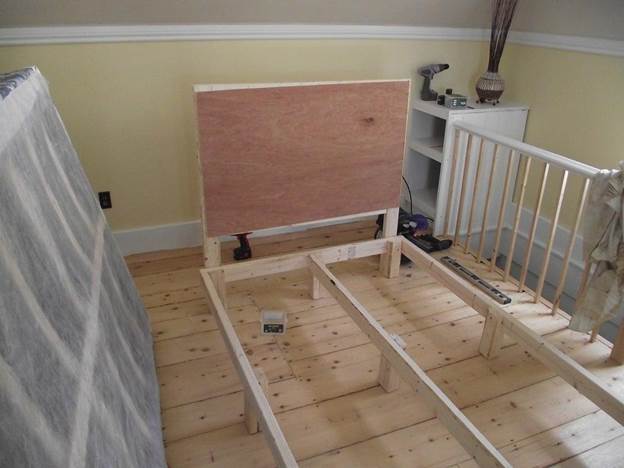
12. DIY Floating Bed Frame With LED
This is an amazing floating bed frame that comes with LED lights. It's not that it comes with it, but you'll have to build the box spring with the light because it's part of the building plan. First, you're going to Need some untreated boards, and a LED light strip that comes with an adhesive backing to easily mount it on the wooden frame, and an additional queen size bed frame. This project will cost you about $120 but it's worth the trouble.
13. Rebuilding A Bed Foundation
This won't be an easy task, but if you follow the steps properly you'll be on your way to a new box spring built by you. So, step into your favorite hardware store and get a few of these items you should get a countersink drill bit, and an electric drill, a staple gun with staples of about ⅜', a circular saw, wood screws, and a few other essential items. So, to rebuild this you need to carefully dismantle the old box spring pieces, then follow the remaining 10 simple but detailed steps to rebuild your box spring. This box spring will also be using an upholstered kit to make it more authentic than the previous one.
14. DIY Upholstered Box Spring
Here’s an upholstered box spring, meaning this is a wooden furniture piece that is covered up with some fabric, and the creator used an amazing velvet fabric and attached some furniture legs to the corner making it look authentic and beautiful.
This looks like something you would buy online that might end up being pretty expensive. The creator used heroin legs, which can be seen at your favorite local store, a nail gun, and a drill. This guide doesn't give you a detailed insight on how the box spring was built but rather it tells you about how you can use upholstery kits and techniques for your box spring.
15. How To Quickly Fix A Squeaky Box Spring
The creator had a two-year-old box spring that he bought and it started squeaking for no reason, it was annoying and unbearable, here is how he fixed that squeak, maybe this method could work for you too. Firstly, the box spring you buy usually has cardboard inside, and is also covered with some sort of fabric. So, you will have to remove that cardboard without ruining the wood framework. When you remove it, staple the edge of the cardboard cover and set it again. Now try your box spring and I doubt if it will squeak again. It's a quick and easy process.
Conclusion
That’s a wrap on DIY Box Spring, all the projects listed in this article are quite easy to follow. You do not need to be a professional in woodworking to be able to make any of the plans above. I love how the creators explained in detail how to build a box spring for normal-sized beds and bigger ones too.
If you have any questions or contributions regarding this article, feel free to reach out via the comment section below.


Ask Me Anything