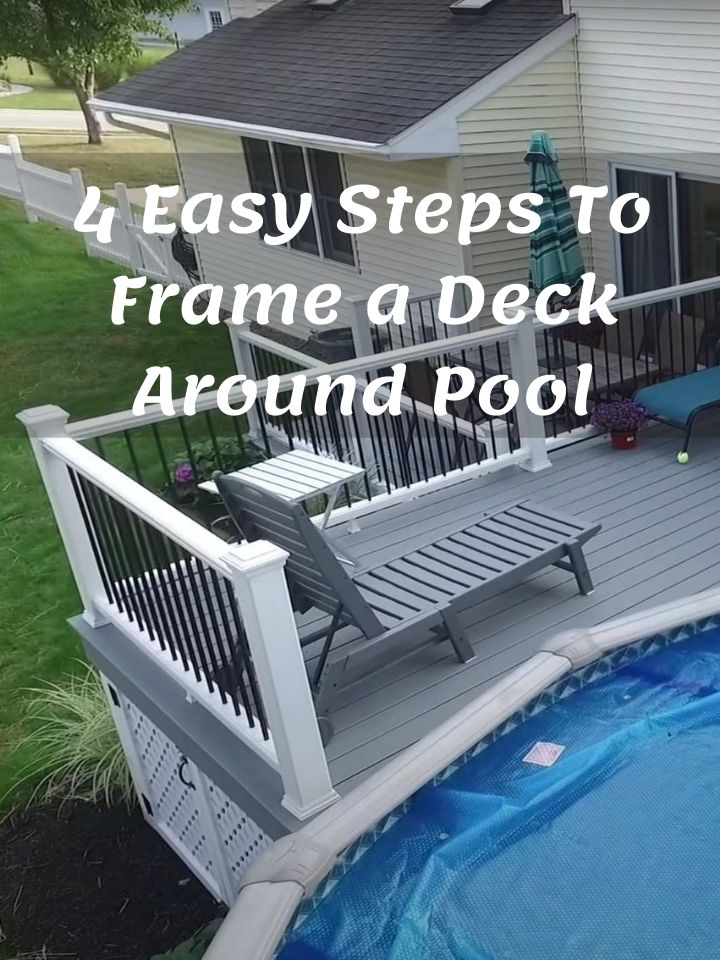
Above-ground pools are an incredibly popular product that sees hundreds of thousands of sales made every year. However, while some people consider these temporary pools or seasonal use investments, others take it far further than that by actually building elaborate decks around these affordable and easy-to-install pools.
Suppose you’re one of the people that take their above or semi-aboveground pool seriously and are considering installing a deck to present your pool better. In that case, you’re in the right place. We’re going to talk all about the method of framing the deck around your pool, answer some frequently asked questions, and more!
Table of Contents
Pre-Framing Checklist
Before you even start the process of framing your deck around the pool, you’re going to need to run through a few things to prepare for this monumental project.
For starters, measurements. You will need to measure the diameter of the pool and its height. Then work with the space you’re going to use for your pool area to determine the size of the deck you intend to build. You want to keep in mind the purpose of the deck, such as movement and furniture.
Now comes the fun part, not really, paperwork and city councils! But, yes, you need to grab some permits. It’s one of those unavoidable things that is the key to starting the framing process and then continuing to complete the project.
You’ll need to have all your ducks in a row before applying for the permits. This means every other pre-framing checklist step has to be achieved so you can apply knowing you’ve done everything necessary.
How To Frame a Deck Around a Pool
Now that you’ve gotten all the bureaucracy out of the way, it’s time to get to work!
Step One: Layout
The first thing you’re going to want to do is to start laying out the deck by using stakes and driving them into the ground. Next, you’ll need some string line to establish a perimeter for your deck. Finally, you’re going to mark the location of your interior post roughly 30 cm from the edge of the pool and locate the next post 4 feet from that point.
To understand how many interior posts you’ll need for your deck, simply go the distance from the pool to the post and multiply by two before adding it to the diameter of the pool and finally multiply by pi. Now, divide the circumference (which you just worked out) by four.
Step Two: Posts and Piers
Now that you’ve mapped out the area your deck will cover, it’s time to get started on installing posts and piers.
- The first step is to install some precast concrete pier footings on the ground, which will support your deck. You can purchase concrete piers that have been precast and are equipped with sockets for 4-inch x 4-inch treated wood posts. You’re going to install the posts where you marked out the locations in step one. Make sure that everything is level, as you don’t want to have uneven posts, which can cause a lot of problems later on.
- At the opening at the top of the concrete piers, you’re going to set a 4-inch x 4-inch post. Then, using a four ft. level across the top of the pools cap, you’re going to mark a line on every 4-inch x 4-inch post.
- Finally, you’re going to remove the posts from the individual piers. Underneath the line you just drew in, you’re going to measure and add in a new line. The distance between these two lines needs to equal the sum of the width of the cap +1-½ inches for the 2-inch x 6-inch decking, 5-½ inches for the 2-inch x 6-inch floor frame, and additionally a ½ inch purely for expansion.
Step Three: Install Frame
Now it’s time to get moving on the frame as you get closer to laying your deck. To install the deck frame, you’re going to need to do the following;
- Around the perimeter of the pool, you’re going to install 2-inch x 6-inch treated deck supports. The supports need to be screwed into the sides of the interior pier, which faces the pool. Use 2-i/2 inch deck screws and use a level to keep everything at a consistent and accurate level. Finally, make use of a square at the corners of the frame to ensure the supports are, in fact, squares.
- Install additional 2-inch x 6-inch supports to mark the decks outside perimeter.
- You’re going to need to toenail joists hangers vertically into the interior using 3-½ inch galvanized nails (16d) every 16-inches on the inside of the deck supports. It should hang roughly 16-inches on the center.
- Install 2-inch x 6-inch deck floor joists into the joist hangers with galvanized nails.
- Install the 2-inch x 4-inch diagonal braces for additional support for decks higher than 30-inches.
Step Four: Lay Deck
You’ve made it to one of the more straightforward steps after your hard work at preparing to lay your deck! In order to lay your deck, you’re going to need to do the following;
- From the outside supports of the pool to your piers and posts, you’re going to install 2-inch x 6-inch decking. To allow for expansion, you will need to rest the decking a ½ inch away from the pool’s edge.
- If necessary, use a jigsaw to adjust the edges of the board, which rests near the pool wall.
- In terms of drainage and expansion, use spacers between your decking boards. Roughly ¼ or ⅜ spacers are a common choice. However, you can also use ½ inch spacers if more expansion is necessary or expected.
- Look for where the decking and the perimeter supports exterior edge meet, use a circular saw to trim some of the spots where the decking juts out over the deck supports.
Step Four: Guard Rails
No deck is complete without guard rails to ensure nobody winds up injured. To build guard rails, you’re going to need to do the following;
- Around the perimeter of your deck, you’re going to need to install 4’ x 4’ posts for your railing. There are numerous precut railing options when it comes to guard rail posts. They can have decorated tops but should always have notches at their base which fit against the deck’s edge. Install the posts using ⅜-inch x 4-½ inch lag screws and secure the posts at the various points that meet the support meets the support.
- Between the posts, you’re going to slip 2-inch x 6-inch boards. You’re going to need to pre-drill pilot holes at the desired angle into each board and attach the boards to the posts using 2-½ inch deck screws.
- Cut a 2-inch x 4-inch to the same length as your board that you’ve installed already and lay the wide side against the board before screwing it into the board using deck screws. This will act as a cap for your railing.
- To further support your guard rails, you’re going to need to install some 2-inch x 2-inch balusters that have a 45-degree beveled base. The balusters need to hang parallel to your existing posts and have an interval of 4-inches between them. When everything is in place, you will screw them into the railing at the top (into the cap) and bottom (floor joist)
Step Four: Stairs and a Gate
You’re going to need to get up to your above-ground pool deck somehow, and that’s where stairs come in. To build stairs, you’re going to need to do the following;
- Set the bottom edges of your two precut left and right stringers on top of concrete patio blocks.
- Make sure the stingers are level.
- Screw the stringer’s upper ends to the floor joists on your pool deck.
- Add an interior stringer to support the stair treads. For every two ft. of stair treads, you’ll need a stringer. If your staircase is more than four feet wide, you’ll only need the two exterior and one middle stringer.
- Finally, you’ll screw in some 2-inch x 12-inch boards to the stair stringers to complete the stairs to your above-ground pool deck.
You have the choice of building a gate as this isn’t something you have to have. However, having a gate is perfect if you wish to keep your pet or small child away from the pool!
Final Thoughts
Now you know what to do when it comes to framing a deck around a pool, more or less. You can find so many different plans online, which will help you understand what you want to do. Obviously, every property is different, so what you need will largely be determined by how much room you have to play with. In addition, the pool you have might be different from the ones available plans work towards, so consider everything when figuring out your planned deck construction.
Let us know how your deck turns out in the comments!

Ask Me Anything