This must surely sound strange to people who are not used to watching anime. This bag is called an “Ita Bag” because there are badges, buttons, figurines, and other merchandise pertaining to anime and manga fandom on it.
We have a couple of ideas and easy ways to make this for yourself or as a gift for someone. I have put together a list of DIY Ita bag ideas that you can DIY from the comfort of your home. The materials used in making these bags are easy to get.
Table of Contents
1. Crafting An Ita Bag
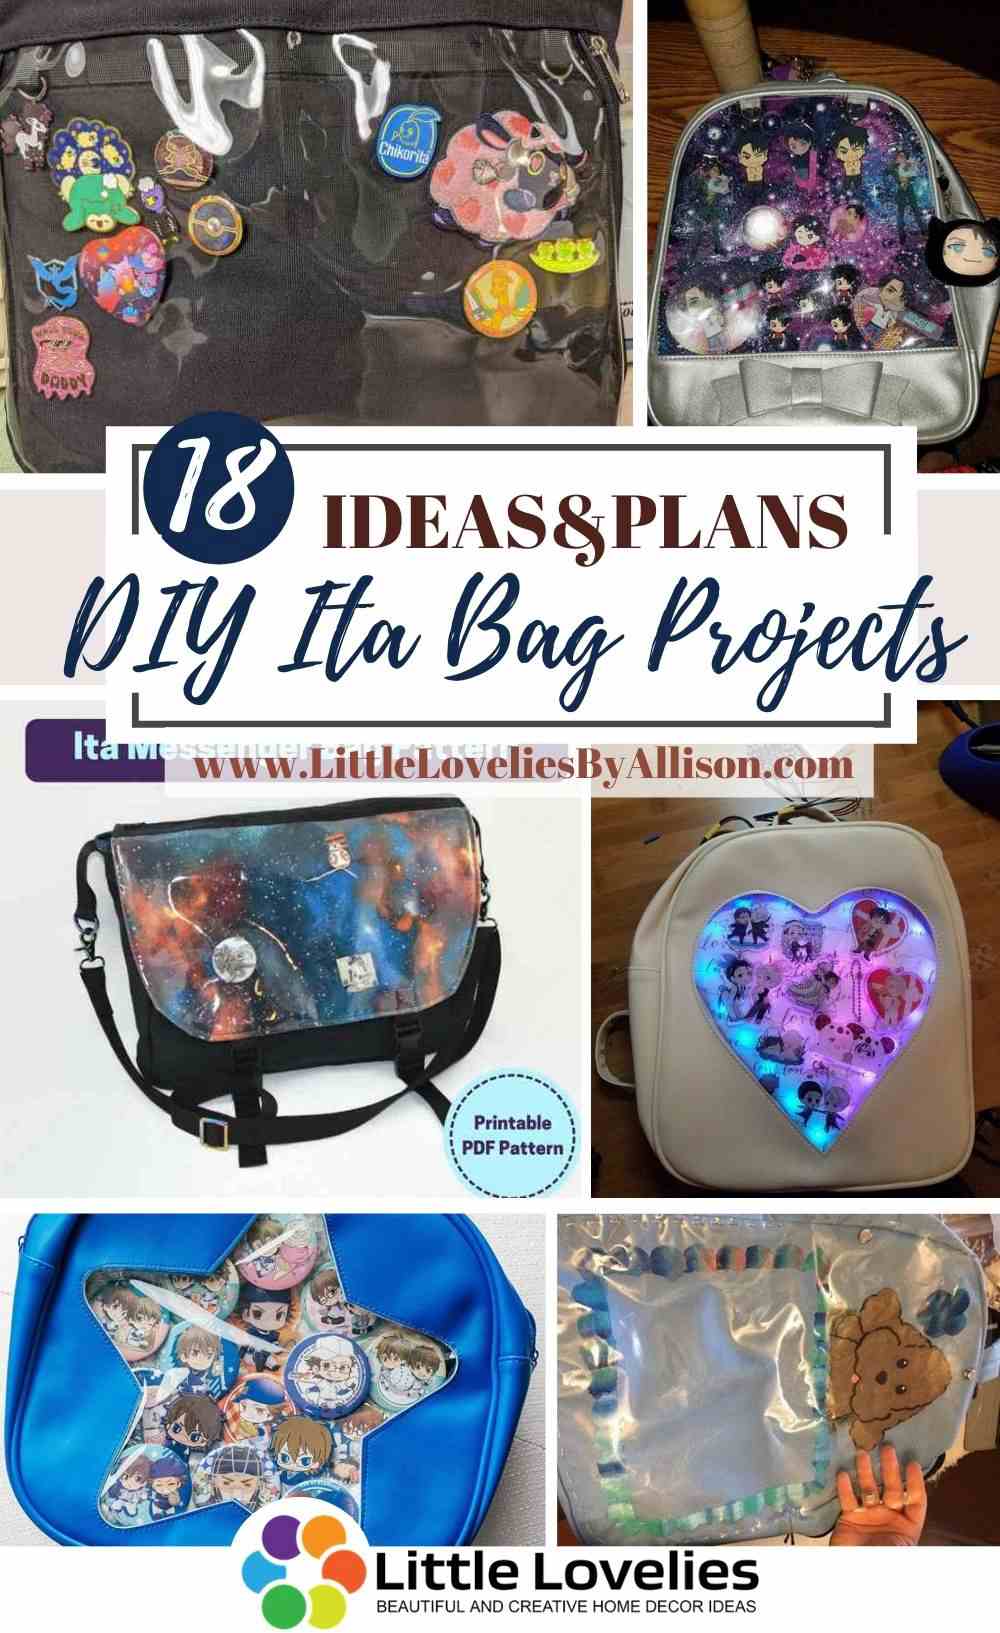
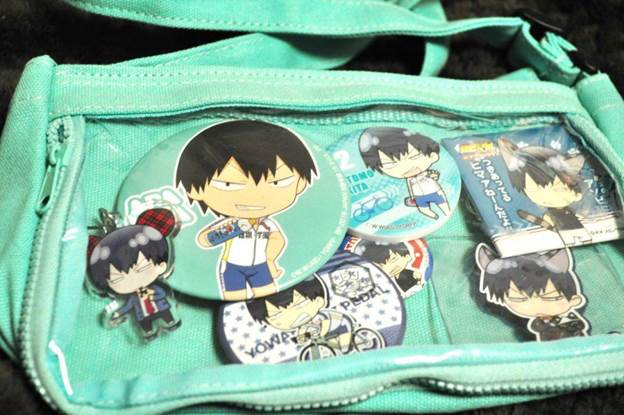
This is a small pen pouch size bag that can be used in the carrying bag to go to any event of your choice. And of course, an anime design is on it. You will need a showa-Note’s Mise Pouch to get this done. Place the badges and designs you want on the bag then use a transparent film over it to secure it.
2. How To Make An Ita Bag Using An Insert
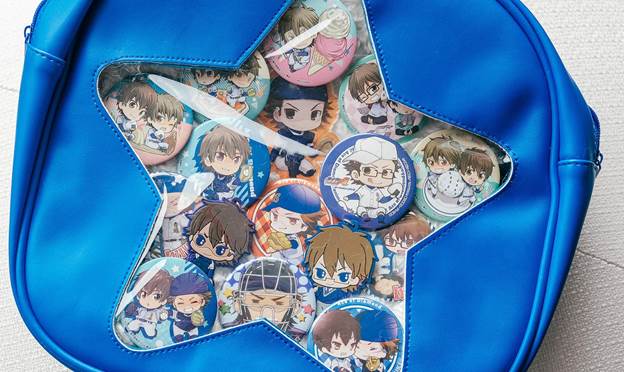
Building your first bag is a daunting challenge because there is so much to consider. In all you do, choose the best. This has a collection of anime characters that are combined into a clear star frame of the bag. Use a plastic mesh to build your insert. It is surely a good deal and it will blend well. Add your fabric and build the shrine.
3. How To Make An Ita Bag Without Sewing Machine
If you are not a fan of sewing then this should be a lot easy for you. The big deal about the Ita bag is the decoration. You will need a bag pack, clear vinyl material, and embroidery as the major materials. Prepare the bag and create the pattern with a sheet of tissue. Prepare and cut the cover material. Sew the vinyl in place. After adding the snaps, decorate. The making process of this DIY ita bag is very easy to follow.
4. DIY Ita Bag
You can make your Ita bag a bit more sophisticated oh. If you have a bag that doesn’t have that clear feature in the front, then you will have to cut out one for the bag. Choose the area you want to be taken off and replaced with the transparent material. Attach the designs to the foam on the DIY Ita bag.
5. Miniature Ita Bag
This bag is a really small fake bag that can be used for dollhouses or if you need it as a decoration. Take some measurements to easily make what you want. Prepare the straps of the bag and add a buckle. From there you can begin assembling.
6. DIY Bakugou Ita Bag
Are you a bakugou fan? Get in here. This is a simple transparent DIY Ita bag that you can customize to suit your needs. Cut out the pattern for the transparent space. Check for pictures that can easily be used. Fit in your pictures, then use a ribbon to make a cross on the pocket side. Making this bakugou bag is very easy.
7. Ultimate Ita Bag DIY
This is a perfectly customized DIY Ita bag. You will not end up spending as much as you would have if you went to the store. This is a fully transparent bag. The first step is to measure the insert. Wrap it around a piece of fabric and glue. Use it inside the bag. Use hot-glue because that seems to be the best option. Add your characters.
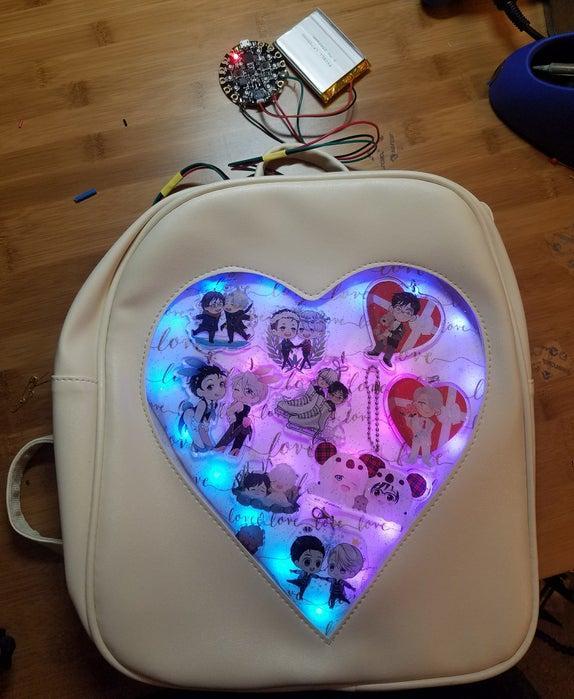
8. Glowing LED Ita Bag
You can have your Ita bag glow in the dark. There is always a clear protective pouch for protecting the charms and badges while displaying them. You don’t have to worry about them falling off. Prepare the heart vector for laser cutting. Input your LED build and program circuit playground. Workaround the lights and pin your charms on.
9. Ita Messenger Bag Pattern
I know you have been wondering, your laptop bags are not left out. You can also make these creations for it as well. This is a messenger bag with a clear pocket on the flap for displaying your pins and other merch. You can always get your designs to be posted online then print out.
10. Ita Bag Insert Tutorial
This Ita inserts with glitters can comfortably stay on the front covering of the bag. You will need any fabric of your choice, a piece of foam, scissors, tacky spray, and a marker to make the markings for the pattern. Use the foam to get a pattern then place on the glittering fabric and cut out. Insert the cut fabric to see how nicely it fits in the bag.
11. DIY Ita Bag
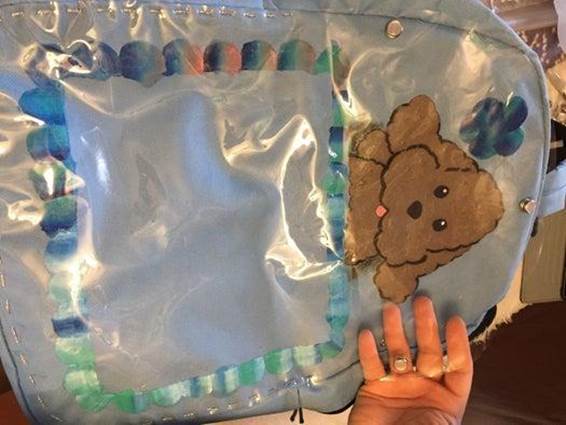
This bag is fully a see-through bag that has two straps to be hung at the back. To fill in the transparent body, measure the bag on the sides you want to work with. Cut out the material you wish to use within the bag then fill it in. from here you can add your characters.
12. How To Make An Ita Bag From Scratch
This bag is made from scratch. This bag is made of cotton material. Get a pattern and the size you will love your bag to be then cut out the pieces carefully. You will still need a plastic frame for the see-through part of the bag where your characters can be fitted.
13. Dwayne Johnson Ita Bag
If you know the popular Dwaine Johnson and you love the character, you can actually use his image on your bag. Get a picture of the character you want to use. Get as many photos as you want. Print and attach them to the see-through part of the bag.
14. DIY Ita Bag Insert
For this creation, you will need an Ita bag, paper, ruler craft foam, pencil, glue gun, and a cloth. For the bag to be stable you need an Ita bag insert this can also serve as a decoration. Take the measurement of the bag and cut out the pattern. Use the craft foam so you can easily attach the key chains. Glue the attachment and slide it in.
15. How To Make An Ita Bag
Making an Ita bag affords you the opportunity of showcasing your favorite characters of anime. This bag pack can be either worn as a two-handed bag or a one-handed. You can also adjust the straps to give a crossbody too. Attach the pieces to cloth in the shape of the clear space then slide it in.
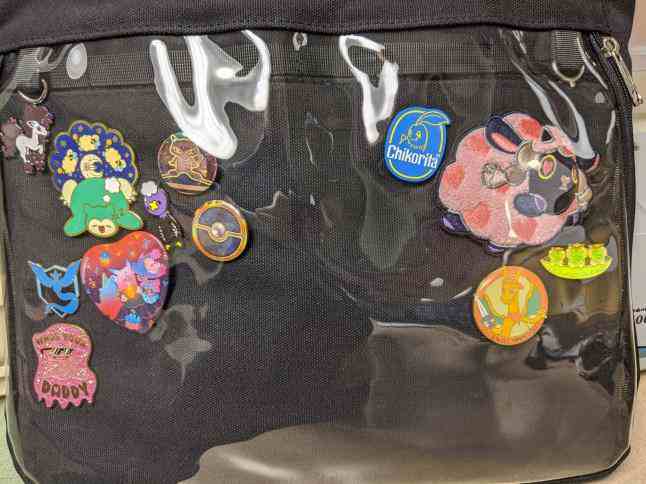
16. DIY Pokemon Ita Bag
These decorations depict the pokemon anime on a tote bag. Select your favorite pins and badges which you will want to fix in the bag. The pins and buttons can be easily placed on the removable panel of the bag. If you want to make a better choice of bag, go for black. It can match up with any color of the badge
17. Sailor Moon Ita Bag DIY
The Ita bag has become a really big deal. Some people find it really difficult to look at because there are tons of small chains, pins, charms that fill up a clear frame, hence they are so disturbing to look at. The base of this bag is cardboard. So, instead of using it plainly, you can always wrap a plain cloth over it so it before you fit in your additions. Start with the bigger ones so you can fix the smaller ones in the left spaces.
18. How To Make A Hamtaro Ita Bag
Hamtaro characters are used for this DIY Ita bag. You will need to get your bag and a couple of different Hamtaro pins and keychains to make your decorations. Getting a bag that has a clear insert at the front view will be the best option. Stick your pins to a foam base that will slide into the clear pocket of the bag.
Conclusion
Ever tried making a DIY ita bag but failed? It was probably because you didn’t follow the right guide. I have carefully selected some of the best guides that show you how to make a DIY ita bag, the making process is pretty much easy and straight-forward.
All you have to do is pick one or two DIY ita bag tutorials, gather the needed materials and start the making process. You would be done in no time.






Ask Me Anything