
Are you looking for how to build a DIY home elevator with little or no cost? You are on the right page. If you are living in a two-story building or your house has a terrace, you will probably know the pain of lifting stuff from one place to another. Or moving a heavy load.
I've done my research and found 7 beautiful DIY home elevators for your shop or home. These guides provide you with step by step ways to create a home elevator, you will completely love the projects.
Table of Contents
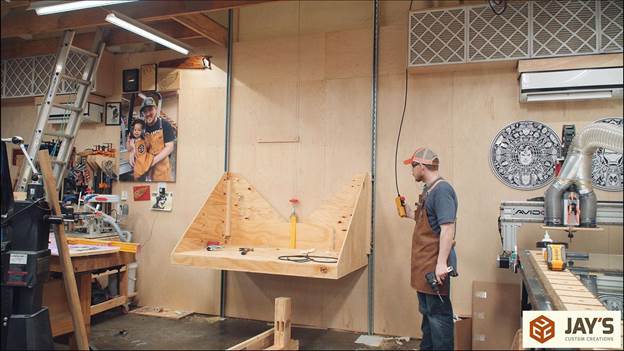
1. DIY Elevator For Home Or Shop
Are you tired of lifting loads? or walking up and down the steps of your house or shop? This DIY elevator is right for you.
The base is made from a wooden brace. It is a steel platform. It has an angle iron that goes into a groove ( a guide to make it go up) a piece is bolted on the angle iron which goes up and switches off at the top. There is a series of notches that serve as a safety device. The control is extended to the first floor.
2. How To Build A Small Elevator
The materials needed for this DIY small elevator include a roller, super struts, and rails.
Slide the roller into the super strut- which serves as vertical guidance for the elevator platform. The roller will give it a nice and smooth piece to roll on and it has 3 bolt holes. Build an arch arrangement that will attach to the super struts and build a platform at the bottom of it with some rails around it. Then, attach the whole project to your preferred position.
The project is simple and easy to create and very durable as well.
3. DIY Elevator
In building this DIY elevator you will need a super strut trolley block, electric hoist, fall arrested, 4 super strut.
Three of the super struts are used to secure the vertical movement while the other one is used to suspend the hoist. Use the shorter step from the hoist to attach the platform to the hoist. Use a bag of ½" of bolts hardware to connect the trolley blocks to the platform. Then build your mounting system. The DIY elevator project is amazing and affordable.
4. How To Install An Elevator In Your Living Room
Do you have any complication that makes it quite uneasy for you to use the stairs? This elevator installed in the living room will give you a guide on how to build your elevator. The project might be expensive but it is fun-filled and reliable.
Remove the ceiling of a small part of your living room where you want to install the elevator. Bring down the joist. Leaving only plywood that connects the living room to the master bedroom. Use a top brace to support the remaining joist in the ceiling to prevent the whole ceiling from falling apart.
The elevator closet is built with an Infrared light curtain that senses when someone crosses the threshold of the elevator. Set up the closet and put a roller at the bottom and top of the rail to keep it moving. Make the elevator stay a little bit above the ground. Install the elevator door and you're good to go. It is very convenient and durable because of its weight capacity. It can hold up to 50 pounds of weight.
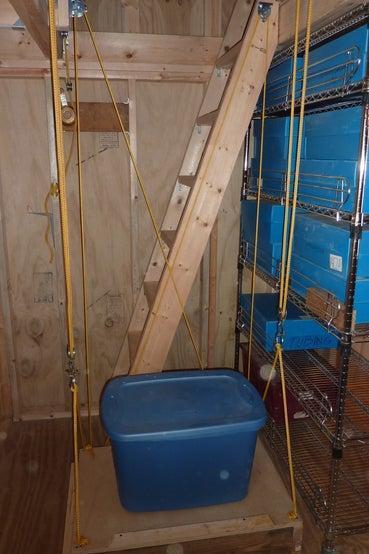
5. Homemade Elevator On Deck
This elevator is built on a cable system. The system involves a long cable wrap around a single piece of pipe. The pipe rotates and winds up or unwinds the cable for movement to occur.
There is a metal frame which the cable latched on, then comes up to the pipe and the other side of the elevator.
Though this elevator is unique and beautiful, it is not designed for human beings. Because of its weight capacity. You can put your stuff in the elevator and use the stairs before you reach the floor. Your stuff will reach the floor as well and that's pretty much cool and convenient.
6. DIY Home Elevator
Are you tired of lifting heavy loads? You have to try out this DIY project on the elevator. The cost of the building is very affordable.
The materials needed for this project include 50' of the line (not probably all of this), 7 pulleys, 5 heavy hooks, 2 heavy rings, 2 shackles, Screws, and tools for mounting it all.
Start by building the platform you will use for the elevator. Cut a section from your deck and support it with appropriate lumber and joist hanger. Stabilize the rig ( it maintains the level of the platform as it gives up and down).
In stabilizing the rig you will need a 25-foot bundle and 4 pulleys. The hoist is made from an old bronze sailboat winch. The project is easy and amazing. You have to try it out.
7. DIY Elevator Bed
An elevator bed? That sounds pretty cool and amazing. Yes. If you want to be a little bit creative about your space. This DIY elevator bed is super amazing to create.
The materials needed for this project include square metal tubing, drill, 4 × 4 platforms, tongue-in-groove planks, and a pole.
The bed frame was made from 2× 4" and 2 × 6" tongue-in-groove planks. When the beds come down there is support underneath to support them. The main control of the bed is fixed to the front of the bed where it would be easy to use a pole to wind up and down the bed. The creative and fun part of the project makes it look lovely. This DIY elevator bed is suitable for a tiny house where there is limited space.
Conclusions
We didn’t just include DIY home elevators that you can build for your home, we also included guides that give tips that you will need if you want to have a DIY elevator at home. There’s also a guide that shows you how to install an elevator.
Do you have questions or contributions regarding this article? Or did you find a DIY home elevator guide that we missed? Please, share in the comments section, we’ll be happy to check it out.


Michael says
Hi Alison,
Here's a challenge:-
There's a huge gap between these DIY elevators (all 7 in the videos are downright bloody dangerous, for many, many reasons!) and "proper" home elevators - which are exclusively for the very rich.
There must be a properly engineered, counterweight - type elevator designed by a serious DIY engineer out there.
Can you find some?.