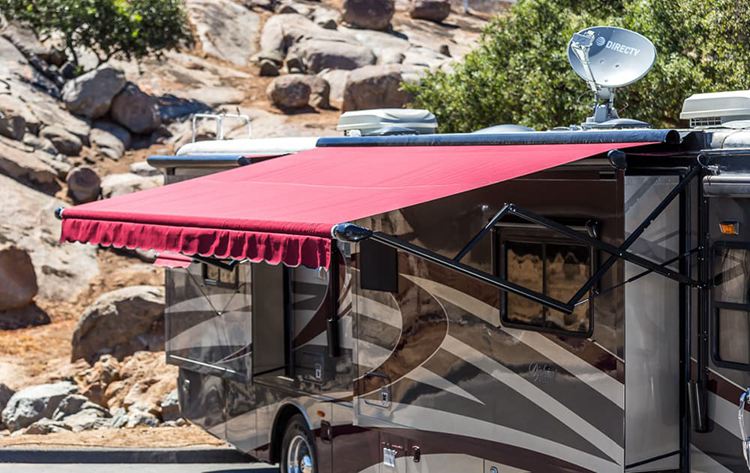
Isn't it always great to go on camping trips? Well, yeah, but not really if you roll down your awning and the mold starts making you nauseous. Even if it isn't moldy, the top can get dirty over time.
Once you’ve realized that your RV shelter needs a wash, you can gather some supplies and get it all cleaned up in no time at all.
We know that you want to keep every part of your RV in the best shape for a long time, so we have compiled a guide on how to clean RV awnings. Read on to keep your RV looking new for years to come.
Table of Contents
Types of RV Awnings
Before you go ahead and start cleaning, you need to figure out what type of awning you’ll be working with. The different materials used to make these awnings require different methods to clean them.
Acrylic awnings have pores from the threads used to make them. The dirt can get inside the spaces, and it can be challenging to remove. Even though many acrylic awnings have a waterproof finish to protect them, you can get your own coating spray just in case.
Make sure not to use rough cleaning methods (such as harsh scrubbing) as the waterproof finish might come off.
Vinyl Awnings don’t have small spaces for grime to creep into. They are waterproof but not flexible. For this reason, you should avoid scrubbing these too harshly as well.
According to rvandplaya, Acrylic awnings are used in windy areas, while Vinyl awnings are used in rainy areas.
Cleaning RV Awning
Step 1: Prepare A Cleaning Solution
Before putting any of these solutions on your awnings, do a small patch test by spraying some of the solution on the spot with dirt or stains.
Let it sit for about 15 to 20 minutes before checking it. See if the color has faded and if the solution has actually worked. If it’s all good, you can use it on the rest of the fabric, otherwise use a different, gentler solution.
#1. Store-bought solution
You can use a store-bought cleaning solution like this one for your awning. It is easy to use and removes grime, dirt, and tree sap.
It will save you time and effort, but you need to ensure that you are not using an oil-based or an abrasive cleaner.This is why you should turn to chemical cleaners as a last resort.
#2. Bleach Solution
It is probably the most popular way to make your own cleaning solution.
It works great, but it’s not recommended. Bleach is harsh, and it will shorten the life of your awning by damaging it with every use.
A better idea is to turn to bleach only when your awning has a stubborn stain that won’t come off with any other method. If you plan to go with this technique, use it in one spot, ideally in the area where there’s grime.
It’s best to use it once every few years. However, if your awning is way too soiled and can’t be cleaned with normal, safe solutions, it’s best to replace it with a new one and deteriorate it further with bleach.
Pour one-third of a cup of bleach into a gallon of water to prepare your solution.
#3. Vinegar Solution
Mix 4-5 cups of white vinegar with one gallon of water and squeeze in some dish soap. This solution works like a charm, and it’s safe for both vinyl and acrylic awnings.
#4. Hydrogen Peroxide
Add two parts Hydrogen Peroxide to six parts water. This solution is only for vinyl awnings as it might damage the acrylic ones.
#5. Baking Soda
Make a paste by mixing some water with baking soda. It will clean up the dirt from acrylic awnings but will take time. Unlike solutions, you can’t spray it on the awning from a distance. Instead, you’ll have to put in the effort to scrub it on the fabric to clean it up.
Step 2: Wash Your Awning
Now that you have your cleaning solution, let’s get to work! Open your RV awning and look for leaves or other materials that may have landed on top of your shelter.
You can stand on top of a raised platform and use a broom to sweep off any debris visible on top gently.
Next, use a water hose to wash the remaining debris from the surface. If you don’t have a hose, you can use a large bucket as well. You’ll have to stand on a stool to keep the awning within reach.
Step 3: Use a Solution
Pour the solution you made earlier into a spray bottle. Spray the top and the bottom of the awning, making sure that each part is well covered. Give extra attention to stains and grime.
If you don’t have a spray bottle, you can dip the brush in a bowl filled with the solution and apply it to the surface of the awning. To stay on the safe side, apply the solution on a small portion first to ensure that it won’t damage the material.
To make things easier, try pulling the awning down all the way before covering it in the cleaning solution. When you’re done, roll it up and let it soak for a while.
Step 4: Scrub
It’s time to scrub! After an hour, roll the awning back down and grab a brush. If you have a vinyl awning, use a soft bristle brush to clean the dirt. For an acrylic awning, use a hard-bristled one.
You can use a brush with a long handle to reach the corners. Don’t scrub it too harshly that it gets damaged and starts ripping apart.
Step 5: Wash Off The Solution
After the scrubbing, use a water hose or bucket once again to wash off the solution. Make sure the water reaches every part of the awning from both sides. Some people choose to pressure wash the awning but you shouldn’t do it, as it can damage its material.
If you still want to use this method, keep an eye on the awning to look for any signs of rips or tears.
Step 6: Air Dry The Awning
Keep the awning outside in the air until it dries up. Never roll it up when it’s wet because mildew will end up taking over. Make sure your awning is getting direct sunlight so that it dries up faster.
Don’t ever try to apply heat to the awning.
However, if you want to fasten up the drying process and you don’t have sunlight, switch on a fan and position it under the awning in a way that it points the air in the upward direction, directly at the fabric.
Step 7: Take It A Step Further!
If you have put in this much effort to make your awning look fresh and new, you might as well go all out and apply a finishing coat. There are many good-quality protective coat sprays available online and in the market. Use it to make your RV shelter last a long time with lesser damage.
Make sure that your protective spray is resistant to soil or dirt and doesn’t let stains soak into the awning. It should also be durable and protective against UV rays.
Some coatings even restore the faded colors in the fabric. Remember to use correct sprays designed for both specific materials. Don’t put a vinyl coating on an acrylic awning because both formulas are designed differently.
How Often Should You Clean Your RV Awning?
Cleaning your RV Awning once a year should be more than enough to keep it looking brand new. Most RV owners tend to wash it when they winterize their camper van, but you can also do it when you start going out camping again!
If you enjoy frequent trips in your RV, you’ll have to clean it more often. Look for grime or dirt and just wash it whenever it seems too dirty.
If you want to get rid of a stain only, you can spray the solution in the particular area and wash it off without giving the entire awning a full, deep clean.
Final Words
To sum up, you can clean your RV awning once a year or when it’s too dirty.
- You can make a solution of your choice to apply to the shelter.
- Remember not to use harsh chemicals on the awning to avoid damage.
- Clean off any leaves from the top of the fabric.
- Then, wash it with a water hose or bucket.
- Spray your solution and roll it up.
- Unroll the awning and scrub it using a brush.
- Rinse it with water to remove the dirt and solution.
- Don’t forget to leave it to air dry before rolling it back up.
That’s pretty much all there is to it, so tell us if you have a question, and we’ll help you out!



Ask Me Anything