Table saw is an excellent power tool that helps you to make wonderful wood projects quickly as well as making cuts correctly and safely. If you are someone who is serious about woodworking with a table saw but don’t know how to use a table saw. Then I have made a guide on how to use a table saw for beginners. And if you are a new user of a table saw, have a look at these well-constructed tables saw for beginners.
Without knowing the table saw uses your work can seem frustrating and even confusing a lot of times. So, you have to make a plan before working and that is exactly what you are going to make. Otherwise, one mistake can cause you to regret. Therefore, you should follow the steps below on how to use a table saw safely and if you follow these steps then you can make successful wooden projects without any trouble.
Before starting your work with a table saw make sure that your saw is set up properly. And before that make sure you choose the right table saw.
Table of Contents
7 Steps on how to use a table saw
Follow these steps carefully before starting your work with your table saw.
Step 1
Don’t be afraid of using this saw and work with care but if you are not careful then it can cause a devastating injury. Like you might lose your finger or can also have an effect on your eye or some other injuries so work with wearing the safety equipment.
Wear safety glasses, hearing protection, and appropriate clothes. You should avoid wearing loose-fitting clothes, necklets, jewelry because these can make hazards while using the table saw.
Step 2
Before getting started, make sure the table saw is set up properly as mentioned before and check out whether your work area is clean or not. Check the safety features of the table saw, saw blade guard, riving knife, and anti-kickback pawls. They are designed to protect you and should be adjusted properly. For maintaining the table saw check or make sure the sawdust catchment bin is not overly full.
Step 3
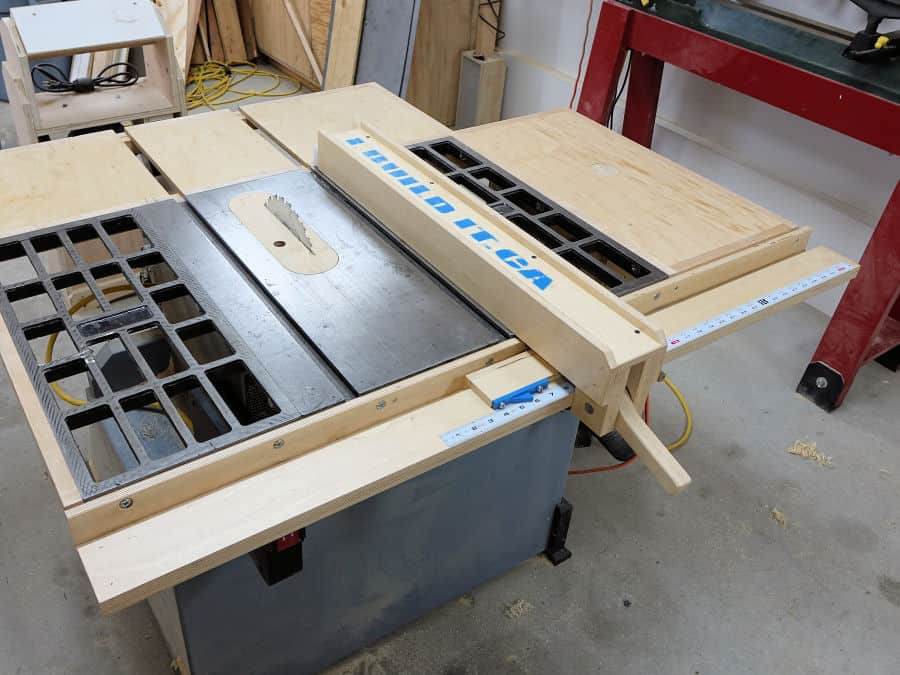
Check the riving knife or splitter with a blade guard and make sure that they are perfectly aligned with the saw blade. Use the perfect saw blade and check the blade height and re-set with every board that is cut. Set the blade length and height to cut with measuring tool.
You need to check the wood you are going to be cutting and the wood needs to be flat on one face and straight. Because, if the board of table is wrapped and pushed through a table then there is a high risk. And if the board catches the wood somewhere it can cause kick-back.
Step 4
After setting up the table saw, blade, wood, and fence then mark with pencil in the wood for cutting appropriately. And plug in to start your work and turn on the power then hold the work piece to the miter gauge/sled. Also, check the alignment of your fence against the miter slot and the miter slot will help to get great results with your table saw. The fence should be on the right side of the blade if you’re right handed. Again, if you are comfortable setting the fence on the left then use it left side of the blade.
Step 5
If you want to make a cross cut by the table saw then line the mark up by eye on the wood or you may mark on your board by pencil. Make sure all the materials are fitted well around the blade. Push the wood slowly and smoothly along the blade marked up line and past the blade.
Step 6
Same way you can follow to make ripping cut like adjust the fence and blade height. Use enough force to keep the board against the fence as much as needed. Excessive force on the fence can cut an inaccurate cut and it can be dangerous. Excessive force can spring load the fence and once the pressure is removed the spring activity will push the wood back towards the blade. Push the wood slow to high speed and remove the scrap wood in a safe way or you may shut off the machine.
Step 7
Keep both hands on the wood and push the workpiece slowly and smoothly through the blade with your right hand. Keep your fingers away from the blade. Hold the workpiece against the miter gauge fence and pull the miter gauge handle with your right hand. I mean hold the workpiece firmly against the edge of the miter gauge.
After finishing the cut shut off the saw and remove the scrap wood or retrieve the pieces.
Summary
To start work with a table saw firstly you have to know about the parts of a table saw and should plan what types of cut you will make. Then set up properly your table saw for cutting and prepare yourself wearing safety equipment.
Next what you have to do this is adjust the blade height, adjust the fence, then turn on the switch of the table saw and start for making cut. After finishing cut remove the scrap wood and turn off the switch of the saw.
Conclusion
I hope following all the above steps you will be able to use a table saw. And these guideline on how to use a table saw have helped you to make your woodworking projects successful.
Anyways, if you have any further questions about how to use a table saw. Don’t forget to comment below and let us know. We’ll be glade to help you out further.




Ask Me Anything