A drill press is an essential power tool for woodworkers. It is versatile and commonly used to create holes in a more controlled and accurate way. As a woodworker, a drill press not only helps with creating regular holes but also useful with a mortising attachment for square ones.
If you are wondering how this powerful tool works and where to use, read on to find useful tips. I understand that as a first-time owner of a drill press, it can be challenging to figure it out. This is why I compiled this article.
Table of Contents
What Is A Drill Press And How Does It Work?
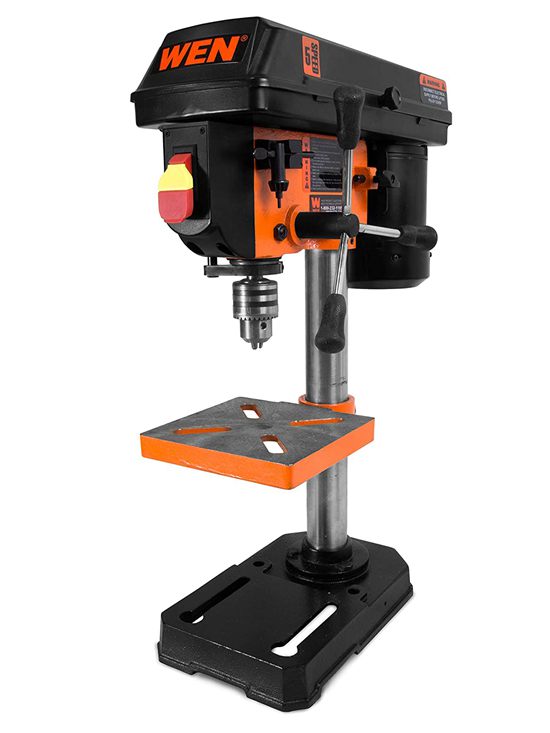
A drill press is a power tool that woodworkers use to create accurate holes. The design features a base, a column, a table, and a head. The head has a motor that powers the tool as well as drilling equipment to create the holes.
The best designs of drill presses have elements such as height and position adjustments. These allow you to customize how it works, depending on the type of material.
A drill press is quite vast compared to a hand drill. It is, therefore, suitable for work that needs large holes and higher precision. Also, it comes in handy to create a range of holes without the material moving when changing bits.
How does it work? A drill press has a rotating spindle that feeds into the material clamped on the table. Some models have a chuck that grips the drill. It has three jaws that move radially in unison. Other models have a taped shank that fits into a hole in the spindle.
A drill press has varying speeds to control the movement of the spindle. This means you can set the speed depending on the material you intend to drill.
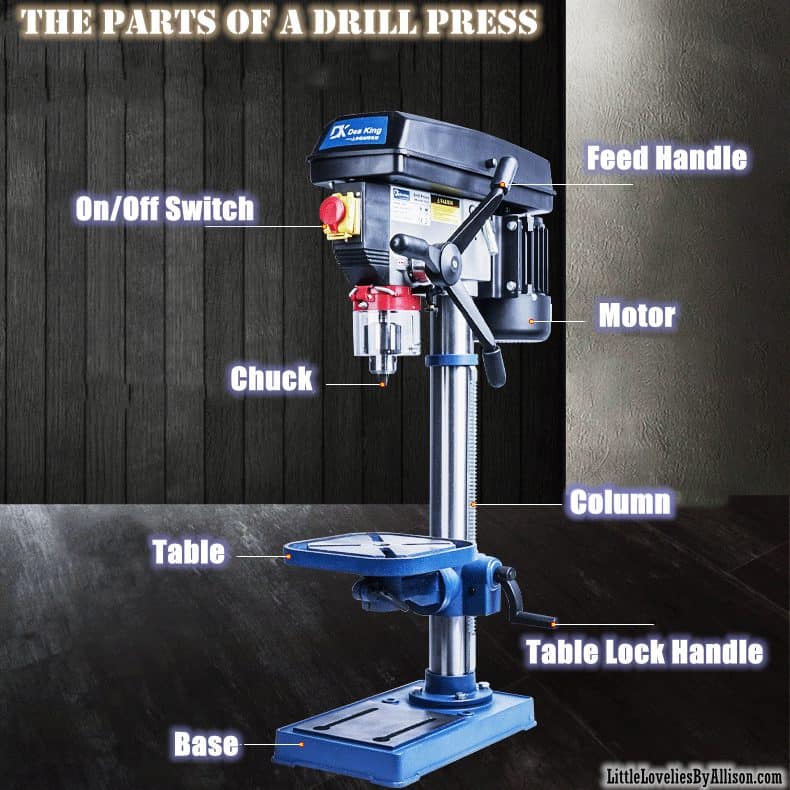
What are the parts of a Drill Press?
- Feed Handle: Turning in a clockwise direction by pulling down on the handle causes the drill bit to move in a downwards direction.
- On/Off Switch: Pressing the trigger switch turns the drill press on.
- Motor: Provide power for bit rotation.
- Chuck: Locking bit.
- Table: Table can be adjusted along tile column for correct height prior to drilling. It can also be swiveled around the column to the preferred operational position.
- Column: The column is the post, to which the table is fastened; the table holds the work in, place while It is being drill.
- Table Lock Handle
- Base: The base of the drill press is the support for the machine it is bolted to the floor and has T-slots so to large work may be bolted to it for drill.
Video tutorial on the steps to follow when using a Drill Press
How to Use a Drill Press - With 6 Steps
Drill presses vary from one manufacturer to the other. On this note, controls are usually different for specific models. You should, therefore, read your manufacturer's guidelines to using your drill press. Here is a simple procedure that you can follow.
-
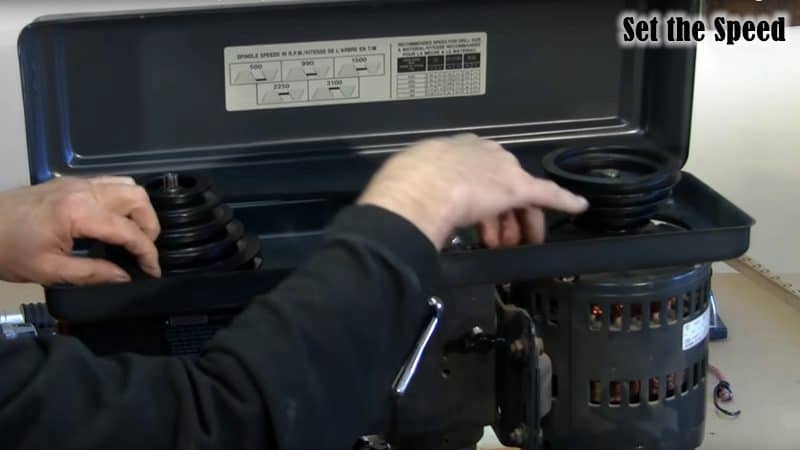
Set the Speed
Most drill presses come with a drive belt that you move to adjust the speed from one pulley to the other. Generally, a small pulley on the chuck axis results in a faster spin. With any cutting action, slower speeds are advisable for drilling metal and quicker speeds for wood.
-
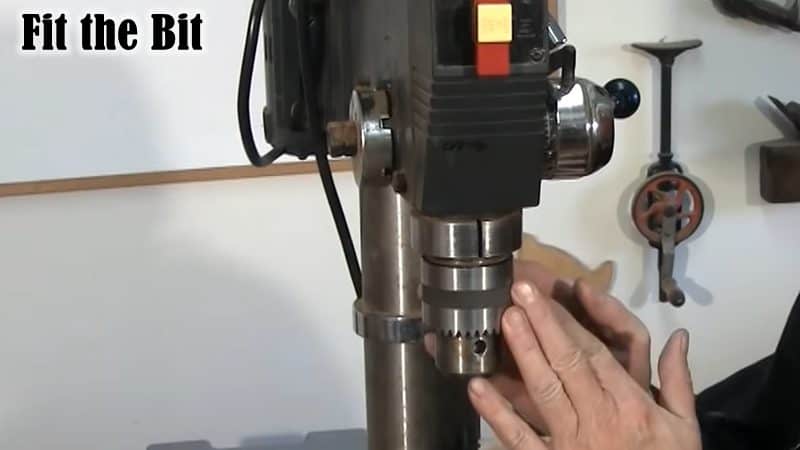
Fit the Bit
The next step is opening the chuck to slide in the bit. Ensure the chuck is snug around the bit's shaft and tighten the three jaws with the key. Ensure you remove the chuck; otherwise, it can be dangerous when you turn on the drill. If you intend to drill large holes, fist drill a small pilot hole.
-
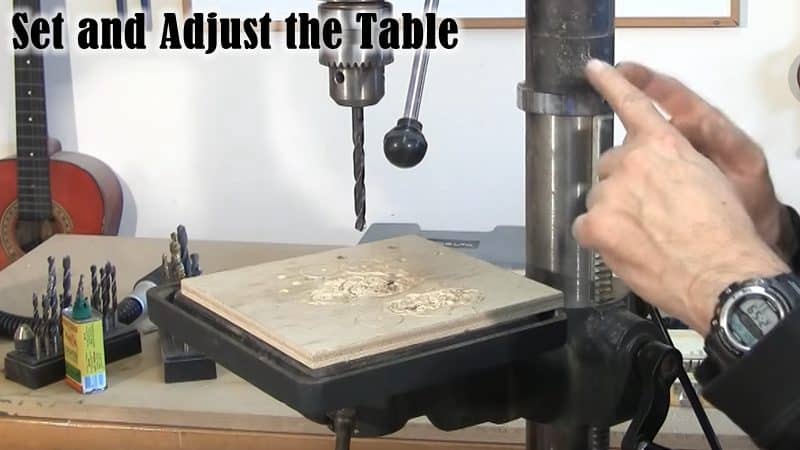
Set and Adjust the Table
Some models of drill presses come with a crank that you can use to adjust the height of the table. Other designs move freely after releasing the clamping lever. In this step, set the table to your desired height, depending on the task at hand.
-
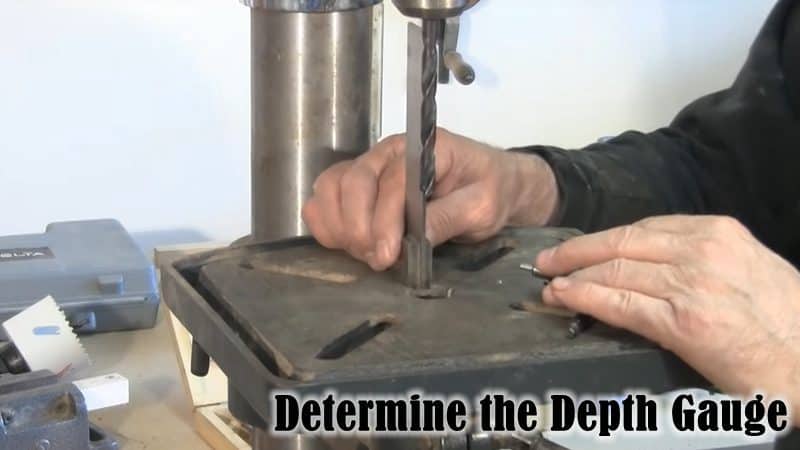
Determine the Depth Gauge
If you are using the drill press to drill a hole in a piece of stock, you do not need to adjust the depth gauge. However, if you are looking to achieve a hole of a specific depth, then this adjustment is necessary.
-
Secure the Workpiece
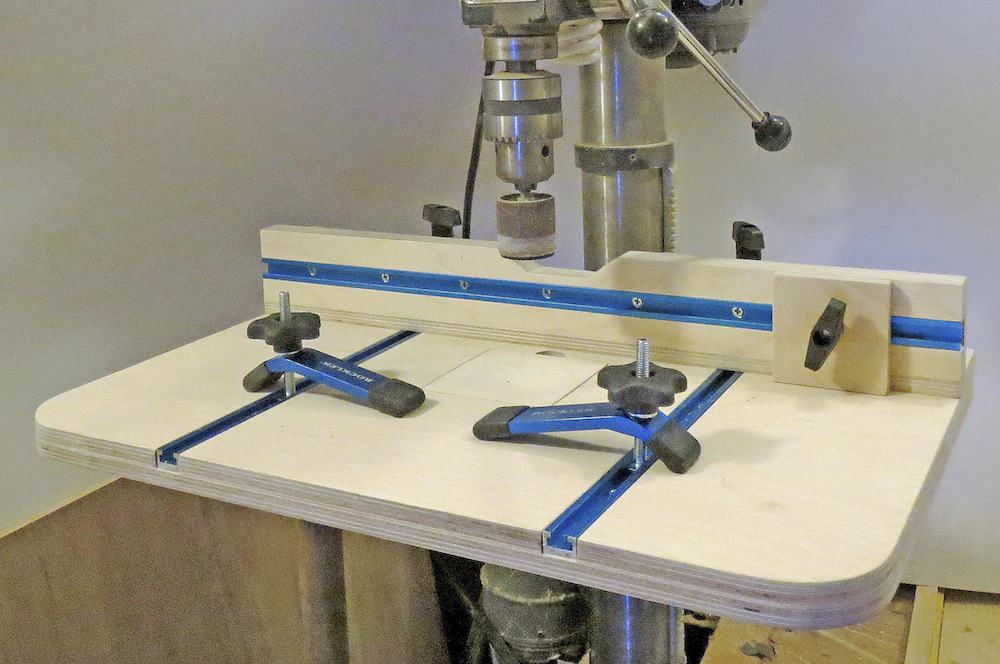
Fix your workpiece securely by clamping it on the table. This step is crucial as it ensures proper drilling and prevents any unforeseen accidents.
-
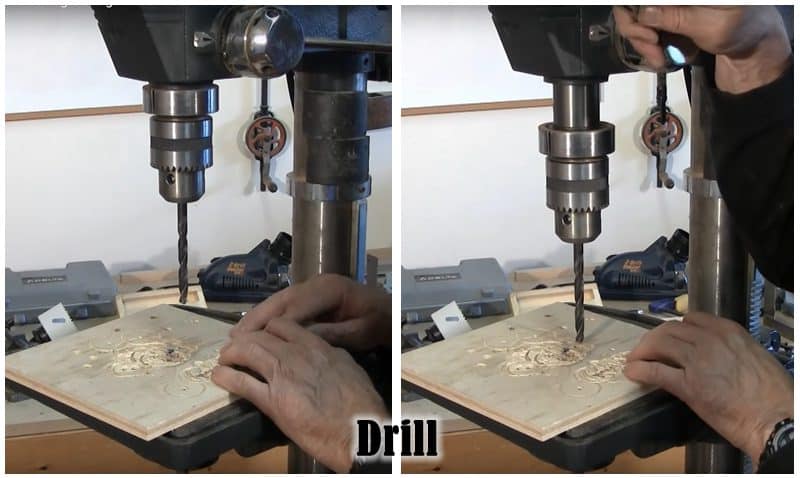
Drill
Start the drill press and run it to its full speed. Drive the bit onto the workpiece to drill while lowering the bit by swinging the rotating lever. After drilling, release the pressure on the lever to return it to its original position.
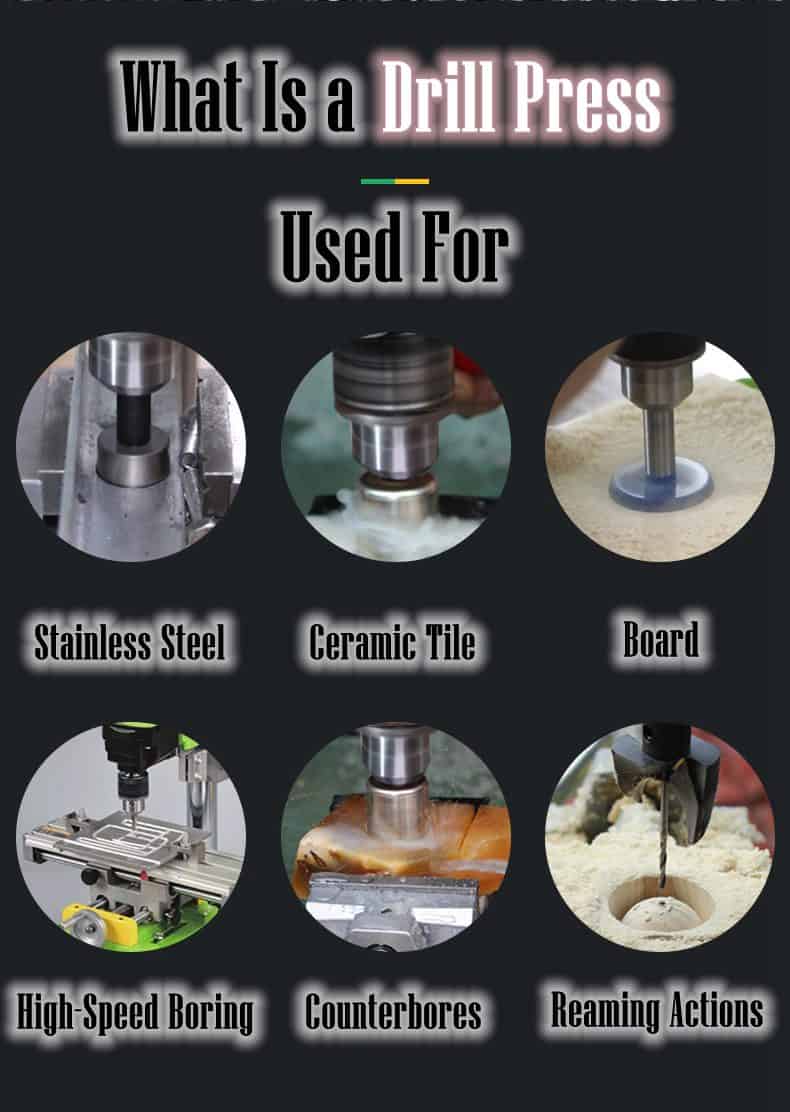
What Is a Drill Press Used For
The primary use of a drill press is to create holes in wooden materials. But, you can make use of it for other tasks.
1. Countersinks
You can use your drill press to remove burrs from an object. The drill starts with a cone-shaped engraving with a conical drilling instrument. It then gradually increases its orbit and drill as directed. Countersinks are useful to fit things quickly; however, you have to be careful with the alignment.
2. High-Speed Boring
There are times you will need to drill a hole that is too difficult for a regular drill to handle. Or, you need plenty of holes at the same time. You can use a dialer and set the size that you wish to drill then insert the object into the machine.
In such a case, you need to determine the speed of the machine and the size of the needle. If you struggle with positioning, you can use a smaller needle for pilot strokes.
3. Counterbores
Counterbores are useful when enlarging an already existing hole to the desired measurement. In this case, your drill can enlarge the hole both horizontally and vertically, depending on the type of needle you are using.
Counterbores are a common technique among drillers since it gives more room to enhancing your drilling all through. These holes are then useful for filling them with bolts, screws, sockets, etc.
4. Tapping
You can use your drill for tapping if you have the right tools. Usually, taps are used to cut internal threads with control and excellence. If you already have a hole that needs a cross-section, then you can use the tapping option.
There are two types of tapping. One is the starting tap, whereby you start the thread in a specific place. The other is the plug tap, which works to end the process by cutting the thread.
5. For Slash Drilling Operations
You can buy additional attachments that allow you to use the drill press as a slashing device. With these, you can cut through thick objects quickly and accurately. But, you have to align the object and the slasher blades correctly for pilot strokes. After this, you have to lock the object and the lashing attachment.
6. Horizontal Dusting
With wood, you can make use of your drill press for horizontal dusting. You only need to attach a small dusting attachment with the tip of the drilling needle, and it will instantly transform into a duster.
This trick helps you get the benefit of two machines from one. On this note, you can also add other types of fishing dusters to perfect your woodwork.
7. Combined Countersink Drilling
In addition to regular countersinks, your drill press can work well for combined countersink drilling. This technique is a mix of countersink and counterbore. In this, you skip the pilot stroke and start drilling until you get to the bottom end.
If you do not have a lot of time to focus on the perfection of the machine, this stroke is useful. It is faster and does not need a perfect alignment. With this technique, you do not need to change the needles.
8. Reaming Actions
Your drill press can come in handy if you are looking for accuracy at a higher speed. With this technique, you can drill accurately on many objects in a short amount of time. The only thing you need to do is set the drilling pace, length, and the right needle of the specific task.
However, you have to start with a pilot drill in the whole body before you begin reaming. After this, be sure to polish the angle when moving from one hole to another.
9. Screwing and Unscrewing
You can make use of your drill press to screw as well as unscrew. It is a useful technique, but you need to set the machine to the lowest speed, and use an adapter if possible. With a needle that complies with the bolt, you can then use the drill press to screw. The best thing about using a drill press for such tasks is how fast and effective it is.
How to Remove a Drill Press Chuck
Drill presses come with a unique tool to remove chucks. The chuck removal tool comes in a shape that fits in a special access window on the spindle. Using this tool is the most effective and quick method to remove the chuck.
You should hammer the chuck removal tool into the spindle window to push the top of the chuck down. You need to continue hammering until the chuck falls out of the drill press.
If your drill press does not come with a chuck removal tool, you can use a hammer and a solid piece of hardwood. With these, you need to position the hardwood above the chuck at an angle. Use the hammer to hit the wood and drop the chuck below.
Although this method is quite cruel, it gets the job done when you do not have a chuck removal tool.
Conclusion
A drill press comes in handy in a variety of tasks. Using it correctly gives you accurate and precise results for your project. I hope this article is insightful; hopefully, you have learned how a drill press works, where to use it, and how to remove the chuck.
If you have any questions on the topic, feel free to leave a message and let's chat.

Ask Me Anything