Whether you’re a part of a clothing business, customize plain t-shirts for sale, or are working on a gift for a loved one, making minor errors while adding letters can sometimes be unavoidable. In such circumstances, removing the letters and redoing them would be a smart solution.
There are several methods for adding letters on a shirt and even more for removing them. But before we move on to the different ways you can fix your mistake, let’s first discuss the types of lettering available in the printing industry.
Table of Contents
Different Types Of Lettering On A Shirt
The type of printing determines the way you remove the lettering from your shirt. The two most popular demands of customers are the heat press and screen printing. But the latter gives a challenge when it comes to removing. Vinyl, dye sublimation, and DTG are other economical methods to add design to your shirt.
Screen Printing
Screen printing, or silkscreen printing, is a process of applying ink to any fabric. It requires a stencil, a nylon mesh, and a squeegee. The steps involve setting up a stencil on the mesh screen and pressing the ink through to create an imprint on the negative space beneath.
Most clients and customers frequently prefer this type of lettering over other methods since the outcome is neat, tactile, and an exact replica of the design. Following are some ways the stenciling technique may vary depending on the materials used:
- Covering of target areas using vinyl or masking tape
- Using glue or lacquer to paint stencil on the mesh
- Creating stencil by using light-sensitive emulsion, which is developed later on
Watch this video to learn about the screen printing method through visuals for a better understanding.
DTG/ Direct To Garments
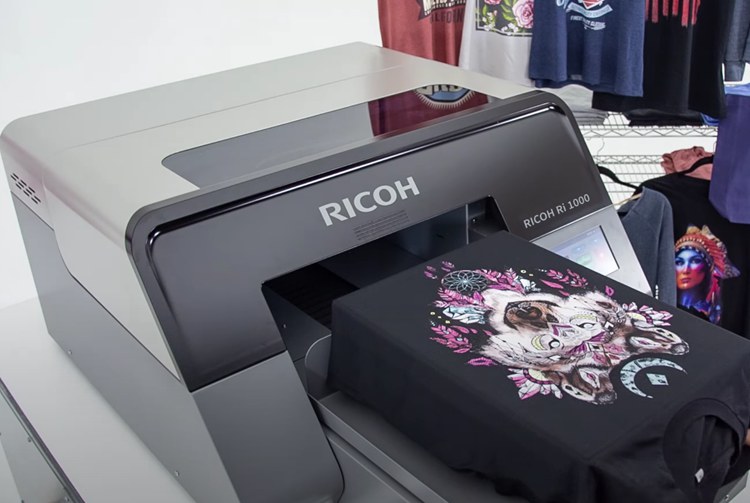
DTG is an industrial process to quickly print designs on fabric using specialized aqueous inkjet technology after they’re uploaded to the computer. However, the implementation of this method demands a set of skills and professional knowledge.
DTG is the most advanced method on the market. It excellently prints even the most unique and complicated designs and doesn’t add extra layers of ink to your shirt. Following are a few significant advantages of using this technique:
- Wide range of color options
- Fast performance
- Low cost for setup
- Eco-friendly
However, the printing is not very durable and fades away quickly, especially if you’re using a low-quality textile printer.
Dye Sublimation
Dye sublimation, also known as digital sublimation, is a printing method that transfers a design on the fabric through heat transfer. It usually works on materials such as polyester and offers maximum durability.
The process involves the use of dispersed dyes that dries up as soon as it comes in contact with the polyester fabric. After the dye solidifies, it is then exposed to pressure and heat. In this way, the dye is embedded into the fabric.
Heat Press Printing
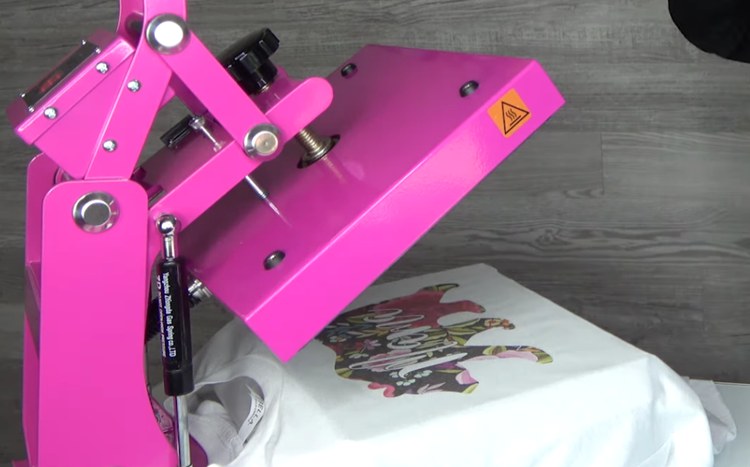
Heat press involves heat-pressed ink that doesn’t become part of the fabric, rather just sits on top of it. Therefore, the print doesn’t survive well in machine washing and drying and cracks over time.
The method is similar to dye sublimation but is much more economical and fast. The design is printed on transfer paper which you take and press on a shirt using heat and pressure.
You are to wait until the dye softens and transfers to the fabric beneath. Then take the glossy paper transfer and strip the dye off to reveal a shirt with your intended design.
To understand the difference between a heat press and dye sublimation through visuals, click here.
Vinyl Cutting
This method is highly convenient and the best for printing on various types of cloth. As the name reveals, it uses vinyl fabric cut into desired shapes and then adhered to the shirt. As vinyl is capable of withstanding harsh elements, the designs can be applied to any fabric material.
The different methods you can remove various types of letterings from a shirt.
1. Remove Vinyl Lettering From A Shirt With Petroleum Jelly
Before jumping to steps, you need to gather your supplies and set up a workstation. Lay down your shirt and plug in the iron. Make sure the setting dial is set to the fabric type of your shirt. You’ll also need an Exacto knife, rubbing alcohol, and tweezers.
Then follow the steps below:
- To begin, place the iron inside your shirt, precisely on the backside of vinyl.
- Next, tie the shirt around the iron using a rubber band. This will make it easier for the vinyl to pull off.
- Then, run your Exacto knife or the tweezers over the vinyl. It will start to come off in small sections.
- Most of the time, the vinyl will stick to your tools. In that case, use the alcohol to rub it off and continue removing the vinyl until all of it comes off.
- If there is still some vinyl or its residue left on the garment, rub petroleum jelly over it. After that, apply laundry detergent to the same area and wash it away to reveal a clean vinyl-free shirt.
When you're done removing the vinyl, wash the shirt thoroughly to ensure the previous design is no longer there.
2. Remove Ironed On Letters Using Steam And Heat
The first thing you need to do before proceeding with this method is to check the label of your shirt. Only continue if the fabric is capable of withstanding high heat. Then follow the steps below:
- Start by laying down your shirt on an ironing board.
- Since you’ll be using high heat, put a piece of plywood or a towel inside your shirt to prevent the opposite side of the shirt from damage.
- Next, take your hairdryer and set it at the hottest setting. Then point it towards the letters on your shirt. You can also use iron as an alternative. To do this, first put a wet towel on the letters. Then remove the towel and place the iron on top of the letters on the highest setting.
- After that, use a knife and scrape the letters off from the garment.
- Once most of the letters are removed, rub a cloth damped in alcohol and rub it over the residual glue. You can also use an adhesive remover for this purpose.
- Lastly, wash the shirt for a clean finish.
3. Remove Ironed On Letters Using An Iron
Before starting, check for the fabric care label to ensure it’s iron safe. Also, use the recommended temperature to prevent burning. Then follow the given steps.
- To start, plug in the iron and set its temperature.
- Then, place the iron inside your shirt in a way that its soleplate is against the backside of the lettering.
- Now, tighten the shirt around the iron and use a sharp knife to peel off the lettering. The higher the temperature gets, the easier it becomes to remove it.
- Next, use a cloth dampened in alcohol or adhesive remover and rub it over the residual glue.
- Finally, wash your shirt in a regular manner using a washing machine.
4. Remove Screen Printed Lettering By Acetone Or Nail Polish Remover
There is a misconception that the screen-printed letterings are permanent and cannot be removed. However, there are a few tips that make it a possible task. If you’re using acetone or a nail polish remover, do a patch test before applying it to your shirt, as some fabrics are sensitive to this chemical.
Now, let’s take a look at the steps you’ll need to follow.
- First, wash your shirt using cold water. Refrain yourself from washing with hot water as it will further intensify the ink to the cloth.
- Then, use high heat to dry the shirt and loosen some parts of the print. Peel it off with your hands.
- Next, dip a cotton ball in acetone or nail polish remover and dab it on the remaining ink. It is important that you don’t rub the liquid on your shirt as it will mutilate its fabric. Again peel off the ink with your hands.
- Rewash the shirt in a regular way to get rid of any remaining flecks of ink.
5. Remove Screen Printed Lettering By Plastisol Ink Remover
This method requires you to use gloves and wear a mask. Also, the workspace should be well-ventilated. Then follow the steps below to get rid of the lettering.
- Start by applying the remover to the target area and leaving it for approximately 30 minutes.
- Then, brush the print off with a soft brush.
- Next, use a soft cloth to wipe off the plastisol remover.
- After that, wash your shirt using detergent and cold water.
- Dry the shirt and if there’s still any print left with your fingernails.
Conclusion
Removing lettering from a shirt isn’t too difficult. However, there are certain measures you must take to ensure a safe environment for yourself. These include:
- Work under well-ventilated space, especially when using harsh chemicals.
- Read through the instructions properly if you’re using any store-bought product.
- Wear gloves and masks to prevent chemicals from getting into your skin.
- Keep your hands dry when using electrical appliances.
- Always keep acetone and other chemical products away from children.
This is it! If you still have any confusion, let us know in the comments below. We’ll get back to you as soon as possible.







Ask Me Anything