
One of the most challenging types of DIY is furniture building, but it is also one of the most rewarding.
You might not wish to build a dining table, but many of us do end up putting together something simple, like a cup holder, outdoor furniture, or maybe even a side table. Perhaps, like many US citizens, you converted a spare room over the pandemic and wish to build something for that. If so, you might consider building a poker table.
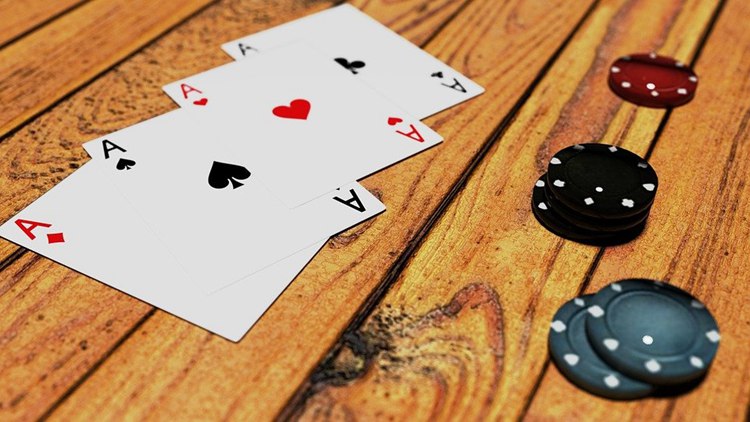
Why poker? It's a popular game in the US right now, with millions of players taking part in games from their basement to the casinos of Las Vegas; in fact, poker is the national card game of the US. When buying a poker table for your home, you can end up spending huge sums of money, but making one is not all that difficult. Also, it makes a great addition to a games room, especially in a space such as a basement.
Here's an introductory guide as to how you can build yours today.
Items you'll need:
Part One: 4 x 4 feet plywood sheet, ruler, pencil, circular saw (or jigsaw), clamps, 1⁄4 inch (0.64 cm), foam, 1⁄4 inch (0.64 cm) pine trim, adhesive spray, speed cloth, utility knife, drill, staple gun.
Part Two: 5 by 5 feet (1.5 by 1.5 m) plywood sheet (2 pieces), framing square, grease marker or carpentry pencil, jigsaw, wood glue, clamps
Part Three: table legs, drill, 9⁄64 inch (0.36 cm) drill bit, #10 wood screws, washers
Part One
1: Take the 4 x 4 piece of plywood. Using a tape, measure 14 inches from the corner and make a dot. Do this on the opposite side, and join the dots, marking a triangle on each corner. Do this for all four corners, and cut along the lines. This will create an equal-sided octagon for you, perfect for an eight-player tabletop.
2: In a well-ventilated area, spray adhesive onto one side of your plywood. Roll your foam across the adhesive and weigh it down for an hour to stick properly. Make sure you smooth it as you go and that you cover every inch of the tabletop to prevent bubbling later. Cut the excess foam from the edges once dry.
3: Install the pine edging along the sides with a nail gun or drill. Ensure each piece is measured correctly, and remember the width of the trim will affect the size of the lip between your table edge and the playing surface.
4: Get the adhesive out again place your speed cloth face down on a surface. Spray the rear of the speed cloth with adhesive, covering every section. Lift your tabletop onto the speed cloth and place it face down onto the adhesive. It's best to have someone helping at this point.
5: Fold the edges of the cloth over the lip of the table, and staple it to the underside of your playing surface all of the way around the table. Where two pieces of cloth meet, as they will on the edges of the octagon, staple them together. Cut off any excess felt with a sharp knife.
That completes the playing surface; it's now time to create the rest of the tabletop.
Part Two
1: Take your covered octagon and lay it in the middle of your 5 x 5 sheet of plywood. Ensure it is correctly centered using a framing square and a pencil.
2: Trace around the octagon, drill a hole in each corner of the outline left on the 5 x 5 sheet, and cut out between the lines. Using your jigsaw, cut between the lines to leave you with a completed octagon in the middle and a square frame.
3: Take the second sheet of plywood, and lay it one the first, with the octagon hole in it. Line them up so they're flush; you should have a 5 x 5 square underneath and a 5 x 5 square with an octagon inside it on top. Measure 12 7⁄16 inches from each corner and join up those dots in the same way you did for the first octagon. Clamping firmly, cut both sheets together to make the two sheets octagon shaped but bigger than the first one.
4: Once you're happy they line up, use wood glue to stick them together, clamp and leave until they're fixed permanently.
That's the tabletop complete, now onto the legs
Part Three
1: If you're really ambitious, you may have turned your own legs, but we're assuming not! Retrieve the spare octagon that you cut from the middle of your first 5 x 5 piece of plywood. Measure it from corner to corner, and place a mark between two and four inches in from the corners.
2: Drill a pilot hole where you intend to insert your legs, slightly smaller than the screw you intend to use. Test the screws on the legs to ensure they're going to fit.
3: Place wood glue around the flat face at the top of the table leg to meet the table underside. Screw the leg in tight, repeat for each table leg, and leave to dry. It should take two or three hours.
4: Once dry, flip the previously assembled tabletop over, and lay the octagon with the table legs attached on top. Line up the corners so your legs are centered, and drill small pilot holes in both the legged octagon and the tabletop. Ten should suffice; screw the bottom onto the top, and voila, your tabletop is complete.
Finishing Your Table
Your table will be a plywood finish if you follow this guide, so at each stage, we suggested sanding the plywood down to a nice, subtle finish and perhaps varnishing or staining to give it a nice appearance. You can do this after assembly, but be careful not to stain the cloth in the center of the tabl


Ask Me Anything