There is nothing more irritating than a desk covered in exposed cords. Everywhere you look, there’s another cable. Whether you use your computer for work or recreation, everyone can agree that rogue cables are not enjoyable to experience.
So how do you fix the problem? We’re going to break down some of the solutions to hide cords and how to achieve them. But first...
Table of Contents
Why Does Cable Management Matter?
There are three main reasons why we believe cable management matters;
- An Organized Workspace Promotes Productivity
When your desk is a disaster, the chances are, so is your professional performance. You work at your desk and spend hours at it a day. So why aren’t you taking the time to make it more organized to make your life easier?
Think of all that time wasted complaining about the cables, and trying to move them, being careful around them, that’s valuable time, gone. Organized cable is a part of having a clean workstation, and when your workstation is clean, you’re able to go on with working without worry about something terrible happening.
- Cables Will Last Longer
The truth about cables of any kind is that they do not last as long as they could or should. The lifespan of a cable dramatically decreases further when you have no form of cable management. Cable management helps ensure your cables don’t succumb to wear and tear as easily or stretching and heat.
Another reason why you should take this point seriously is just how expensive and time-consuming it can be to replace cables. If your computer is on the older side, then good luck finding the right cable, and when you do, good luck with the price tag.
- Less Chance for Computer Casualties
The chance of something terrible happening by accident is present even more so in the instance of lousy cable management. The last thing you want to do is walk past your computer and trip over a loose cable bringing the entire operation down with you.
If you think that it is impossible, and that will never happen, then you’re precisely the person who should be getting better cable management in place.
How to Hide Cords on Your Desk
There are a few options to declutter your workspace, and we’re going to go through a few of them and break them down.
1. Going Completely Wireless
Wireless devices also come with their pros and cons;
| Pro’s | Con’s |
|
|
If you’re in a position to take this opportunity to invest in all-new wireless products, take it. There is no point in saying no unless the cons of wireless devices are enough for you to reject the idea flat-out.
2. Zip Ties, Clips, and Other Accessories
There is a variety of easy-to-use cable management accessories on the market. Whether it’s zip ties, velcro ties, clips, etc., they’re able to help in making your desk easier to manage.
You’ll be able to tie all the cables up nice and neatly to ensure they don’t tangle, stretch, or get in the way. As a result, all your cables will be nice and tidy to ensure you don’t have to move wires out of the way constantly.
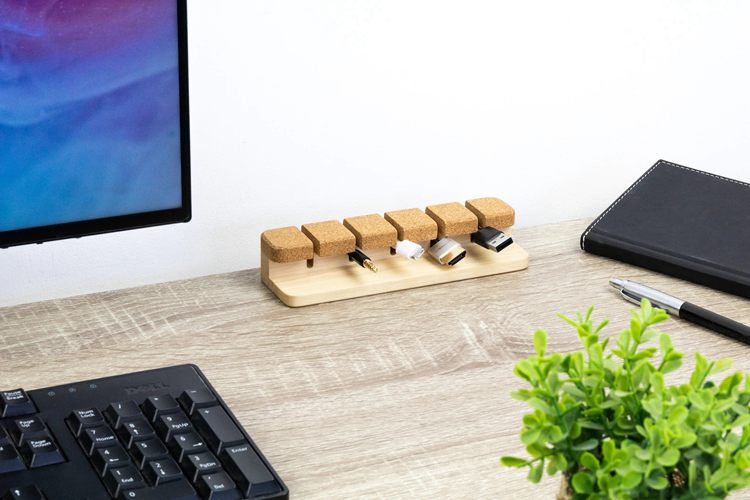
Wood Company Wooden Cord
Cables fit easily into the slots, but from there they can’t fall out.
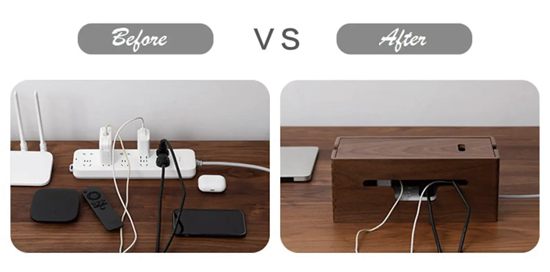
Solid Wood Wire Storage Box
Its Multi-function application allows for cable organisation with enough room inside the box to fit a 10 Space Power Adapter while the box cover can display routers and set-top boxes.
Screw on/off design keeps your cables accessible and where they need to be. Ideal for use with mobile phone and laptop charge cables, USB cables and power cords.
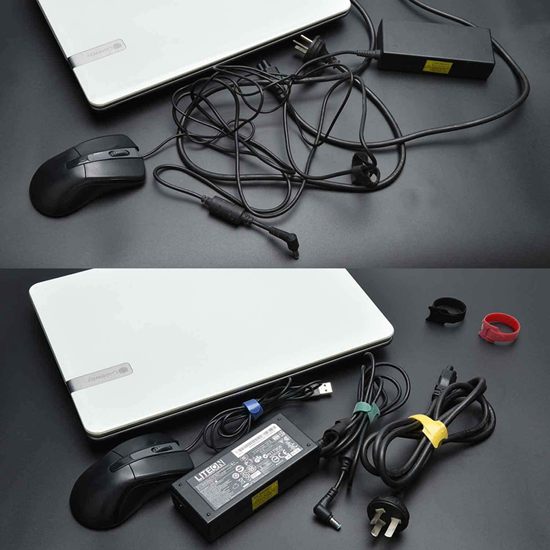
Color Cable Ties
It is much better organizing cables than plastic cable ties and you don’t need to trim it. The cable wrap opens and closes easily and quickly.
3. Cable Grommets
Cable grommets are a wonderful means to organizing your cables by feeding them through a hole in the table that’s either left bare or has a cable organizer built-in.
To make such changes to your desk, you’ll need to follow these steps;
- Step One: You first need to determine where you are planning to place the desk grommet. Plan around your desired PC setup and attempt to plan the best course of action.
- Step Two: Mark out the space and specifically mark the center of the grommet area.
- Step Three: Drill a small pilot hole at the center.
- Step Four: Leaving the pilot hole exposed, apply masking tape to the area you intend to cut. The masking tape will ensure you achieve a clean cut.
- Step Five: Attach a hole saw to your drill. Drill a hole at a low rpm setting and make sure to keep the Hole saw perpendicular to the work surface as perfect as humanly possible.
- Step Six: Remove tape, and clean off the surface.
- Step Seven: If necessary, add in your plastic cable organizer.
- Step Eight: Feed the cables through.
- Step Nine: Organize cables behind the desk with other methods unless they’re hidden enough to your liking.
4. Cable Management Snakes & Sleeves
Cable management snakes are one of the easiest and possibly best options available for cable management. Cable snakes usually feature a magnetic design and can connect to the frame of your desk.Find it for cheap on Amazon.
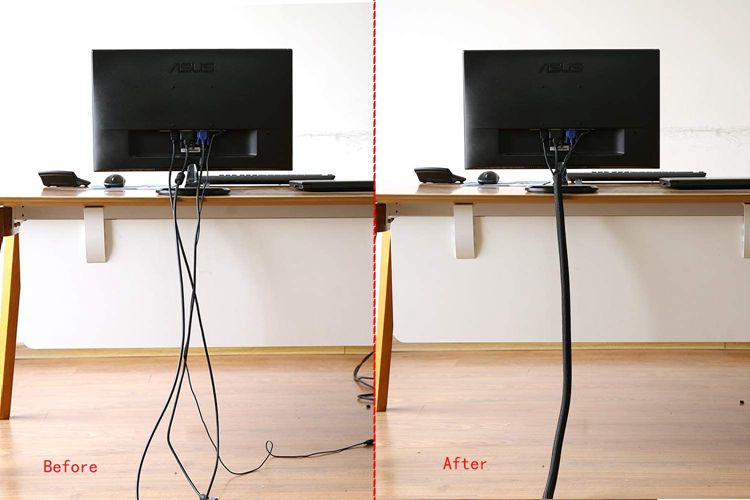
Cable management sleeves are almost the same thing as snakes, but they’re material versions. The design of the cable management snake makes it clear it was intended to be a sturdy, practically built-in option, whereas the sleeve is just a giant cable sock.
However, if you’re interested in a DIY project, here are the steps to making your own!
- Step One: Decide on which cables need to be included in the cable snake.
- Step Two: Measure how long the cables are, but make sure to measure it while keeping in mind some space for plugging into your PC and power bank.
- Step Three: Choose a fabric or other material to use to make your cable sleeve.
- Step Four: Using the measurements, cut your cable sleeve. If you’re skilled enough, consider adding in velcro to make it easy to open and close up as needed. You may find yourself needing access to the cables down the line.
- Step Five: Wrap up your cables and make amendments where necessary.
There you have it, all done and dusted.
5. Cable Trays
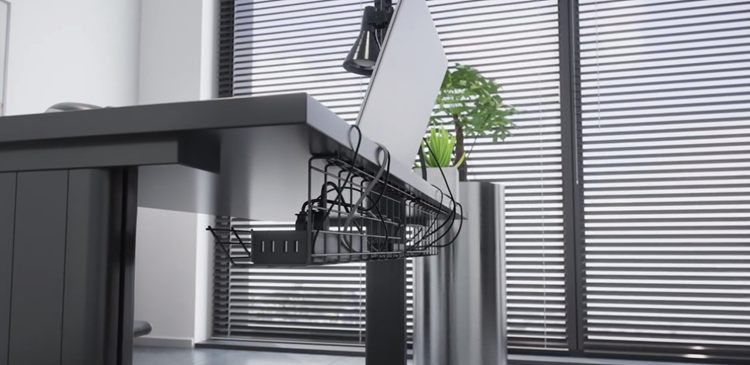
Cable trays are metal or wooden trays that go under the desk and hold the cables out of sight. Cable trays can be great, but you need to spend the time looking for the perfect one. Some cable trays are unreliable and made from flimsy materials. Be sure to read the reviews and look around before making your decision.Find it for cheap on Amazon.
6. Cable Runways
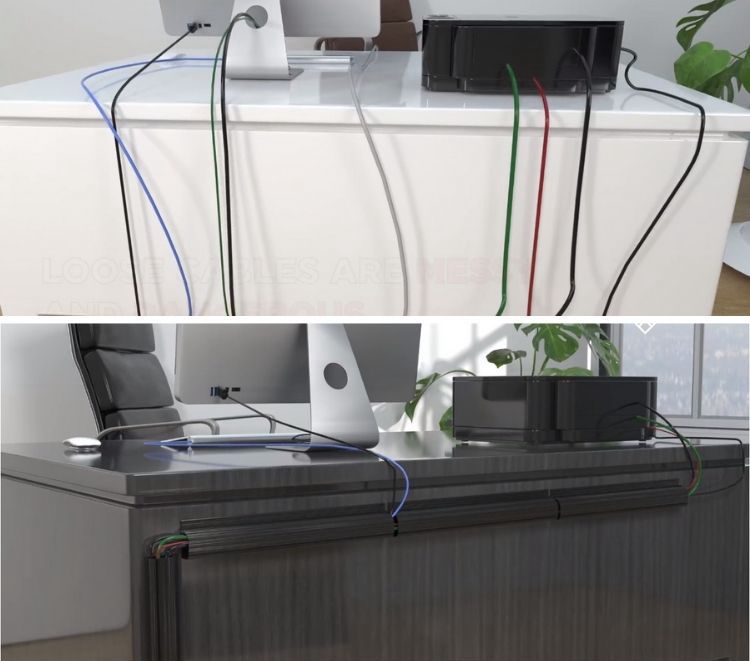
Cable runways are sort of like cable snakes. They’re usually made of plastic and encase the cable inside before being mounted to the desk with double-sided tape. They can go any way you like, vertical, horizontal, or diagonal, and be cut down to the size you’d prefer pretty quickly.Find it for cheap on Amazon.
The Ultimate Set-Up
What if we told you that there’s a perfect set-up, one where your cables are hidden and extremely organized.
We’re going to walk through the ultimate setup for you to maximize your cable organization system. You’re going to need a power bank, cable box, an optional cable management method, and some additional measures to ensure the success of your cable management.
Step One - Planning
Consider all the elements of your plan. Where you’re going to mount the power bank, place the cable box, where the cables start and end and how you want them to get to those two points, etc.
Step Two - Mounting a Power bank to your Desk
You’re then going to take your power bank and begin mounting it to the desk either on the side, underneath, on top, wherever. Make sure the cables reach, and then drill, screw, and finish mounting the power bank.
Step Three - Cable Box
You can either buy a cable box or make one yourself from an old shoebox like the video below so wonderfully demonstrates;
Once you have the box, place the cables inside. Position the box behind the desk, next to it, or underneath.
Step Four - Pick an Option
You need to decide if you’re going for a cable tray or cable runway. Once you’ve decided, prepare your cables and the option to be installed properly.
You’ll need to install a cable tray before adding any cable. On the other hand, cable runways need the cables first before you stick the runway to the desk.
Step Five - Additional Measures
Before fully finishing with Step four, consider the additional options of cable ties, grommets, sleeves, etc. Anything you want to add is perfectly valid as long as you can make it work within this already definitive plan.
Final thoughts
There you have it. All the ways to clear up your workspace and hide the cords from your desk like they never existed. Now you can focus on being productive without fighting with the mess and thinking to yourself how you should maybe get around to fixing it every day!
Which method did you go with? How does it look? Let us know what you did, and don’t forget to share this article with a friend with a messy desk!






Ask Me Anything