
If you’re looking to handle the creation of your punching bag yourself, then there are some things you’re going to need to know. First, we will break down everything you need to know about filling a punching bag correctly.
We’ll break down the different types of materials to use and a step-by-step process to get you on your way to exercising with a well-crafted bag. But first...
Table of Contents
Why Does It Matter What’s Inside the Punching Bag?
If you choose the wrong filling for your lightweight or heavyweight punching bag, then you’re not going to get the results you want out when training with the punching bag. It doesn’t matter if you’re a skilled boxer or not; a poorly filled bag, using incorrect materials will have the same effect on you as it would someone whose untrained.
Why? Well, it’s because of a few reasons;
- Incorrect use of filling materials in a punching bag will cause it to swing in a way it’s not supposed to.
- It can be hazardous to the wrists and knuckles.
- Materials will sink before settling at the bottom of the bag, causing a soft-top but hard-bottom.
- In order to have a beneficial exercise using a punching bag, you need the right kind and amount of resistance. If your punching bag isn’t filled with the correct filling, you won’t get the resistance you need.
Here’s a video that further breaks it down for you as to how to determine what’s suitable for your skill and body weight.
What to Fill a Punching Bag With
There are two types of punching bags, soft (lightweight) punching bags and hard (heavyweight) punching bags. These two types of punching bags have three options for filling material: material, sand, and sawdust.
Lightweight Punching Bags
When it comes to lightweight punching bags, any form of material will create the kind of softer, lighter density that you’re looking for from your punching bag. With softer materials, you’re preventing dense compaction and therefore experiencing less force on your joints when you use and strike the punching bag.
Foam
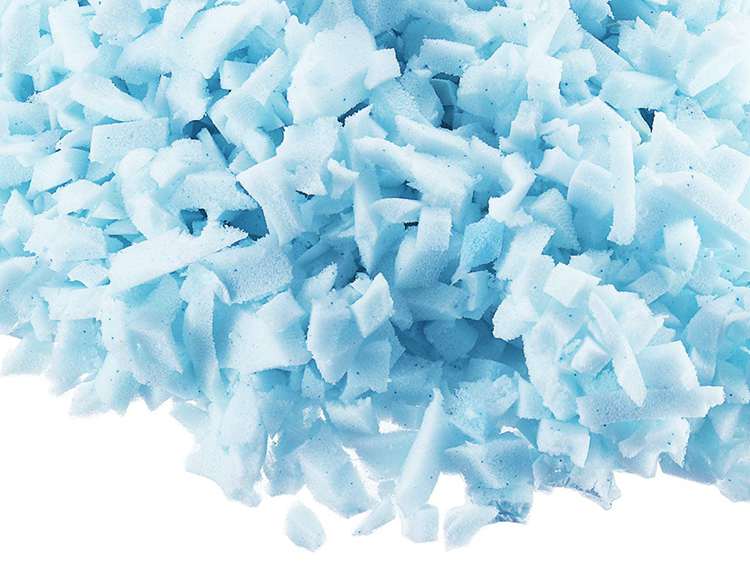
Shredded Memory Foam Filling is a really inexpensive material to use for your punching bag. It will help with lightweight training as it can absorb the hits incredibly well when mixed with other materials to provide a good workout experience.
Material
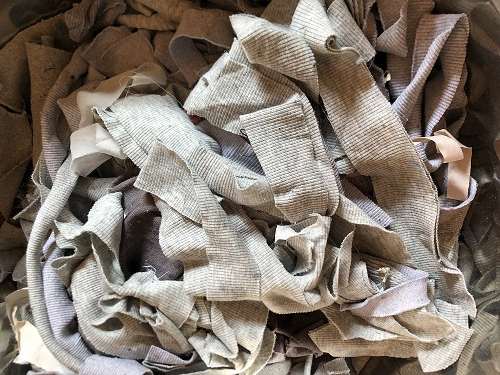
This can be material you buy, or just old material lying around at home. Fabric strips are probably the best choice, but you can make these yourself using the old or new materials you buy. The option of using fabrics is endless as they can come from various places, making it a very accessible method for lightweight punching bags.
Heavyweight Punching Bags
When it comes to heavyweight punching bags, you’re looking for a firmer feel. To achieve that better, feel you need smaller and finer fillings. These fillings make the bags not overbearing for the case and can be layered with thinner materials to give it a well-rounded feel.
Sand
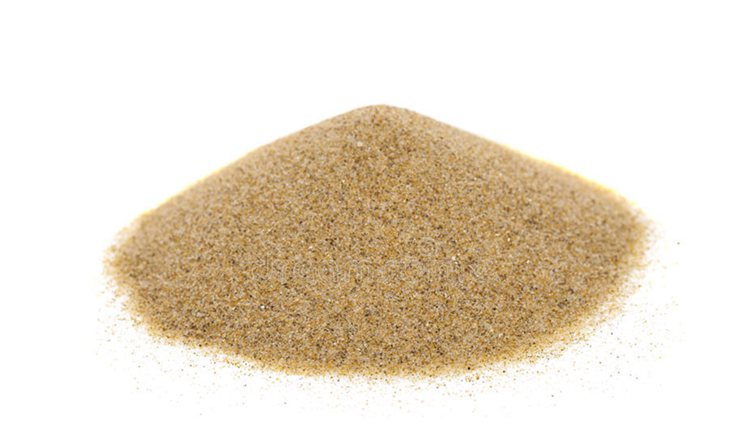
Sand is the most common option due to its fine texture. It takes a bit of time to use sand, as it requires some time to layer the center correctly. However, the results are worth it, considering you get a punching bag that, with every punch, delivers that crack your craving.
Sawdust
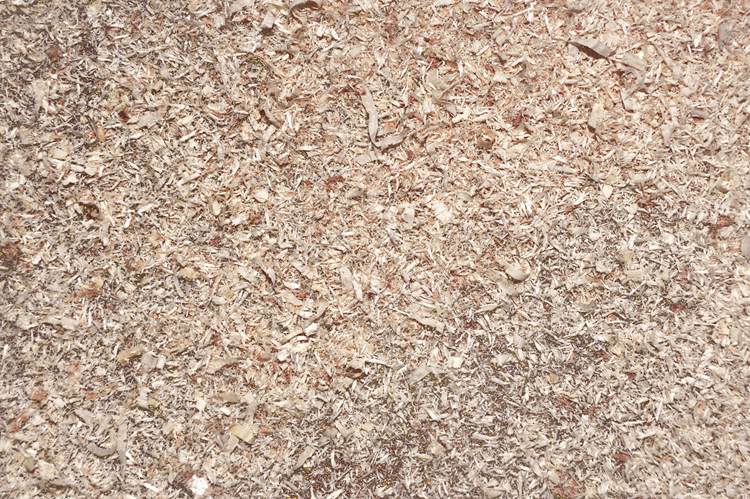
If sand is a little too rough for you, then substitute for sawdust. Sawdust is still small and perhaps not as fine as sand; it’s still enough to produce the same feeling, if not a tiny bit, softer than if sand was used exclusively.
How To Fill Your Punching Bag
While filling a punching bag is a simple process, the act of answering all the essential questions surrounding your punching bag requires some thought and consideration.
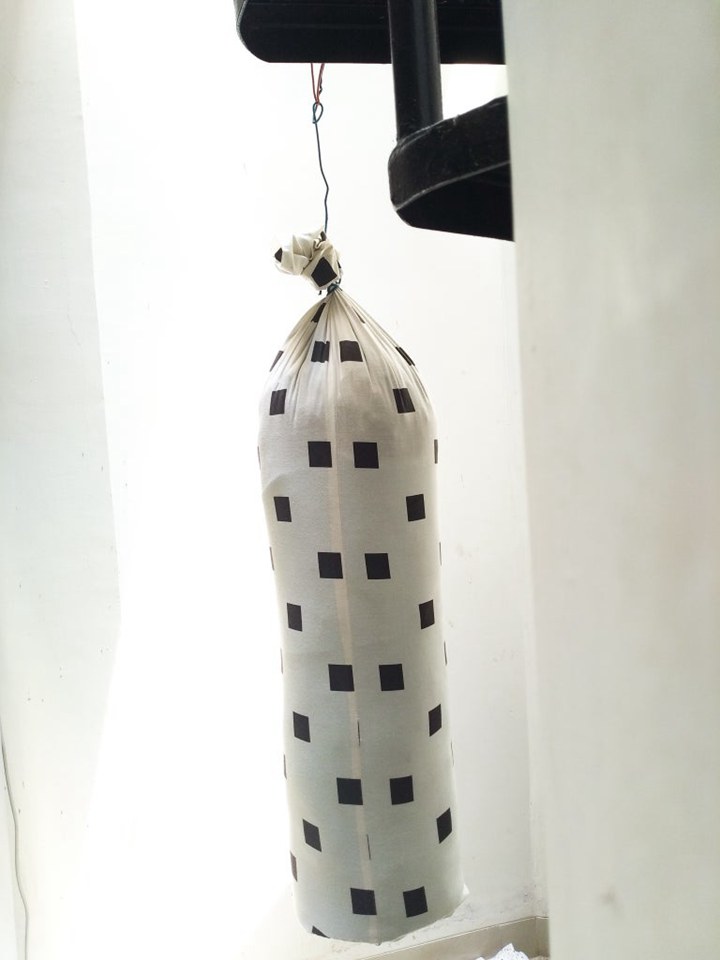
Make sure before you begin the process of filling your boxing bag that you’ve achieved the basic step, which is purchasing the bag that you intend to fill. It’s pointless doing all the planning if you don’t have the bag to fill in the end. Choose a bag that is made from solid materials such as vinyl, canvas, etc.
Step One: Choose FIlling
The first step you’re going to take in filling your punching bag is considering how dense and how heavy you want the bag to be in the end. The heavier the bag, the harder it is to move, thus requiring those extra strong punches.
On the other hand, a lighter bag that isn’t as dense will sway when to hit and won’t require as much force to do so. If you’re new to boxing, a lightweight bag might be the best place to start, and as you gain muscle and strength, you can progress to a heavier bag.
Step Two: Light Vs. Heavy
If you’re going with a light punching bag, you need to fill the bag with strips of fabric, old clothes, rags, etc. If you’re adding nothing but materials, you’ll limit the density and heaviness of the bag. However, we recommend you pack it as much as possible to be appropriately filled to allow for a reasonable swaying when punched.
If you’re opting for a heavy punching bag, then your options are sand or sawdust. Both options will add to the density and weight of the bag that clothes alone simply cannot produce. This is perfect if you’re looking for a punching bag that requires a little more force. It’s easy to find both sand and sawdust online, so don’t stress too much about how you will get these two punching bag ingredients.
Step Three: Prepare Filling
When preparing the filling, you’re going to need to do something different for every option;
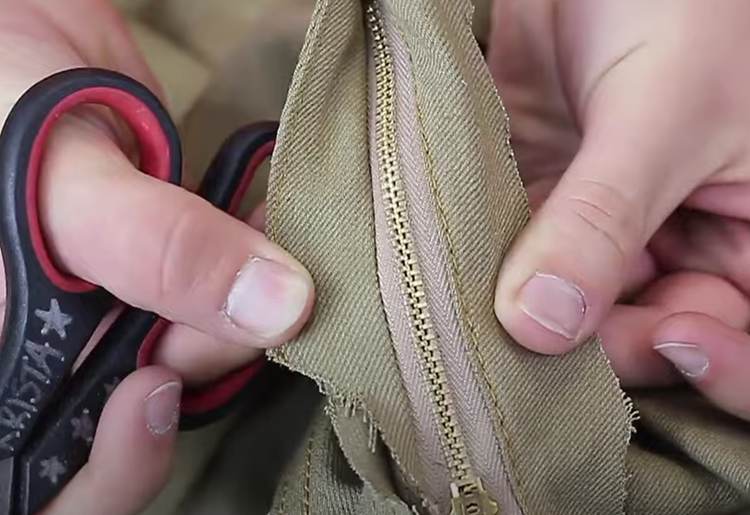
Fabric = for fabrics, you’re going to want to remove any zippers, buttons, and lingering metal pieces of the clothing to avoid the bag tearing, as well as the slight chance of a potential injury.
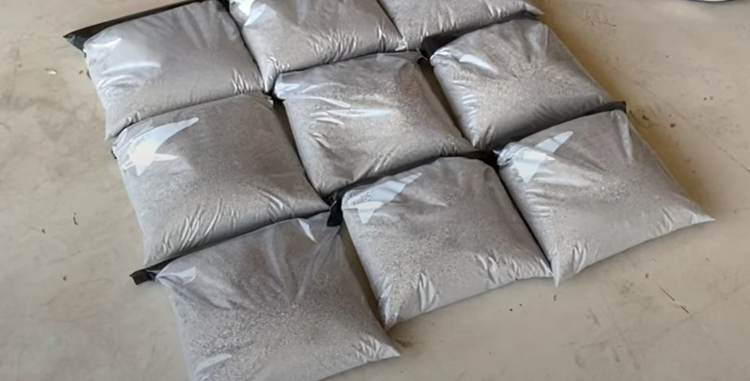
Sand/Sawfust = Pour either into a plastic sealable lunch bag. Seal the bag and check to make sure no sand or sawdust is spilling out. You’re going to then wrap the bags in duct tape or any equivalent to secure them from breaking with the consistent impact they’ll receive.
Weigh your fillings to ensure you have enough for the punching bag. For fabrics, just place them in a single bag and weigh them. For sawdust and sand, just weigh each sandwich bag individually.
Your punching bag should weigh roughly 0.23 kgs (0.5 pounds) per 0.45 kg (1 pound) you weigh.
Step Four: Add Filling
At the top of your punching bag should be a zip; open it and add your first layer. The first layer should be fabric regardless of what you’re using for the punching bag overall. The reason is that the clothing can help further protect the bags of sand or sawdust from breaking open and spilling.
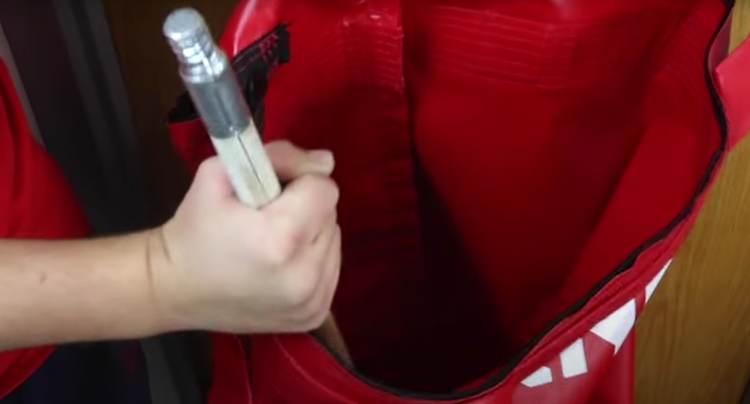
Pack the filling down using a stick or bat to eliminate empty space. Be gentle in this part of the process with your sand or sawdust bags to avoid breaking them. Continue adding in the layers as you go, and continuously pack the layers down to eliminate all the empty space possible.
Step Five: Zip Up and Get to Hanging Up Your Bag
Well, you’re done now; you’ve filled up the bag, zipped it up, and are ready to hang the bag from the ceiling. Make sure your bag isn’t overstuffed, as this could negatively affect your well-being when hitting the bag.
If you’re struggling to zip your boxing bag up, try removing a few items or the top layer to get it to close.
FAQ
Here are some of the questions we constantly come across regarding filling a punching bag;
Can I Fill My Punching Bag With Water?
You can, but it’s not advised. If you’re going to use water to fill your punching bag, then understand that you need to ensure your punching bag is water-tight. While it seems convenient as all you need to do is fill it with water. We ask you to consider what it might mean for your home. If it breaks, you’re in a lot of trouble.
How Can I Make My Bag Stop Moving So Much?
In order to stop your boxing bag from moving so much, we recommend simply adding more weight to it using sandbags or sawdust bags.
Final Thoughts
There you have it, everything you need to know about filling a boxing bag. We hope this managed to help you create the perfect blend of light and hard while ensuring it met your workout needs.
If you have a friend looking to get into boxing and wants to know how to fill their own boxing bag, send them this article. Then, finally, let us know how it goes for you and filing your boxing bag.

Ask Me Anything