Are your kids falling off their bet at night? Protective bed rails are the solution. Even though baby cribs have protective rails, that is not usually the case with beds too. But, don’t spend a lot of money on beds with rails on them. At the end, they are temporally. Kids do grow up fast, so you might not need them in few years.
In this article we are going to dive into the topic of DIY toddler bed rails for beds. They prevent your baby from falling off and make your toddler feel secure and protected. Instead of throwing the existing bed and getting a new one, one with bed rails, you could just do the rails on your own and attach them to the bed your kid uses right now. And all that, done in a matter of couple of hours or so, depending on the type and complexity of the design you choose.
Table of Contents
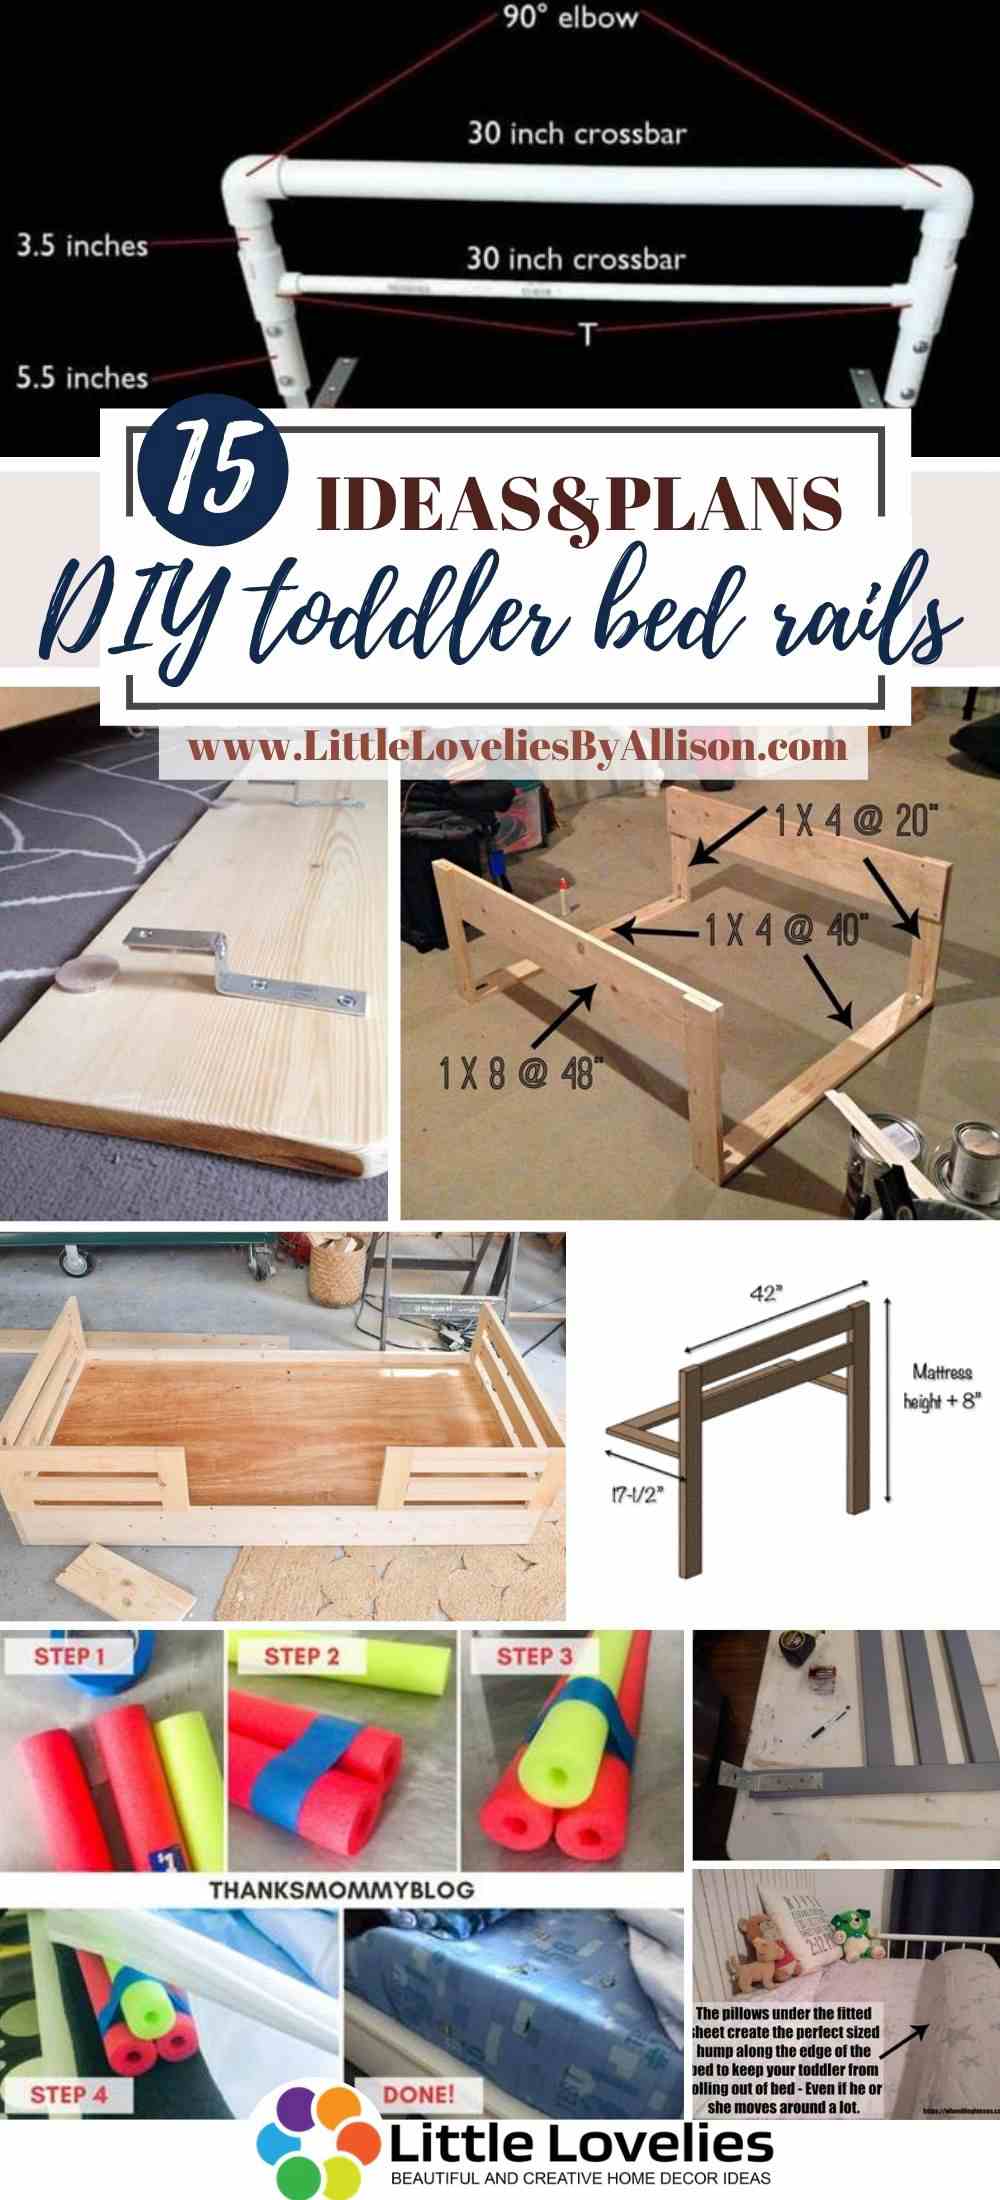
1. Pool noodles as bumpers!
Let’s start with the easiest solutions out there. Just duct-tape three pool noodles in the shape of a triangle and slide them under the bed sheet. It’s so simple, yet it’s genius. Once ,,installed’’ this noodle bumper should prevent your kid from falling off the bed, except maybe if it is a tough solder. Some kids, well, they are some real toss-and-turners, and a few pool noodles won’t stop them. If your kid is one of those, then this simple solution will be simple for his turning too. And if that is the case, you should take a look at the other DIY and find a better design.
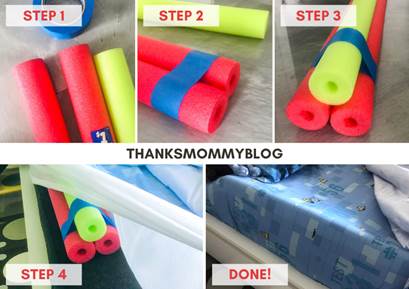
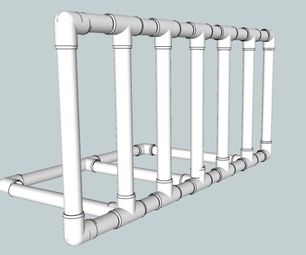
2. Pipes for bad rails
This is another simple DIY project that doesn’t require a lot of cutting and nailing. Just cut a few PVC pipes and buy PVC tees and 90 degree PVC elbows, draw the design and start your project. Compared to the other DIY project listed here, this design might not look the best, but it’s cheap and easy to make. You only need drilling if you decide to put some screws for more stability. Other than that, this is a simple, quick solution for your kids’ bed.
3. Pipe rails with textile
As an adaptation of the previous example, we have the pipe bed rails, but with textile for a support. This design works really good for smaller kids because it minimizes the possibility that your toddler will hit its fragile body on wood, metal or anything that might leave a bruise. Bigger kids might tear it apart and fall off the bed anyways.
4. The sides of your old crib are your new bed rails
This guy makes the best repurposing you can possibly imagine. If you too have an old crib you don’t need any more, this is the thing for you. This way you can even do your bed rails totally for free (maybe you need to buy a few screws, don’t take it too literally).
5. Buy the parts, make the whole
In this design, you start from scratch. It’s really suitable for people who like to give it their own touch, make just the right size, or combine materials that are compatible with other parts of the room and so on. Basically, you go and buy wood boards with the right sizes, take some time off and screw them all into place. This tutorial is really easy to follow and understandable, so you can surely do it, but might need some time. All in all, this is the best plain, forward and handy way to do your bed rails.
6. Plain, all wood rail
This is a simple DIY project that doesn’t even need screws. Just one plank, two side smaller planks or sticks (four if you don’t cut one on half like in the tutorial), a handful of dowel sticks and some glue for better combining. And that’s that! Drill the holes, put some glue before the dowels and let it all dry.
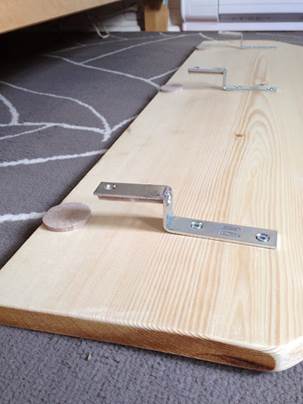
7. As simple as it gets
This project it as simple it can be. Just take a part of your unused, old board (or buy a new one), get those brackets on (make sure they fit the side of the bed frame width) and if you want to keep the frame from scratching, use furniture pads. With less than 15 minutes of work, you get yourself a nice removable bed rails.
8. Rails in colors and textures
There isn’t much more to this tutorial than to the others, with just the difference that this rail fits nice with the color of the room. The basic is the same – one long horizontal plank, two smaller ones attached vertically (make sure that they fit between the bed frame and the mattress) and what all the fuss is about – round the horizontal plank with some nice looking textile of your choice (or should I say your kids’ choice), maybe add a little bit of sponge inside and there you go! Your kid now has soft bed rails with its favorite fictional character.
9. Complex project, easily explained
This is for all of you ,,jacks of all trade’’ out there. Starting from scratch, this guy makes a video that explains all of the steps you need to follow in order to get your rails done. When you do something from scratch, you can do it whatever way it works for you. The good part about this tutorial is that the process in explained plain and simple, from two different point views and with some nice hacks to use when you build something.
10. Make it stand out
Instead of fixing the rails on the bed frame, as lot of the designs propose, you could make them stand alone, with parts going under the mattress, for stability. This tutorial shows you exactly that. Make sure you follow the instructions for measurement, and start screwing the parts together. This is a relatively harder project if you are a beginner builder, but with focus you can make it.
11. Through all the width of the bed
Almost all of the projects mentioned before are for just one rail, so if your bed is not next to the wall, be aware that you need to make two. Or choose this design, whatever works. Here, the two rails are screwed together with horizontal planks that go under the mattress. That way, you won’t damage the frame with glue or screws and get, what I imagine is, the most secure bed rails ever.
12. Something that doesn’t need screws
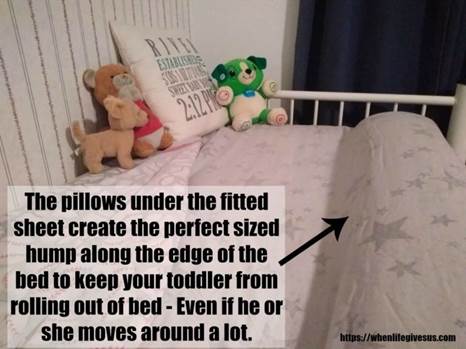
You know what they say – Sometimes the easiest way is the best way. This project (if we can call it that) is made out of feathers. Just take Bolster pillows or any other kinds of pillows you have, connect them with safety pins (or roll them in some kind of material so they stay together) and place them under the bed sheet.
13. Rail attached to the bottom of the bed
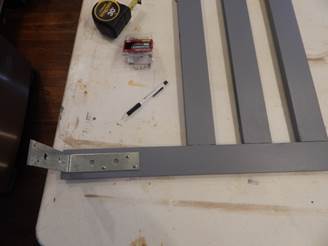
Made from three horizontal, two vertical boards and two L-brackets, these rails are pretty simple to piece together. Once you have it finished, just screw the free side of the L-brackets to the bottom of the bed, beneath the mattress.
14. Pipes attached to the bottom of the bed
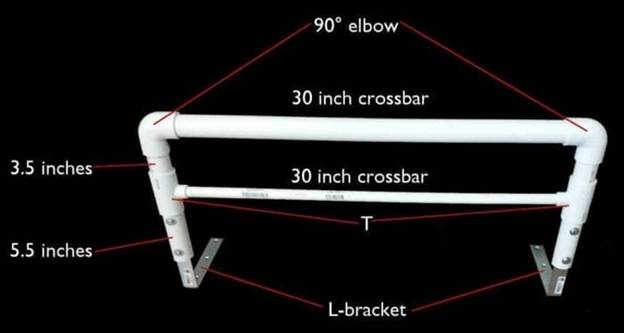
Similarly to the previous DIY design, these rails are made from PVC pipes, two of everything – longer pipes, smaller pipes, tee joints, elbows and L-brackets. Use some glue or screws for safety and crew them to the bottom of the bed.
15. Floor platform bed with rails
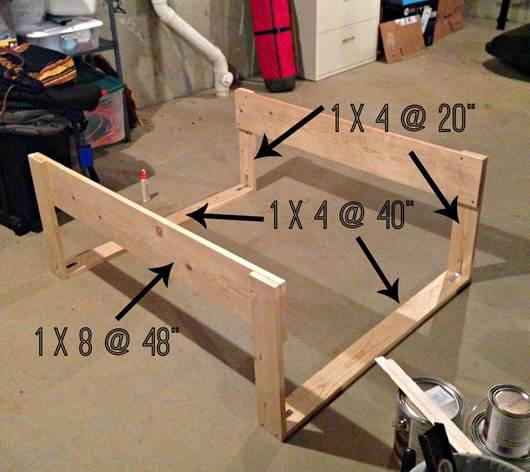
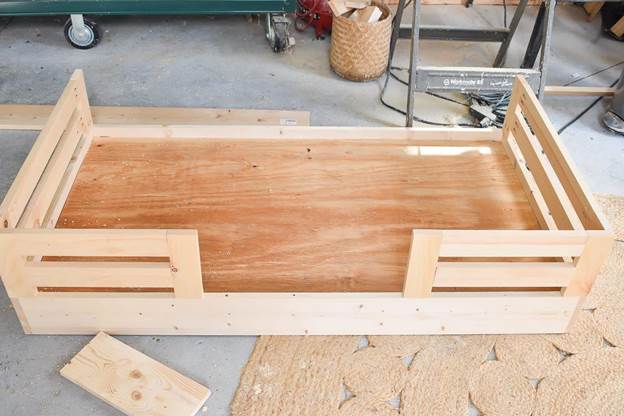
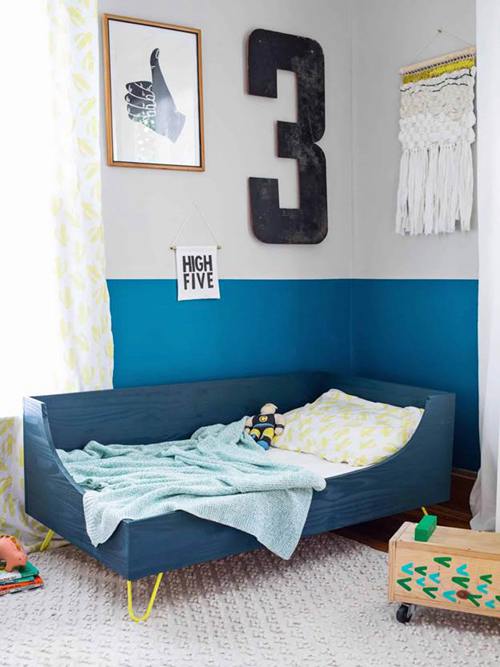
Why buy a bed and then attach bed rails, when you can do both on your own?! This project is a little bit more complex, but in the end – you get a whole bed! Make the frame and put the horizontal boards as a base, put the plywood for the mattress and than just add fence like constructions from the sides. They will be the sides of the bed frame, but if you make them higher, you also get bed rails. This might look a little bit complex, but trust me, the tutorial is plain, simple and very educational so you won’t have any problems. Plus, your effort will pay off since your kid will absolutely love its new bed.
Conclusion
A lot of the toddlers know to be toss-and-turners and for them falling out of bed could be hurtful, traumatic and stressful. But bed rails come to the rescue. Instead of paying a lot of money for factory made rails, you could do them yourself. Keep in mind that they are temporary; you might not need them anymore in a few years of time. With as much as 20-30 dollars you could do a family DIY project that everyone will enjoy. Plus, since most of the tutorials are easy, you could combine them and come up with something even better. Your kid will absolutely love its new bed rails.

Ask Me Anything