A DIY resin tray, like the ones on this page, is an excellent way to transform a simple piece of found wood into something amazing. Using a thin casting of transparent resin, you can create a glossy, protective layer that will add depth to your work and help preserve the wood underneath. Add decorative elements, such as dried flowers, leaves, and shells for more interest.
Create a beautiful resin tray using easy-to-find tools and materials. Resin trays are a great addition to any home at any time of the year, but we especially enjoy them around the holidays. For example, you can use the tray as the base for a centerpiece or display Christmas cards. The tray also makes a wonderful gift! Here are 24 DIY resin tray projects to make in your spare time.
Table of Contents
1. Beautiful Resin Tray From A Mold
To Make a Resin tray you'll need a Tray, heat-resistant resin, and opaque black pigment. Pour the black pigment into the tray, leave for 5 to 10 minutes to firm up, add the white Resin in a random position. Leave it to blend around then install the handles. The making process is fairly easy to follow.
2. White And Gold Resin Tray
This video tutorial will be showing you an easy way to make this white and gold resin tray. First of all, make sure to dust particles off the Mold, mix your Resin and add the white pigment then add gold flakes to a clear Resin and mix, Pour the Resin diagonally into the mold half white and half gold, pop air bubbles with a torch gun.
3. Black And White Epoxy Resin Tray
You'll be needing a Mold, a tree Mold preferably for this tutorial. Pour in clear Epoxy randomly, add your light cloudy white, fill up the spaces with clear Epoxy, add your black Resin and add your gold Resin randomly. Blend it with a heat gun and add handles.
4. How To Make A Resin Tray
Supplies needed for this tutorial are; Champagne smart vinyl, vellum paper, dry florals, clear tape, Cricut explore, standard grip mat, 2 cups of Epoxy resin, coaster molds, Tray molds, gloves, respirator, measuring cups. Watch the video for more details on how to make this
5. Making A Resin Tray
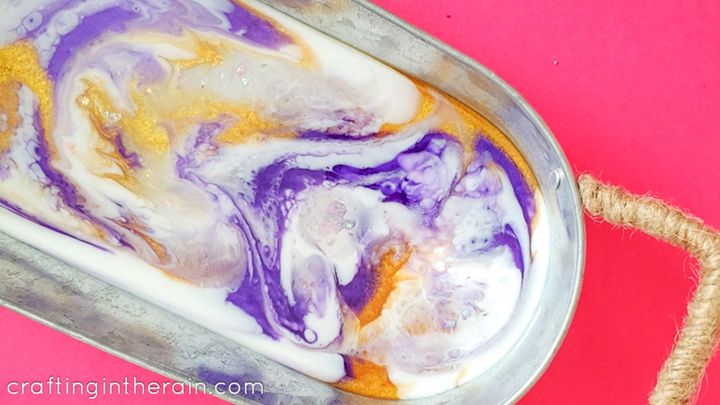
Tools needed are, Tray, Resin, colorants, mixing cups, stir stick, heat gun and we're good to go. We start by mixing the Resin, dividing and adding colors, Pour Resin into the tray while rotating to cover up the tray. Make sure to remove bubbles using the heat gun, create more Resin patterns and allow it to dry. craftingintherain
6. DIY Blush And Rose Gold Resin Tray
In this DIY, the maker is gonna show you how to make an amazing blush and rose gold resin Tray. You need to prepare your space, you wouldn't need your table to be messed up. Mix up your resin, pour the first layer to cure up and pour your 2nd layer after which you add your rose gold flakes, add your handles and take out the mold from the Tray. happilyeverafteretc
7. DIY Resin And Wood Tray
As beautiful as this Tray looks, it is also easy to make. I love the fact that it is made from wood. Things you will need are; a wood Tray, two-part Resin, craft paint, heat gun, mixing supply kit. Firstly, paint your Tray if it isn't, mix up your Resin and Pour it into the tray, pop air bubbles and make patterns using the heat gun and your wood tray is ready. bybrittanygoldwyn
8. How To Make A Custom Resin Tray
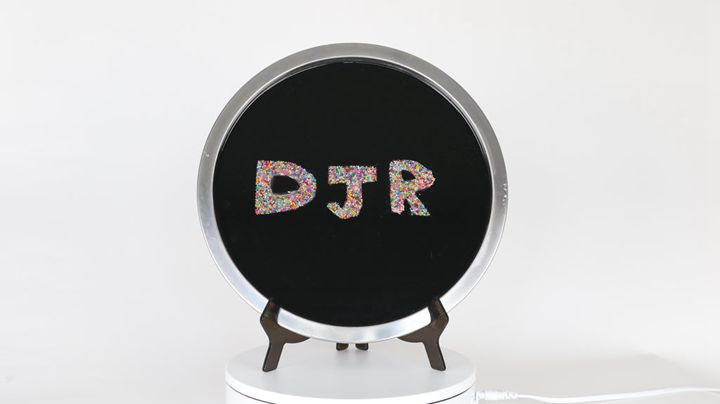
I know you've been searching for a customized Resin Tray, worry your head no more, we've got you covered on this. This tutorial is well detailed just for you. It shows how to properly customize a resin tray using your initials, pet’s name, or just about anything you want. You might want to click on the link for more details. artresin
9. Epoxy Resin Tray DIY
What do you need for this unique tray? Resin, silicone Mold, liquid + mica pigment, gold leaf + glitter, mixing containers, heat gun, blow torch, handle, enamel paint. Mix Resin, split Resin into 4 smaller containers, add different colors, fill the mold with a clear resin, add the other colors and allow to cure. The making process is pretty much easy to follow.
10. Decorative Wooden Resin Tray Design
You need a scale for measurements, after that, split the Resin into different cups and add the colorant. The colors needed are black, pink, blue and gold. Pour resin into the tray and make sure everything is leveled before using a heat gun to pop bubbles. You can also use the heat gun to create some effect.
11. DIY Wooden Tray Resin Pour
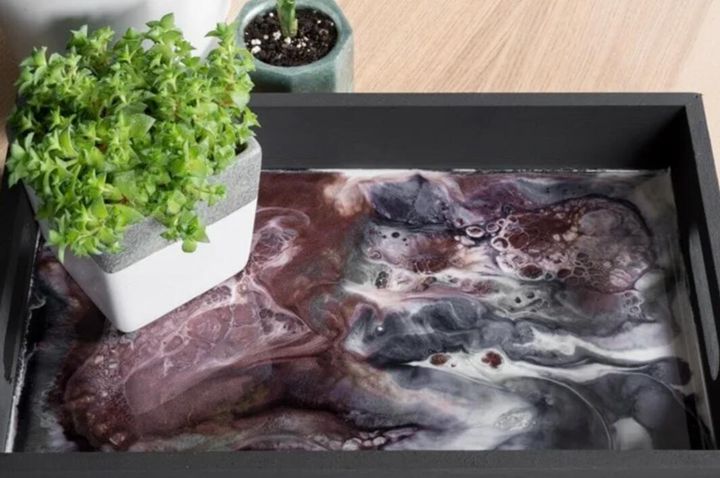
In this tutorial, the creator started by weighing and mixing the Epoxy, dividing the Epoxy into 3 containers, adding black alcohol dye, silver alcohol dye, and bronze micca. Pour a little of the black Resin to make a base. Then you pour the 3 cups of Resin into one cup, thereafter pouring it on the plate in random order. Use the heat gun to pop and we're done.
12. How To Make Free Form Resin Tray
For this tutorial, start by mixing your resin and splitting it into different cups, add Pearl powder to each cup and mix properly to achieve a sparkling look. Make the pink color your base before applying other colors. Sand sharp edges and apply one layer of gold leaf to it.
13. DIY Epoxy Resin Wooden Tray
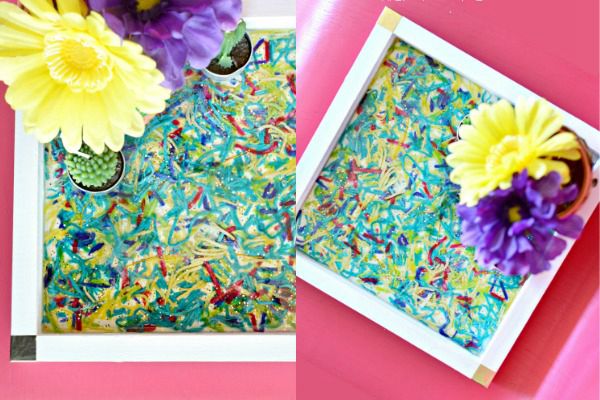
Are you wondering if yarns can make a beautiful Resin Wooden Tray? I guess you already know the answer. This tutorial is well detailed and it contains step-by-step procedures to follow. Please click on the link below to get more details. deliciousanddiy
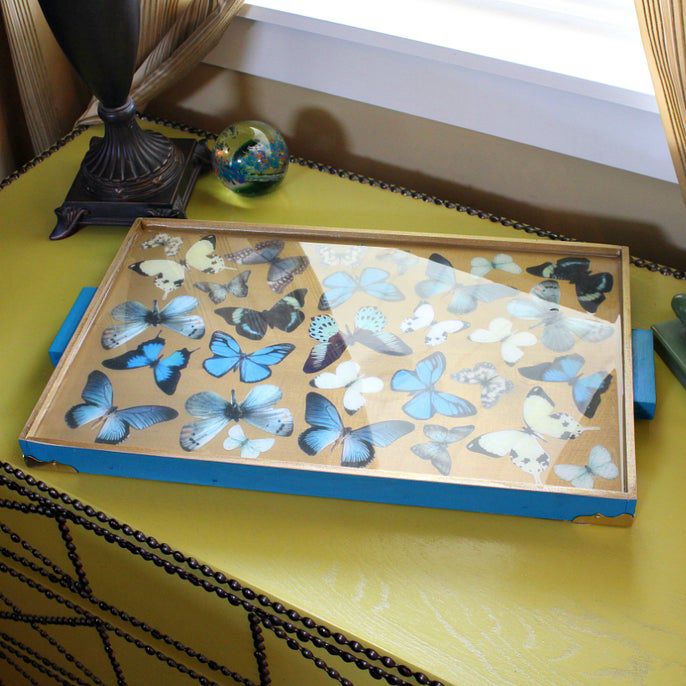
14. Resin Butterfly Tray
Isn't this amazingly outstanding? A butterfly Tray? You don't want to miss out on how to achieve this. You'll be needing a Tray, Butterfly images, Americana decoupage in gloss, etc. Cut out your Butterfly and decoupage them to the base of the tray, add your decoupage over the images and on the edges of the tray. Instructables
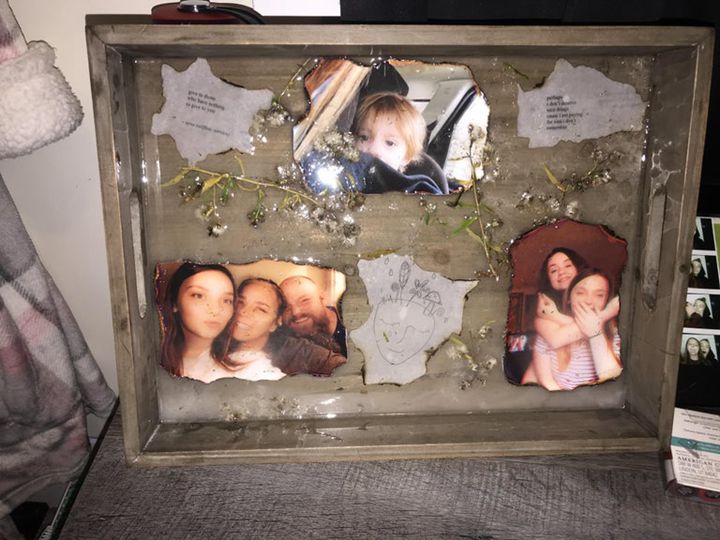
15. Photo Resin Tray
This is a photo resin tray that makes use of family photos. Isn’t that amazing? The supplies needed are; Wooden Tray, Resin, mixing stick, lighter, poetry books, 4 to 6 photographs, mixing cups. Burn the edges of the photographs and carved poetry books, set them on the tray, and glue them down. Mix your Resin and pour into the tray and allow to cure. instructables
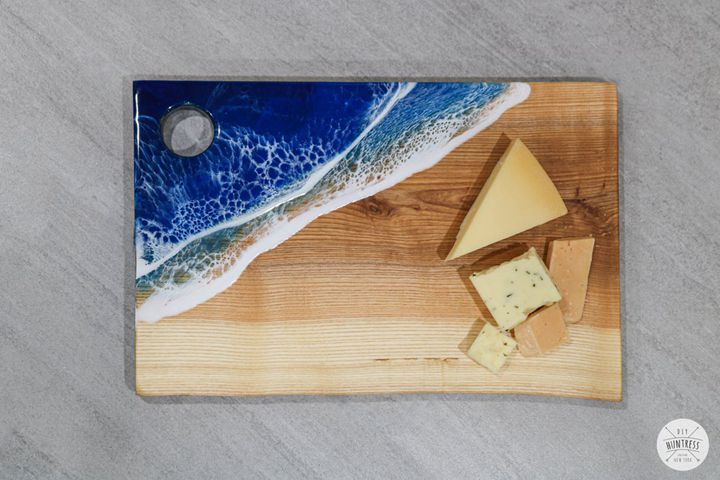
16. DIY Resin Ocean Serving Tray
To make this DIY resin ocean serving tray, prepare your board, drill holes for handles, and sand your board. Get your Resin ready then Pour the Resin using different color variations, from a darker color to a lighter one, add your clear Resin, make waves and fill up the empty spaces. Voila! Your tray is ready. instructables
17. Resin Serving Tray
In this guide, the creator uses marble, wood, and Resin together to make a beautiful Serving Tray. I love the gold handles on this tray, it makes it easier to carry the tray around. You will need some power tools for this build like a drill, and probably a saw for cutting wood into your desired size. Watch the video for the complete tutorial on how to make this.
18. Pearl White Resin Tray
Did you ever wonder if you could gift someone a Resin tray? Well, this is perfect for a gift. You'll be needing Resin, Pearl White, and golden flakes. Mix the pearl white and the clear Resin and mix the golden flakes with the clear Resin. After that you pour the mixed Resin side by side, fix the handles and you're good to go.
19. Resin Casting Tutorial
Are you having issues casting resin? This tutorial shows you a working method on how to cast resin with ease. Materials needed for this Resin Casting Tutorial are; mold, handles, Resin, dried flowers, Butterfly cuts. Set up your dried flowers at the bottom of the tray, Pour your Resin, leave it for a little while, add your glitters and your handles.
20. Gorgeous 3D Flower Resin Tray
Here’s one of my favorites. This is a 3D flower resin tray that will surely make the family go “WOW”! Mix and pour resin on the Mold, and in a small separate cup of Resin, add some ghost pearls, glitters and golden flakes, mix them and pour it near the center of the Mold. You may want to watch the video for more clarification.
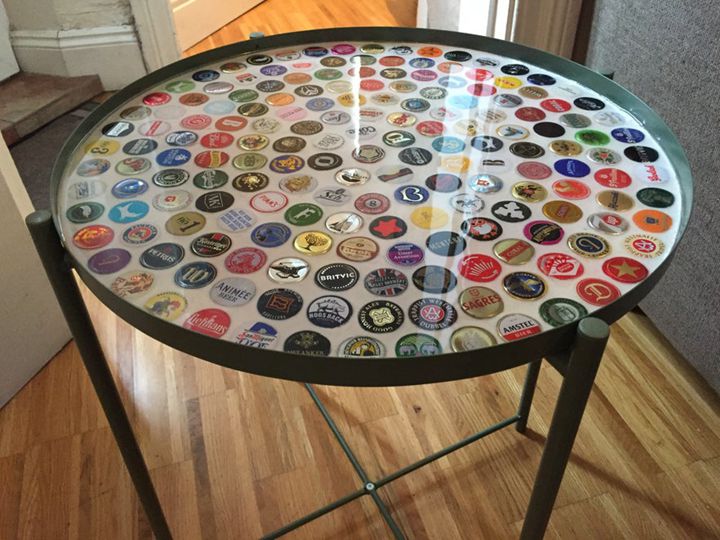
21. DIY Bottle Cap Resin Tray
This DIY looks so interesting and finding bottle caps must have been fun. The first thing you need to do is find as many bottle caps as you can, prepare your space, arrange the caps as desired, glue caps to the table, grout your caps, and apply resin. That’s it! Easy as ABC. instructables
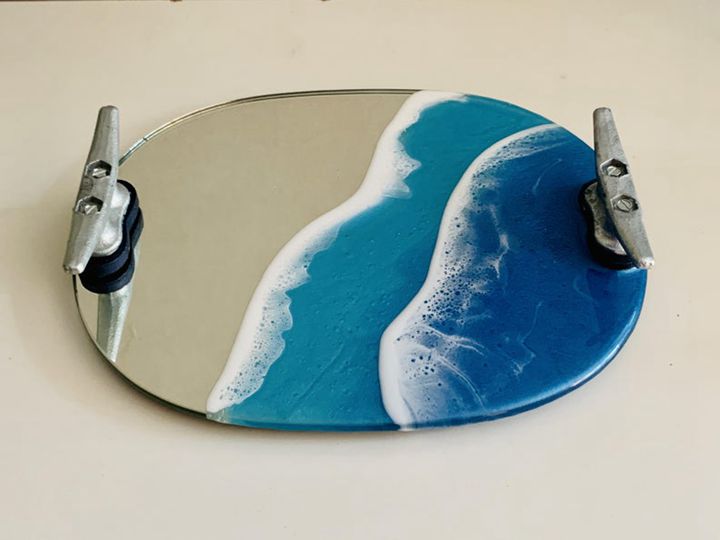
22. Resin Ocean Mirror Tray
Firstly, you need to prepare your Mirror Tray, Pour your first Resin Ocean and make a wave, pour the second and make a wave too. Let it cure overnight, attach your dock cleats for handles and you're ready to go. instructables
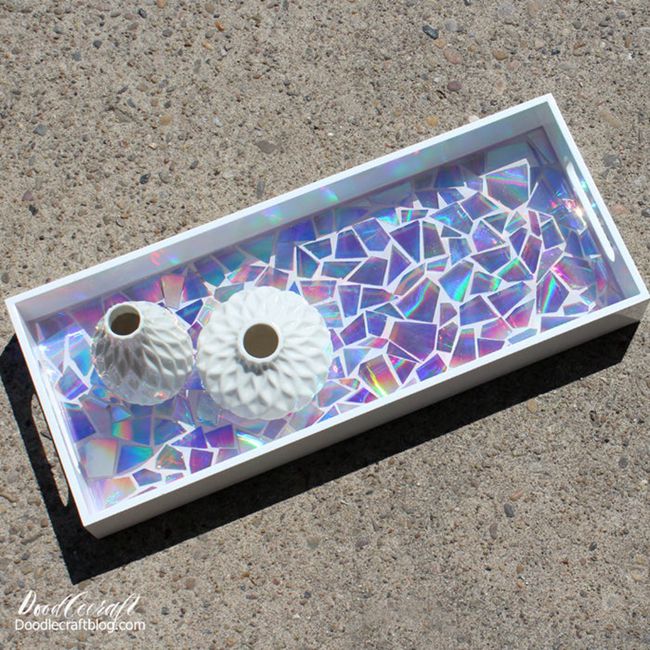
23. Recycled DVD's Mosaic Resin Tray
Now, this is what I call “Art.” No need to throw away old CDs. This Tray is amazing to behold. For this Resin Tray, you'll need a Tray, recycled DVDs, a hot glue gun, and scissors. Start by Cutting the DVDs into pieces and gluing them to the board, Pour Resin and Tada!!! Your Mosaic Resin tray is ready. instructables
24. Happy New Year Resin Tray
Last but not least is this amazing new year resin tray. Add squirts of black paint and mix it thoroughly, add glitter to your black Resin and pour it into the tray, allow to cure for 24 hrs then you add your happy new year sticker and press it firmly, Pour a final clear Resin, pop the bubbles and allow it cure for another 24 hours. resincraftsblog
Conclusion
This DIY resin art tutorial will walk you through the easy (and fun) process of creating a unique and modern home decor piece. We'll show you some amazing projects on how to make a DIY resin tray by mixing epoxy resin, chemicals and pigments to create a mesmerizing end result! If you haven’t found an ideal resin tray tutorial, feel free to go through this list again, I’m sure you’ll see what you’re looking for. Thanks for stopping by.





Ask Me Anything