
Are you looking for how to build a simple and affordable quilting frame? Here are some practical steps you need to build one by yourself. We did our research and have put together 8 of the best DIY quilting frame projects that you can make in your spare time.
Is it difficult to make a quilting frame? No, it isn’t! With the right tools and guide at your disposal, you can make a sturdy frame for your quilting needs. The tutorials are pretty much easy to follow.
Table of Contents
1. DIY Quilting Frame Plan
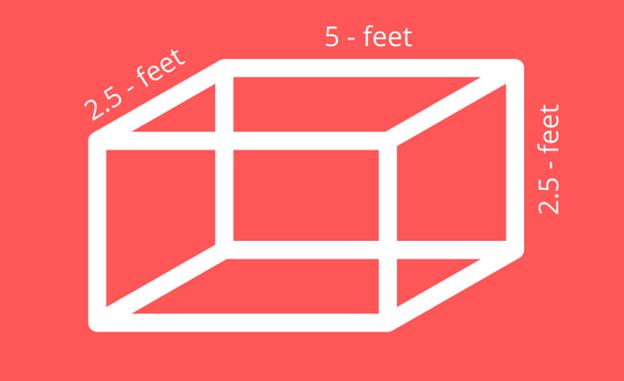
The first quilt frame on the list is this beautiful frame made from PVC pipe. It is very light in weight and it can be easily stored. The size of the frame depends on your preferences. Since a normal PVC pipe is a 5-foot length.
The materials needed are PVC elbow fittings, PVC pipes, and pipe snap clamps, measuring tape, hacksaw, PVC glue, etc
For instance, let's say your plan is 4'×2'. Cut your PVC pipe into 4's and cut the 4' to 2' equally with a hacksaw or a PVC cutter and sand each cut to make it smooth. After the cutting, you will have four 4' and eight 2' pipes.
Attach the elbow fittings to the 5 4' and lined up your 2' to attach them to the 4' pieces. You can use glue to hold the elbow fittings in place but add it lightly to one opening to allow easy detachment for storage. To attach your fabrics to the quilting frame use poor snap clamps. The clamps vary in size according to the size of the pipe.
2. How To Build A Quilting Frame
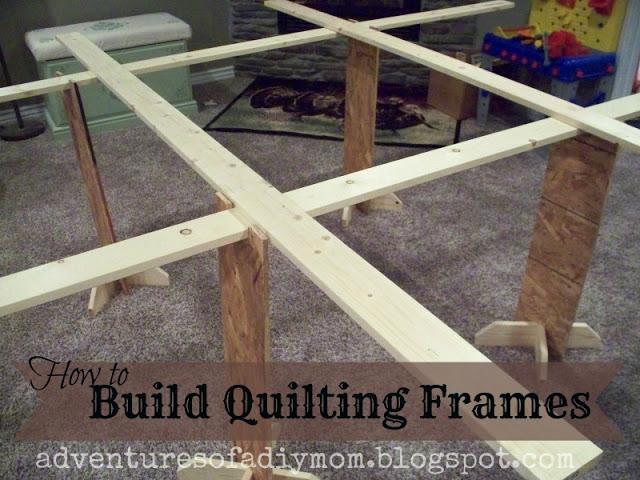
For this DIY project, you will need 4 pieces pine - 1' x 4' x 8, 2 pieces pine - 1' x 4' x 8' - cut into (8) 16" lengths, a table saw, a band saw, 4 clamps and tacks. This is a woodworking project and will take some time to finish, however, it is one of the easiest DIY quilting frames you can make. The process is pretty much basic.
3. How To Make A Quilting Frame The Easy Way
This is built from 3-4 pieces of 110mm PVC pipe, 6mm MDF board, pipe cap, roller, and glue. Cut 2 pieces of 6mm MDF and mark one of the pieces at the required angle as shown in the video. Drill three holes on the surface of both pieces and enlarge the hole to 48mm (to accommodate the poor cap)and clamp together.
Cut a 6mm hole at both ends of the pieces. Smith the surface of the MDF and corners with sandpaper. Glue the end cap to the pile with PVC cement, then pass the like through the holes on the MDF. It is very affordable to build.
4. DIY Quilting Frame
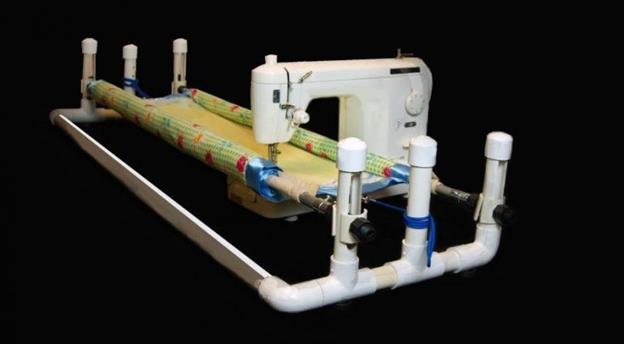
This is a very big and complicated DIY quilting frame. The materials used in building this are wheels, bearing, stitch regulator, and contact sensor.
The stitch regulator comes with a constant contact sensor for optimum speed accuracy. As you speed up and down it regulates the length of your stitches. 2 wheels and bearings were attached to the bottom of the machine to measure motion speed.
The whole process involves setting up a stitch regulator on pipes and wheels to move the machine up and down the pipes.
5. Making An Easy Cheap Quilting Frame
A quilting frame can be simple and easy at the same time if you have the required knowledge. This frame is made from reticulating pipe, three tubes, two storm drain pipes, and fittings.
Mark out the MDF board that will serve as the two side pieces and drill 3 holes at the required place. Set the slots of 6mm on the pieces. Fit the end caps to the pipes and pass it through the holes on the side pieces. The cost of building this quilting frame is very minimal and the outcome is very cool and amazing.
6. Small Project Quilting Frame
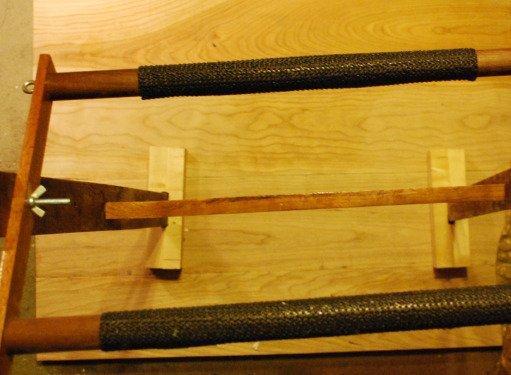
This amazing quilting frame is made from cherry, walnut, gripping mat, wood glue, flush saw, drill, scissors, and many more.
Make the four pieces of the cherry the base feet of the frame. Drill 5 holes 2 inches apart on the long walnut piece and another 2 apart from the middle legs. Drill another two holes at both ends of the cherry pieces.
Fix the cherry bar to both legs and insert the walnut dowel. Assemble the frame and mat! Your quilting frame is ready. The process is cool and interesting but requires patience and skill.
7. How To Make Your Quilt Frame
The processes in building this quilting frame are very simple and fun-filled. The material needed includes 4 pine boards, 2 sheets of sandpaper, an electric staple gun, scissors, tape measure, and clamps.
Smooth the board with sandpaper and wipe the board with a damp cloth to remove the dust. Cut a long fabric strip into four strips and fold each strip into half and fold again almost into half and place it on your board and staple it with the electric staple gun. It is very advisable to iron the fabric strips to hold the fold in place accurately.
8. How To Build A Quilting Frame With PVC Pipe
Building a quilting frame with PVC requires some level of skill and careful attempt. All you will be needing to build this beautiful frame is PVCvc pipe, fittings, clamps, hacksaw, etc.
In this process, measurement is very essential, that is why it is very advisable to draw your plan and take the appropriate measurement before starting to build your frame.
Cut the preferred length of the pipe- for the base and legs). Connect the pipe with the elbow fittings and make sure the fittings face the same direction.
Conclusion
That’s a wrap! All the DIY quilting frame plans listed above are easy to make. If you have a hard time understanding the build, feel free to seek professional help or advice. It’s totally fine if you do not get it right the first time, you can try again and again.
The comment section is open if you need any help regarding this article. You can also drop contributions and questions and we’ll be in touch.

Ask Me Anything