Luggage tags are a form of identification for your suitcases. You can be at an airport and see a piece of luggage that looks exactly like yours, the best way to differentiate yours from another is via a luggage tag.
In this article, we have compiled some of the best DIY luggage tags that you can DIY from the comfort of your home and without having to spend too much on materials. Some of the tags can be made using items that are already in your home, which means, no spending whatsoever!
Table of Contents
1. DIY Luggage Tag Using Duct Tape
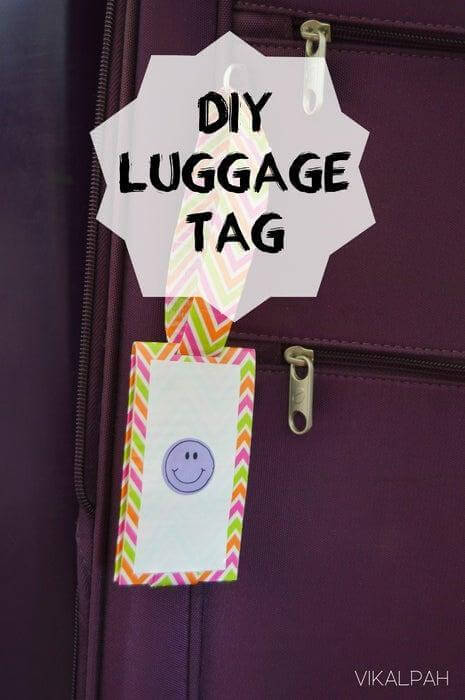
This simply beautiful tag is made out of duct tape. Place the sticky side of two strips of 8” duct tape together and fold in half. On a 3" duct tape cut half inch square on both ends of one side. Fold sides together leaving the square as a flap. Place sticky areas of flap on top 8" tape fabric. Attach velcro then place clear plastic inside and fold up fabric. Attach a long strip of tape and secure to luggage.
2. DIY Luggage Tag Sewing Tutorial
Get your necessary materials ready. Cotton fabric, medium weight interfacing, clear vinyl, cutting mat, scissors. Place interface to back of fabric cut out and iron. Cut off one inch from the corner of the two main pieces with a rotary cutter. From all sides measure one inch to form a square on your window piece.
Sew all the way round and cut out the square at the center. Place the vinyl window and top stitch to fabric, place the window on top of your main piece and pin round. Sew with ½inch seam allowance then flip over to the front side and top stitch. Pinch hole too and fix in eyelets, then use a silky cord to tie.
3. DIY Personalized Luggage Tag
Print out the tag template and trace out on faux leather. Using an exacto knife, cut off the shape and dampen leather in water and leave to dry off. Take out letters of your choice from the leather stamping kit and place on the leather softly hammering in. Use black paint on the letter groove to make it more visible.
Cut a small portion out of an old binder or clear plastic sheet then line up on a smaller tag. Make the leather wet and add gorilla glue on the flap placing on the other piece and leave to dry. Print out address info and slip into tags. Punch hole at top of tag the nude a strip of leather to tie.
4. DIY Duct Tape And Leather Luggage Tag
The beautiful piece here is made out of duct tape. You'll be needing 3 rolls of duct tape, two with contrasting colors or pattern and one clear tape. Cut out the colored tape with tag size twice placing against each other, add the third piece on top then flip over and add the Fourth piece of tape. Cut your four pieced tape to shape giving it a triangular top, cut out the same shape for the clear tape. Cut ½inch strip of pattern tape, put on all sides of colored tape like an outline. Either print out address info or write it out in paper and slip paper in. Make a long strip piece with a pattern toe and use it to attach a tag to the box.
On the other hand, cut leather to shape using awk or thumbtack to poke holes and stitch. Glue both pieces together. Using a clear tape cover the top of your printed address and fit in tightly.
5. DIY Embossed Leather Luggage Tag
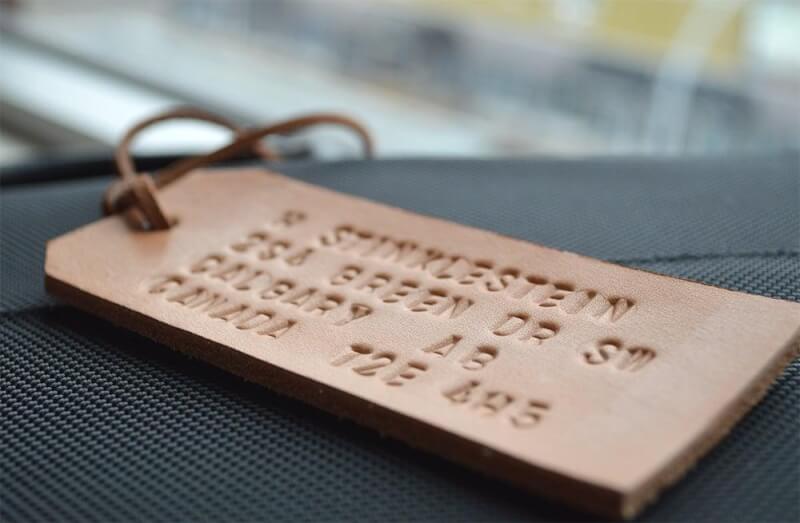
Because leather is more receptive when damp, dip your already cut leather tag in water & leave to dry. Using a hammer, give your letter punch a one stamp tap till you have your personalized write-up. Loop cord through hole at top of tag to finish.
6. Leather Luggage Tags DIY
Take your tag pattern template and cut out on leather drilling a small hole on top for string. Moisten leather, then move on to hammering your stamp firmly into the leather. You can create design patterns of your taste round the tag. Attach your strings and you're done.
7. DIY Luggage Tag
Using a leather with any choice color, trace tag template at the back and cut out the pieces. Glue the front and back pieces together then hot glue the edges. Thread strip of leather through hole on top and hot glue ends, wrap contrasting embroidery floss at top part of strip. Slide in printed personal info and that's it!
8. Homemade Luggage Tag
Cut out two rectangles of fabric placing them inside out and felt on the outside. Sew them together. Now turn fabric inside out and iron. At the top, insert ribbon and topstitch. Sew vinyl on the outside to look like a pocket leaving an opening to slide in address paper.
9. DIY Luggage Tag
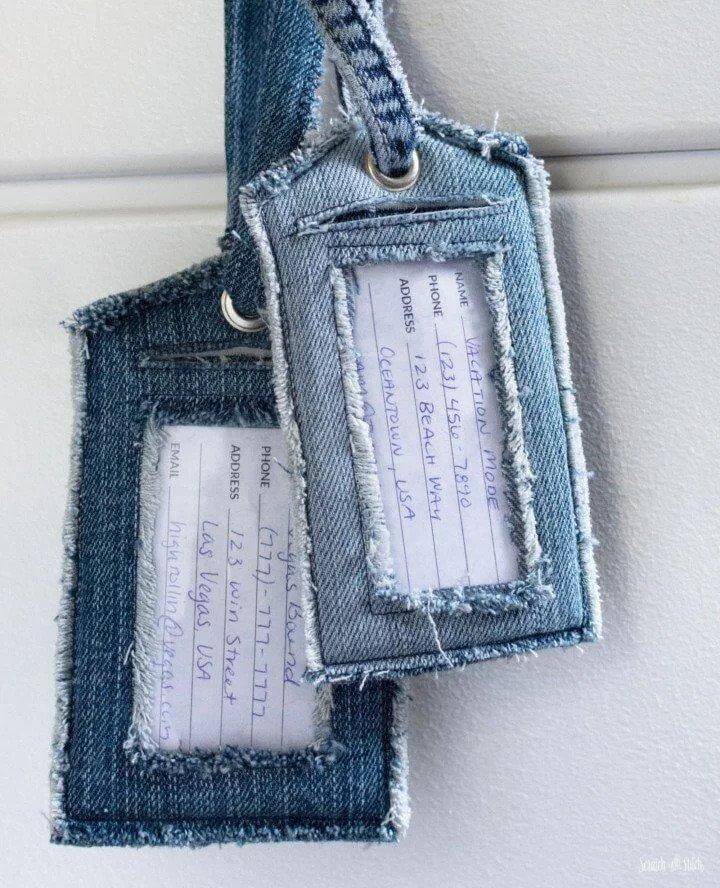
Cut tag pattern on denim fabric so you have four pieces out. Cut out vinyl and cut the same size on stabilizer, then sandwich stabilizer in between two pieces of denim and stabilizer & vinyl in between the other two pieces. On a vinyl piece, cut an opening revealing vinyl. Install grommet at the top of tag. Fray sides of denim then make an opening below the grommet to slide in the address card. Attach strip for hanging.
10. Homemade Luggage Tag
Print out design and word of choice on printable vinyl. Use transfer tape to apply letters first to tag then do the same with the design. Seal design with couple coats of decoupage to protect against rough handling.
11. DIY Laminated Luggage Tags
A simple cardstock paper tag. Cut paper to shape aligning images vertically. Cut 2¾inch of a strip down, cut 3¾inch length and another of 3¼ inch long. Place both cards in a laminating sheet and laminate, when done with that, cut each piece out. Make hole at the top and pass loops.
12. DIY Fabric Luggage Tag
Cut 4 pieces of fabric to size, sandwich heavyweight interface between two fabrics and iron together. Replicate for the other two pieces. On one piece cut out the window using a sharpie, stitch window edges with zigzag stitch. Make strips out of spare fabric and stitch at the top centre of fabric, place velcro and sew on top of the strip. Topstitch vinyl to the back of the window piece, then place soft velcro and stitch three sides of the tag leaving an opening to attach contact info.
13. How To Make A Luggage Tag
You will have your leather cut into a tag shape. From your stamping kit take out letters and hammer to leather. Evenly spread glue to the back side of the leather and compress to the second leather piece. Give the edges a saddle stitch finishing as well as flushing the leather in sandpaper. Also apply leather balm on the edges and buffer the edges too. Slide in your card, take your strip and feed through the hole.
14. DIY Quilted Luggage Tag
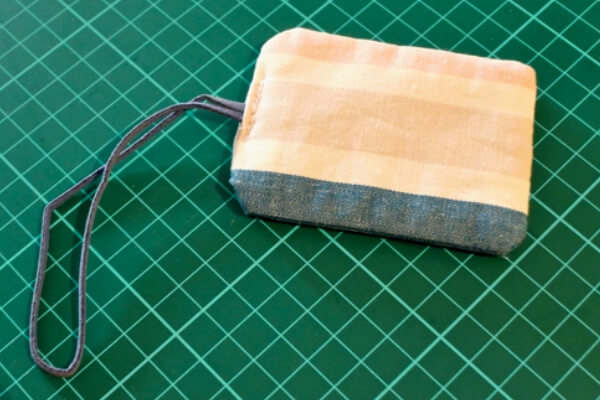
Cut out two pieces of fabric, one will act as lining. Place the front piece on cotton batting and sew it together. Attach elastic on top and stitch. Place the front fabric on the lining piece and sew, leaving an opening. Turn inside out to reveal the right side of fabric. Attach vinyl on top like a pocket and sew. Slide in the address card and your tag is finished.
15. DIY Fabric Luggage Tag
Print address details on cardstock, draw tag shape on printed card. Apply fabric mod podge to card & stick to fabric. When dried, cut tagline on fabric and punch hole to feed your string through.
16. How To Sew DIY Luggage Tags
Cut luggage tag pattern on fabric. Fuse interfacing on fabric pieces. Sew pieces to interface then place your window piece on the main piece so it looks like a pocket and then sew leaving an opening to fix in the card.
17. DIY MDF Luggage Tags
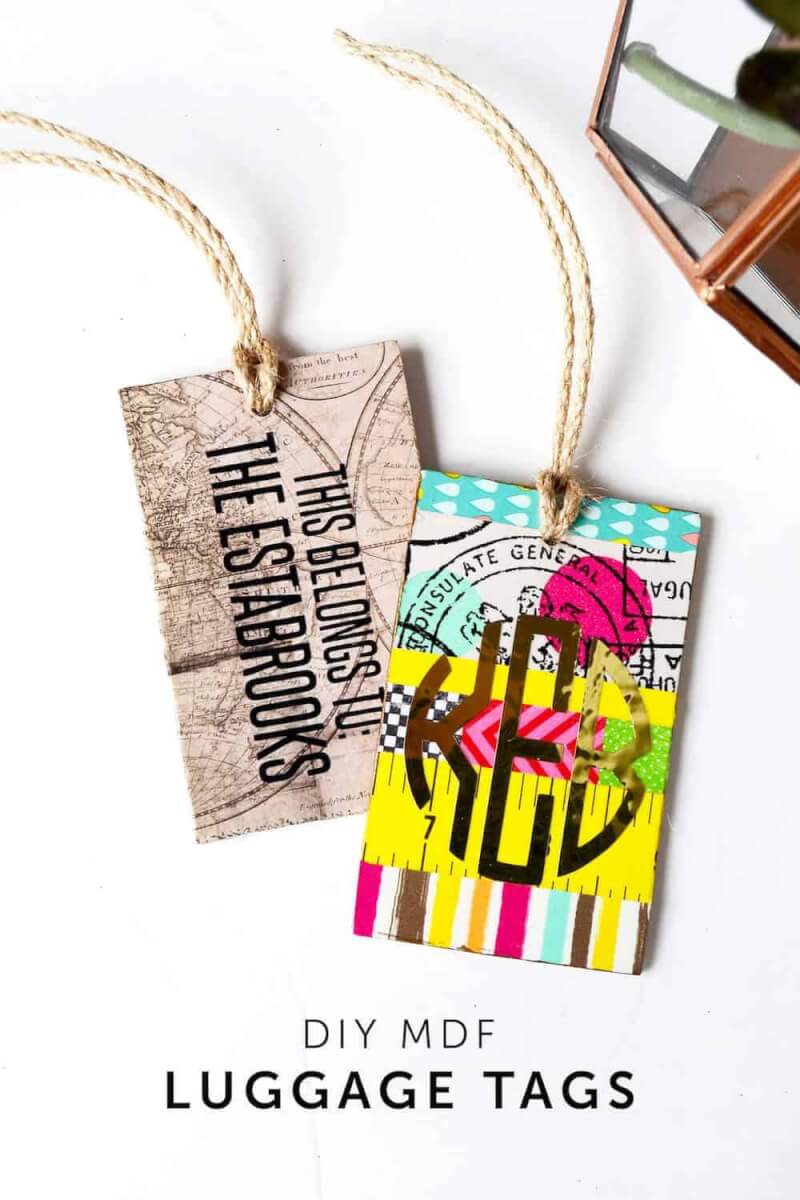
Cut tag shape on MDF wood, sand the wood and drill hole at top centre. On desired cardstock, cut out the same shape. Paint MDF with white acrylic paint, use washi tape. Apply two layers of decoupage and leave to dry, apply decal then tie jute twine.
18. DIY Luggage Tags
Cut two tag shapes on faux leather, on one of the tags cut out the window. Glue 3 sides together and punch hole for loop. Slip info card and acetate sheet in. Loop leather cording through hole and tie knot, then attach to luggage.
19. How To Make A Luggage Tag In Leather
Trace out tag pattern on leather and cut. Apply glue evenly at the back of the leather and place on another leather of longer length. Give the top edges a triangular look, then saddle stitch all sides. Burnish edges with lighter. Cut a strip of leather and poke two holes to attach a fastener.
20. Leather Luggage Tags DIY
With your tag pattern on a graph paper, trace it on your vegetable tanned leather. Take out personalized letters and hammer softly on leather. Next, cut strip for loop, then punch two holes on the loop each apart from the other then draw a straight line in between the holes. Use a cutter to cut through the line having a space there. Feed loop through the tag hole and you're done.
Conclusion
While picking the DIY luggage tags to be included in this article, we made sure to incorporate the ones with amazingly outstanding designs. The idea is to confuse you a little bit, “how is that working out?”
Let us know what you think of the DIY luggage tags listed in this article. The comments section is now open for contributions and questions.













Ask Me Anything