Are you looking for kayak cart build plans? After hours of research, I put together a couple of projects made by creative folks out there. Most of the projects are relatively easy to follow and won’t require you to spend much.
There are 10 DIY Kayak Cart projects listed here to DIY with a few tools and materials handy. The choice is yours; however, choose wisely.
Table of Contents
1. How To Build a Kayak Cart out of PVC
You can make this under $30; it’s easy and efficient. For the materials, the first few things you’ll need are your rubber wheels, a ⅝-inch rod that can fit into the ⅝-inch hoe on the center of the wheel, ⅝-inch washers, lock washers, hex nut, and locknuts.
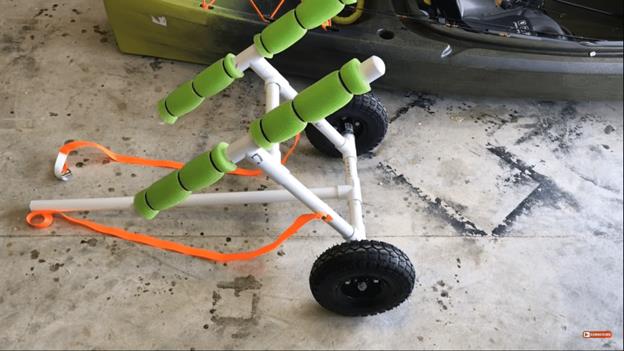
You also need some PVC end caps, tee sockets, a purpose cement, and measuring tape. The PVC pipes will all be ¾-inch. Your first cut made on the PVC pipe should leave the pipe 18-inches, the second cut should be 10.5-inches, your third cut should be 8-inches in length, and you should have 4 of the 8-inches. Continue cutting the remaining pieces and start assembling them together.
2. DIY Kayak Cart
You don’t have to spend much to build this cart. You are going to get a 10-feet section piece of schedule 40 PVC pipe ($3), PVC tee fittings ($3.50), PVC caps ($1.20), PVC glue ($3), 10-inch pneumatic tires ($12), and a few other materials. In total this will cost you $35. To get the different lengths of the pipe, visit this guide and check it out.
3. How to Build a DIY Kayak Cart
For beginners who have no idea how to start building a Kayak cart they can use this guide. The instructions are easy to follow, and it only takes two hours to finish the building process. It is also cheap to build; you will spend nothing more than $50 for the whole project, and it’s half the price if you wish to buy a new one.
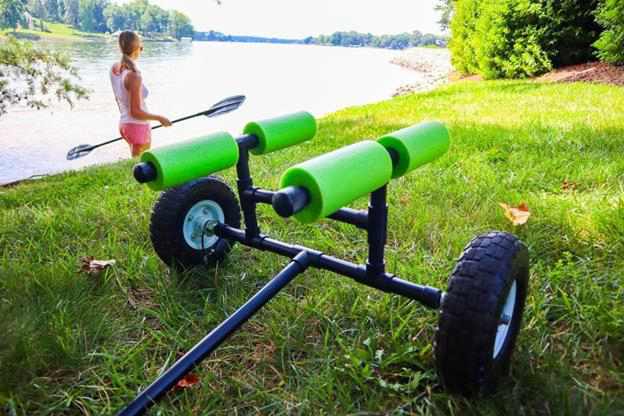
This will also weigh between 45 - 70 pounds. You need an ABS black plumbing pipe as one of the primary building materials, soft foam to prevent damage to the bottom of the Kayak, ABS pipe cement, zip ties, galvanized nails, sandpaper, stainless steel nylon lock nut, and many more.
4. DIY PVC Kayak Cart
Now that you need a thick PVC pipe, the better for all of us. It seems PVC pipe is one of the most-used essential materials in making Kayak carts. It’s also very functional and inexpensive to purchase.
The materials you need are easy to come by; go to any hardware store and get a 90-degrees fitting elbow, 45-degree fitting elbow, T-fittings, PVC pipe spacers, PVC pipes, PVC insulation foams, and zip ties. For the wheels, you can use wheels from a golf bag cart like the one used in this guide or any similar wheel, large washers that can fit into the axel you choose, cotter pins, and hollow axle.
5. DIY Kayak Cart With PVC
Here’s another PVC Kayak cart that is not only functional but is esthetically pleasing. Here is what you’ll need to make this happen, PVC pipe, two wheels, buckle or lashing straps, threaded rod, generic T junctions, PVC end caps, PVC glue, and one pool noodle.
Although this video you will see many materials, you won’t need to use all that, only the ones I have written here. The step-by-step process is easy to learn, and you can build this from scratch.
6. DIY Sturdy Kayak Cart
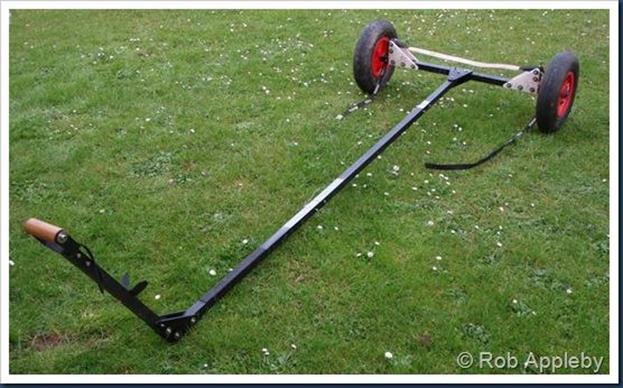
This is a short video on how you can make a trail-worthy cart for your kayak. This can allow you to take your kayak through rough terrains, and it will still be firm and functional. First, you need a 10-foot long power struct. Proceed to insert an iron rod inside the strut where you can attach your wheels. The wheel’s choice is all up to you; you can use a wheel of a golf cart or some other carts that you’re not using at the moment.
7. DIY Kayak Cart Under $25
All you need to have to build this kayak cart is just $25. The first important material is the PVC pipe; you can paint it with any color you want. Other supplies are four tee sockets, end caps, nuts, washers, and a rubber wheel. The cart is short, and it doesn’t have a handle, so you can’t move it around easily.
8. How To Build A Low Budget Kayak Cart
If you are searching for a way to build a kayak cart on a low-budget, try this instructional video. Use a furniture trolley, cut off the base of the trolley with a saw, and smoothen it over. Attach the kayak to it and it is ready to go, that is super easy and you don’t have to build anything from scratch.
You can do that for a canoe, depending on the size of the canoe. Also, note that the cart does not have a handle.
9. DIY Kayak Trolley
Are you having doubts about this Kayak troller? Don’t! You can make it, and I’m going to show you how. The materials are so simple and easy to find, so you have no worries. You need some triangle brackets that are made from machined aluminum.
After assembling the rods with pippins, fixing the wheels together will take seconds to finish. Within an hour, you can be done with this for the day.
10. PVC Kayak Cart DIY
Here are the supplies you need for this project. There are two rubber wheels, PVC glue, tee sockets, long PVC pipe, PVC cap ends, a miter saw, and a measuring tape. For the axel, you need threaded rods, flat washers, split lock washers, lock nuts, and two hex nuts.
The first thing to do is glue two 8” pieces to the opposite ends of a T, assemble the middle section; the last thing is the axle casting before you attach the wheel. You can decide to paint the PVC Kayak cart any color you want.
Conclusion
Building a kayak cart won’t require you to spend much; regardless, you should take your time while making one. If you have never done this kind of project before, there is a higher chance of errors.
Carefully follow the procedures given on the full tutorial page, and you would have built an amazing DIY kayak cart.




Ask Me Anything