Are you looking for a way to make your custom exhaust hanger using some cheap parts you can buy from the available spare parts store around you? We have listed some DIY exhaust hanger projects for you. The method of setting up the hanger is straightforward and allows easy removal of the system.
Here are 9 different ways of fixing, removing, modifying, changing, or replacing your exhaust hanger with ease. Check out the projects below and start working on your preferred one immediately.
Table of Contents
1. Cheap Exhaust Hanger
See here a super cheap and easy way to hang your exhaust. There are two ways to do this; you can go by welding or just by making a hanger by yourself. To make the hanger, get a ¾" metal rod and put it in a vice.
Since you will need two pieces for the hanger, cut the rod into two. Take one of them and put it in a vice; make sure to tighten the vice very well and that the rid is in the proper angle you want it to be. After this, use a hammer to bend the rod, and that’s it. Now, take it to the exhaust and hanger the curved part in the hoke.
2. DIY Tomei Exhaust Hanger
To make this Tomei exhaust hanger, you need a hose, a rubber seal that will be out on the hose because of vibration, and a metal rod attached to the hose clamp. The rubber might not want to stick well to the hose clamp, or with the rubber, the clamp doesn't fit well with the exhaust, then you need to remove it. Watch the video to learn more about how to DIY a Tomei exhaust hanger.
3. Making Custom Stainless Steel Exhaust Hanger
You will need a basic knowledge of welding to try your hand on this custom stainless steel. Make sure to use your protective equipment like gloves and helmet/goggles while working in the exhaust hanger. The video tutorial will show you the complete list of the materials used and the attaching process of exhaust to the stainless steel hanger.
4. How To Modify Exhaust Hangers
Do you want to modify your exhaust hanger? Or replace it with another one? This video tutorial is for you. It is straightforward; all you need to do is get an exhaust hanger from the store and weld it to the muffler. But in case the hanger doesn't fit well, that means you need to close the gap between the muffler and the steel hanger.
5. DIY Removable Exhaust Hanger
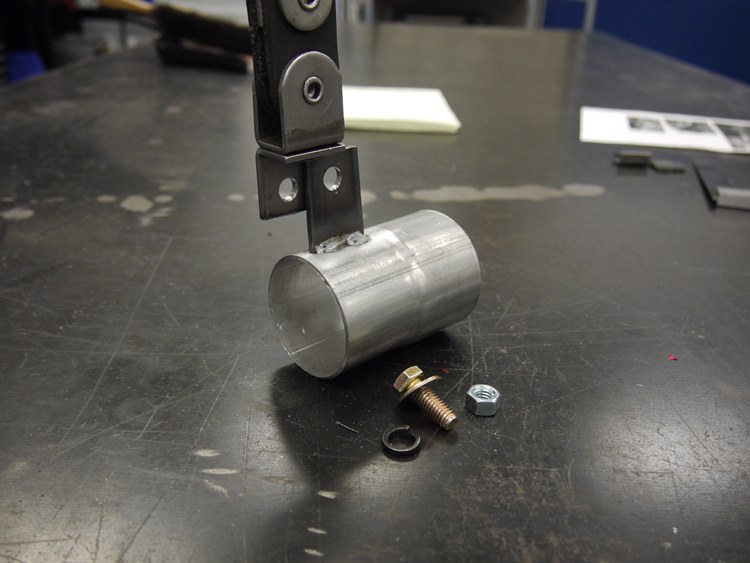
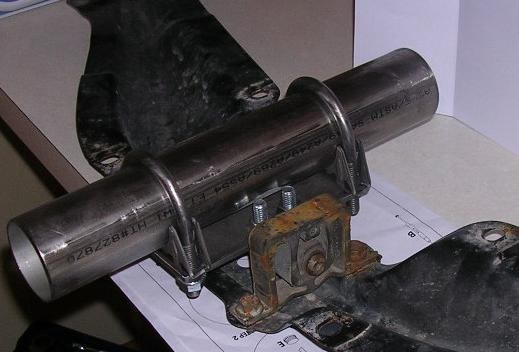
The most important thing about this exhaust hanger is that it is straightforward to set up. Also, it allows the easy removal of the whole exhaust system. You will need a universal exhaust hanger with an open, pivoting end, 1.25 ” X 1.25″ piece of ⅛″ steel, 5/16″ thread bolt 1″ long, lock washer, and hex nut, and high-temperature paint (to prevent rust). See the link below to know why choosing those materials above, especially the universal exhaust hanger.
6. DIY Exhaust Hanger For Rear Pipe
This exhaust hanger is for the rear pipe, and it's straightforward to set up. The first thing you need to do is to get an exhaust hanger with an open pivoting end. Cut the exhaust hanger along the drawn line on it with a cut-off wheel. After the cut, you will have only a tab sticking down. Then, clamp the square tab to the exhaust hanger leaving enough space to drill a hole big enough for the bolt.
Mark the center of the space for the hole and make a dent using a center punch for the hok not to wander. Click the link below for the complete list of materials used and the process of putting the exhaust hanger together.
7. How To Build An Exhaust Hanger
Learn how to build an exhaust pipe and custom turndown pipe dump before the rear axle. Here are some of the materials used: 3.5" exhaust clamp release, Doug's header stainless steel turn down, exhaust hanger, DeWalt impact driver, reciprocating saw, welding helmet, and V-band clamps. Once you have all these materials, watch this video tutorial and get to work immediately.
8. How To Replace Exhaust Mount Hanger
Are you looking for a way to replace your broken exhaust hanger? If yes, the search is over; this video tutorial will help you solve all your exhaust hanger issues.
Before you can replace the broken exhaust hanger, you have to remove the broken one first. To remove the broken exhaust hanger, you can use your hand if it's a rubber hanger or use a long tool for popping it off the hook. After it has been removing can now put the new exhaust hanger. It is as simple as this.
9. How To Install Exhaust Hanger
This video tutorial shows you how to repair, install, fix, change or replace a broken or ripped-off exhaust hanger. One of the essential tools used in this video is the rust penetrant. The rust penetrant does several works, which include easy loosening of the bolts and some others. The process is straightforward, inexpensive, and effective, and you can carry it out alone without others’ assistance. 1aauto did a great job by putting this video tutorial together. Click the link below to watch the full video of the tutorial.
Conclusion
To make an efficient exhaust hanger yourself, you need to go through these DIY exhaust hanger guides listed above. They give you an easy way to navigate the project at a low cost. Top professionals created all the tasks listed above.
If you loved this article, do us a favor by sharing it with your friends or family members that might be interested in building a DIY exhaust hanger.






Ask Me Anything