
Having a baby is one of the most exciting highlights of your life, especially if you’re a first-time parent. The monthly milestones, the gender reveal, every experience is a discovery.
For many expecting parents, another exciting part is decorating their baby’s nursery. There are so many things to consider: themes, color schemes, baby furniture, and many more.
As you’re thinking about choices for the nursery, budget is another consideration. The expenses that come with a baby could rack up and be an unwanted stressor in your life. In addition to this, you would also have to worry about how safe your nursery and house are for your baby.
If you feel overwhelmed, don’t worry. You’re not alone. Your wallet and your baby’s safety don’t have to limit your creativity. Yes, it is possible to achieve what you want without breaking the bank.
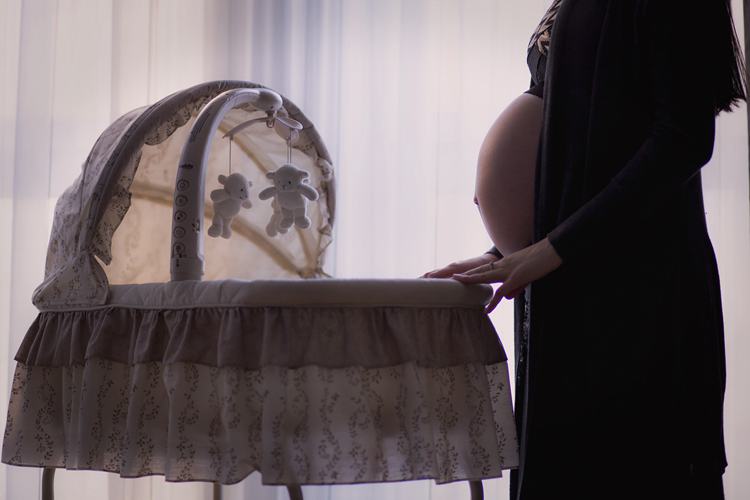
To help you start, we’ll take one thing off your nursery checklist - the bassinet. It’s where your baby would spend most of his time. It is comfortable, soft, small, snug, and padded to provide the same warmth like a mother’s womb.
If you are considering a new bassinet to paint and fit with your theme, check out https://thegoodnursery.com/organic-bassinets/ for some of the best organic bassinets for your baby.
Table of Contents
1. DIY Bassinet Fitted Sheets
You don’t need an expensive bed set for your baby. One quick way to liven up your bassinet is to play with your bassinet’s fitted sheets’ fabrics. You can get plenty of inexpensive fabrics brand new from discount stores or second-hand from thrift stores. You can also just re-use old sheets you don’t use anymore.
Make sure that the fabric you are using is made of natural and breathable materials like cotton. You want to make sure that your baby has no difficulty breathing and keeping cool in the bassinet. The 100% natural cotton fabric is very gentle on the skin. It makes it unlikely for the baby to experience an allergic reaction.
If your fabric is new, make sure to wash it and dry it first before making your sheets. This is to account for possible shrinking in future washes.
For this project, you’d need a sewing kit, your fabric of choice, garters, and your bassinet mattress. You’ll need the latter to get the fitting right.
It would be best to make quite a few. After all, we know how messy babies can get. You may need to change your bassinet sheets again and again after some feedings. Some babies tend to throw up or make accidents after feeding.
Remember to use only fitted sheets for your baby’s safety. Loose sheets are unacceptable as they pose a danger to your baby. The sheets should fit perfectly and tightly conform to the shape of the mattress.
2. Painting the Bassinet
If you want to keep decorations to the bassinet minimal but trendy, why don’t you try painting an old bassinet to give it a fresh look and feel? You can upcycle an old bassinet with inexpensive, low VOC (Volatile Organic Compound) or with zero VOC, non-toxic, odorless, and baby-safe paint and make it new again. We can’t stress enough how the kind of paint you use matters. Some babies would “teeth” on the bassinet when they get older.
Once you’ve selected your paint, you’re good to go. The great thing about painting a bassinet is that you don’t need a professional to do it for you. You can disassemble the bassinet first to get a thorough paint job.
Painting a bassinet shouldn’t be too heavy on the wallet, provided that it isn’t bigger than average. As long as it’s safe and for your baby, it doesn’t matter if it’s an old or a new bassinet.
3. DIY Hanging Bassinet
If you have very little floor space to work with and you’re looking for alternative bassinets or cribs that will keep things as uncrowded as possible, a hanging bassinet can fix that problem. These bassinets don’t need to be pushed up and tethered against the wall. They can be suspended (always hang on a secure beam!) from anywhere in the nursery.
They say that a hanging bassinet makes the transition from womb to world easier for your baby. The movements resemble that of movements that your baby has experienced while he was in the womb. If your baby fusses in his sleep, the bassinet is gently sent into a rocking motion that soothes the baby back to sleep.
Of course, there are some who worry about the safety and integrity of the bassinet since it is suspended from the ceiling. Consider the materials that you use for the bassinet and suspension. Make sure that it is securely screwed into the beam and all the knots are very tight. After it is done, the bassinet should be very hard to flip or be turned upside down.
You don’t have to buy expensive gadgets that will rock your baby to sleep. The hanging bassinet is a cheaper but trendier alternative for parents on a budget.
If you need help finding inspiration, check out our article on making your own Bassinets from scratch!
4. Bed Skirts

Bed skirts can change the look of your bassinets. These wrap around the bottom of the bassinet. You can play with different fabric colors and textures and completely transform your baby’s bassinet as a centerpiece of the nursery.
You can make bed skirts with ruffles, or you can stick to a simple one that doesn’t need a lot of sewing from you.
There are a variety of inexpensive fabrics available that fit your budget. Choose washable ones.
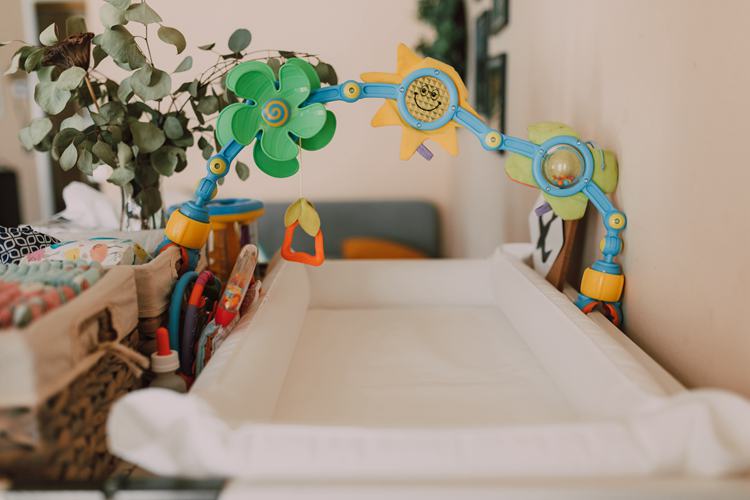
5. DIY Baby Mobiles
Not only do they keep the baby entertained, but they also add such charm and decoration.
A quick DIY of baby mobiles is to upcycle the things you already have in your house. You don’t have to stick to gendered baby mobiles. You can add anything you’d like; clouds, shapes, cartoon characters. It’s entirely up to you.
You can make one by tying colorful ribbons to an embroidery hoop. You can buy cheap small animals and tie them securely to an embroidery hoop suspended on a stand.
You can also create baby mobiles by seeing felt fabric or colorful paper into various patterns and designs. The possibilities are endless. You can get your supplies at your local craft store or dollar store. These tend to be very inexpensive as well.
Remember that these baby mobiles are only meant to be seen and not touched by the baby as they may become a choking hazard.
6. DIY Canopy
You can create an inexpensive and oversized canopy for your baby that matches your baby’s nursery.
You’ll need a hula hoop, some light fabric, a sewing kit or some E6000 glue, and a few other light decorative pieces that you can affix to your canopies like leaves, flowers, and butterflies. Make sure to suspend the canopy securely. Safety is always a priority with the young one.


Ask Me Anything