
Have you checked bed tent pricing lately? These tents cost a lot depending on the technology and type of materials used.
Why spend all that money when you can comfortably build your own at home? In this guide, there are easy to understand and follow tutorials to make your bed tent. Do this to cut off expenses and make your next camping adventure fun and affordable.
The advantage of these procedures is you recycle some of your old materials in your home that have no use.
Table of Contents
1. The Raged Wren DIY Bed Tent
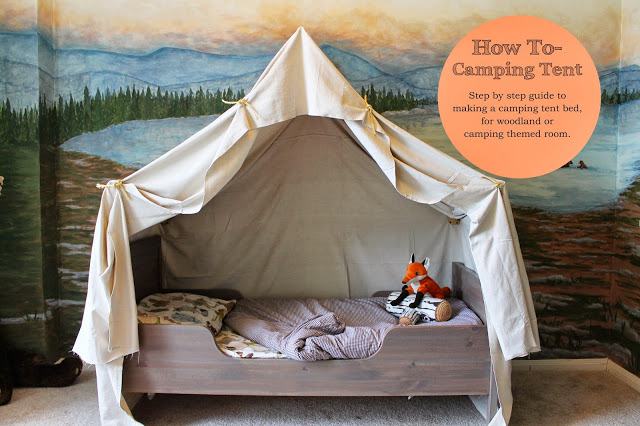
This bed tent is versatile; you can use it indoors and outdoors depending on the quality of materials. You will need flag pole mounts (3), wood dowels, rope, canvas cloth, cardboard, drywall mounts (12), screws, electric screwdriver, drill bits, glue gun, and a miter saw.
Before you begin this process, place your bed in the required position. This is because once you finish setting up the tent, it will be tricky to readjust it. The time to complete this process varies depending on the design, and it requires a clear mind and it.
You can use a printed canvas cloth to make your tent beautiful.
2. Old Ladder Re-Purposed DIY Bed Tent
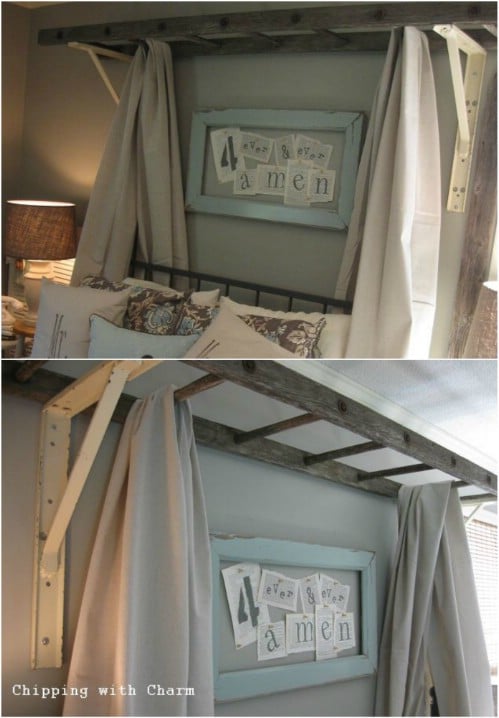
Another right way of making use of old ladders is to make yourself this tent. Apart from the ladder, you need drop cloths, two brackets, a drilling machine, drill bits, screws, and vanish.
You only need 30 minutes to complete this setup. To start, drill holes on the wall using the drilling machine. Also, drill holes on the bracket.
Attach the brackets to the wall using screws. Mount the ladder on top of the frames. Drape 2 drop cloths over the rungs of your ladder, and you are through. Use matching clothes to create a unified piece.
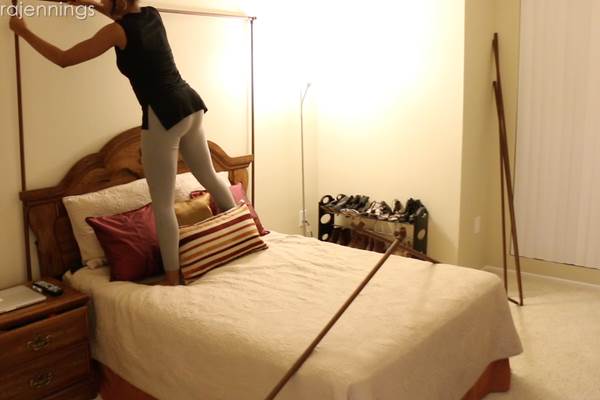
3. Curtain Rod DIY Bed Tent
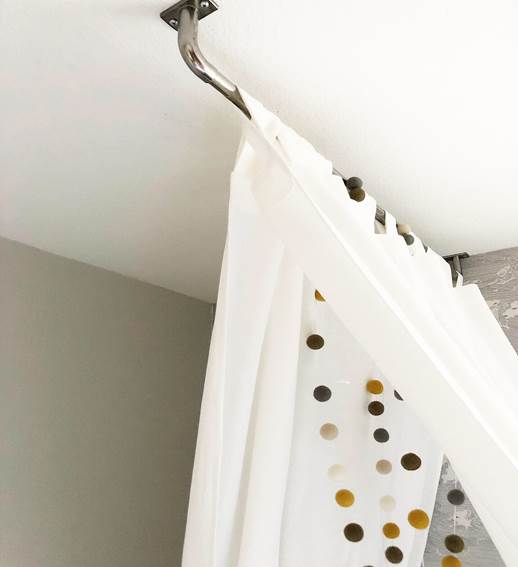
To make use of remaining curtain rod tents to build a lasting bed canopy, you need; a curtain rod, hammer, nails, screws, curtains, and drilling machine.
For this process, locate the ceiling joists on your ceiling to prevent the rod from falling. Measure and mark the length of your curtain rod on the roof. Make two holes on each end using your hammer or drilling machine.
Fix the rod to the ceiling using nails and screws. Lastly, add your curtains to complete the bed tent.
4. Homemade Truck DIY Bed Tent

If you are going camping, you need to try this out as you need PVC pipes, corner fittings, elbows, saddle tee, clamps, tarp, measuring tape, paper, pencil, and of course, your truck.
After assembling all the tools, measure your truck’s dimensions. Make a sketch of how you want the tent. Fit the PVC pipes in the holes on the truck's bed. Use the elbows and tee to connect these pipes to the desired design.
Finally, use the clamps to make your structure strong and throw in the canvas on the top. The canvas should fit perfectly to protect you in case it starts raining.
5. Easy To Build DIY Bed Tent
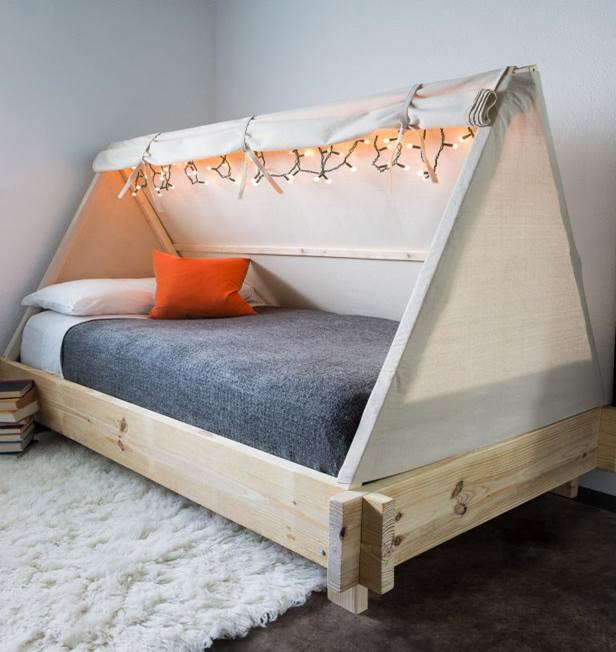
For this process, assemble the following; boards, measuring tape, screws, bolts, nuts, washers, canvas cloths, thread, sewing machine, scissors, and tape.
Now that you have your tools ready start by building the tent frame using the boards. Use the canvas cloths to make the tent cover. The sewing machine helps create perfect twitches as you design the cover.
The last step is to connect the tent frame to the bed and fit the tent cover. Feel free to add other decorations such as hooks for holding the cover.
6. Hula Hoop DIY Bed Tent
Most people don't know using a hula hoop, ribbons, Tullie yarn, hook, glue, and other decorations; you can make a bed canopy.
To do this, assemble all the requirements. Wrap the ribbons around the hula hoop, screw the hook to the ceiling and wrap the Tullie pieces around your ring.
Tie the hula hoop to the hook using the ribbons. Use decorations such as flowers to make your tent attractive. The last step is to hang your net or sheets from the hoop all the way down.
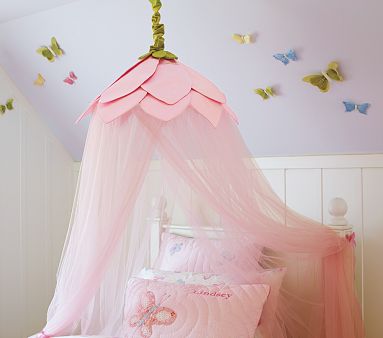
7. Rainbow For Your Kid’s DIY Bed Tent
This is the best-improvised bed tent you can make for your kids. You will need removable and also washable curtains, a sewing machine, serger, measuring tape, cotton, thread, twill tape, adjustable frame, PVC adhesive, duct tape, and zip ties.
For the cotton, you need a variety of colors to make the rainbow pattern.
The first step is to assemble the frame. Then, design and build the rainbow canopy. Add casings to the structure and then complete your top.
Next is to create the rainbow curtains. To do this, cut the fabric according to the canopy s dimensions. Use the sewing machine to make the rainbow.
Install your canopy to the bed and then fit the rainbow cover on the top.
8. PVC Pipe DIY Bed Tent
By using 8 PVC pipes, elbows, caps, spray paints, and window scarves, you can create a perfect bed tent.
To start, use spray paints to create the desired color pattern on the pipes and elbows. Leave them to dry. Measure the dimensions of your bed and cut the PVC pipes to ensure they fit. Attach the lines using the elbows to build the canopy.
Make the joints between the pipes and elbows tight by using foam mounting squares. Add other materials such as strap brackets to secure the structure.
Over the top, drape the window scarves and ensure they fit. You can be creative and add some LED lighting and other decorations.
9. Cat DIY Bed Tent
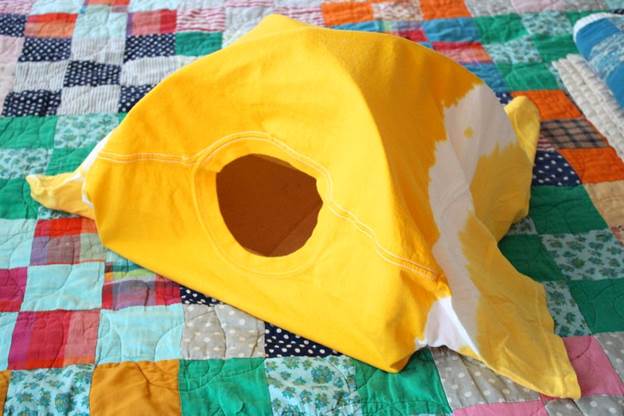
Create a comfortable space for your cat using a t-shirt, cardboard, wire hangers (2), tape, safety pin, and pliers.
Cut the hangers and straighten them out. Then shape your hangers and reinforce the board. Make a hole in the corners and tape the hangers together.
After designing the canopy, create the cover tent by using the t-shirt. Use the neck hole as the entrance. Fit the cover in a way that is easier to remove and clean.
10. Teepee DIY Bed Tent
This procedure requires bedsheets, hook, thread, pegs, weights, and other decorations. You can make a permanent hook on the ceiling, but it is a temporary tent; the curtain rod can help.
First, assemble the requirements, then tie the corners of the sheets to the curtain rod using a hook or thread. Spread out the hanging curtains to cover the whole bed area.
Use pegs to pin up the bedsheets from the back but leave the front area open. Since the sheets are light, use weights to hold them down and make them firm. Pro tip: use sheets of same or different colors as long as they can blend together.
Your set up is almost ready. Add decorations such as flowers and LED lights.
11. Galvanized Pipes and Pipes DIY Bed Tent
The materials needed are curtains, a sewing machine, a hammer, anchors, drilling machine, galvanized pipes, flange, screws, and decorations.
Use the sewing machine to sew the two curtains together. Tip; remove the top of only one curtain. Use the other top with the loop to hook onto the tent rod.
Use the hammer or drilling machine to fix the anchors on to your wall. Make three anchor positions; two on the same level and one at the top. Fix the flangers in the places and twist the galvanized pipes to fit in perfectly.
Next is to fit the curtain onto the pipes. Hang the curtains by passing the top tube through the loop we left out.
12. Blanket Fort DIY Bed Tent
The final tutorial on today's list is the blanket fort DIY bed tent. You will need blankets, fasteners, clamps, rope, pillows, cushions, clips, and rubber bands.
After assembling all the materials, stretch the rope from one side to the other. Ensure you cover the bed area. Attach the blankets to the rope and keep them tight using pins. Lastly, tuck the sheets and add pillows and other decorations.
Another alternative is to attach the rope to the ceiling and tie the blankets together. Use clamps to hold the sides together and finally tuck the sheets to make them cover the whole bed area.
Conclusion
Make your bed more interesting by adding a classic tent to style up your room. Most of these tents are easy to make, and you do not need any special skills to set them up. They are also good ways of recycling old materials in your home.
If you love camping, hiking, and other outdoor activities, use the truck DIY bed tent to save some money. Make your family and friends happy by making them one of these bed tents today.


Ask Me Anything