
Track saws are the best choice for making long, precise cuts. They are also known to cut faster than other saws such as table saws and ordinary circular saws. Track saws do an excellent job of giving you clean and smooth cuts on your wooden material. There are certain qualities that a good track saw should offer, for example, performance, functional design, sturdiness, and versatility.
Track saws are not difficult to operate. They are merely drive-saws that you attach to a track that helps you cut long plywood or wooden materials as straight as possible. There are track saws available on the market; however, they are quite expensive and will almost be a waste of resources. With a few materials, you can make your track saw without much hassle.
In the following list, you can find building lessons that show you how to create your track saw using different methods; all you need to do is pay close attention and follow the instructions.
Table of Contents
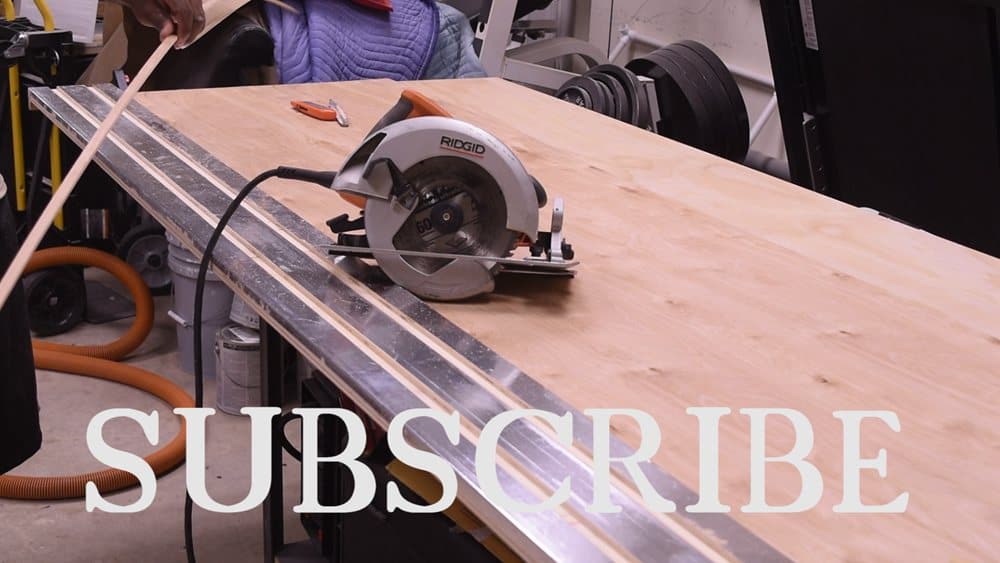
1.DIY Track Saw
For this plan, you’d need the following materials; tape measure, drill, router, circular saw, trim router, combination square to build the saw. You would also need flat aluminium bars for the inner part of the track that would keep your saw in place to make a straight cut.
This track saw is quite easy to build, but you need to pay the utmost attention while working to make sure that the running bars are correctly aligned when you attach them to the saw. This way, once you set them in place on the track, the saw would be able to move smoothly.
The video tutorial gives you detailed and clear instructions while the designer works, so you may need to take notes while you watch or listen with rapt attention.
2.Easy DIY circular Track Saw
This tutorial teaches you how to transform your old circular saw into a brand new, fully functioning track saw. The designer doesn’t use any expensive tools or gadgets. For this building plan, he used a thread tap, spring clamps, and a circular saw, of course!
In his list of stuff used, the items include ½ inch of MDF, ¼ inch MDF for the base plate, wood glue, brad nailer, spring clamps, tap and die set, and machine screws. The video tutorial is not too long, and the instructor walks you through each step.
There are no dimensions or measurements in this plan. This saw is helpful because, according to the designer, you no longer need to measure the distance from the blade to the edge of the bed of the saw. You can measure to the mark you want to cut, align the saw, and cut.
3.DIY Track Saw Guide
If you follow this guide correctly, you will get similar results like this track saw design. In this build, you also need the same type of materials listed in the previous tutorials. This 8-stepped tutorial is easy-to-follow and brief.
It’s a written tutorial with simple and clear instructions. In the first step, you get ready all the items you would need; the second step has to do with routing the first track while step three and is marking and routing the second track.
In steps five and six, you add bars to the circular saw and then cut off the track. Step seven and eight round off the tutorial with few tips.
4.Super Simple DIY Track Saw
This video tutorial shows you in less than 10 minutes how to make a super easy track saw. The track for the track saw works in such a way that it captures your saw on both sides, allowing you to align the track with your mark through some sight holes you will cut into your saw.
The design stops your saw from moving in either direction, so you have a perfect and deeper cut. The tutorial is a step by step guide that allows you to follow carefully.
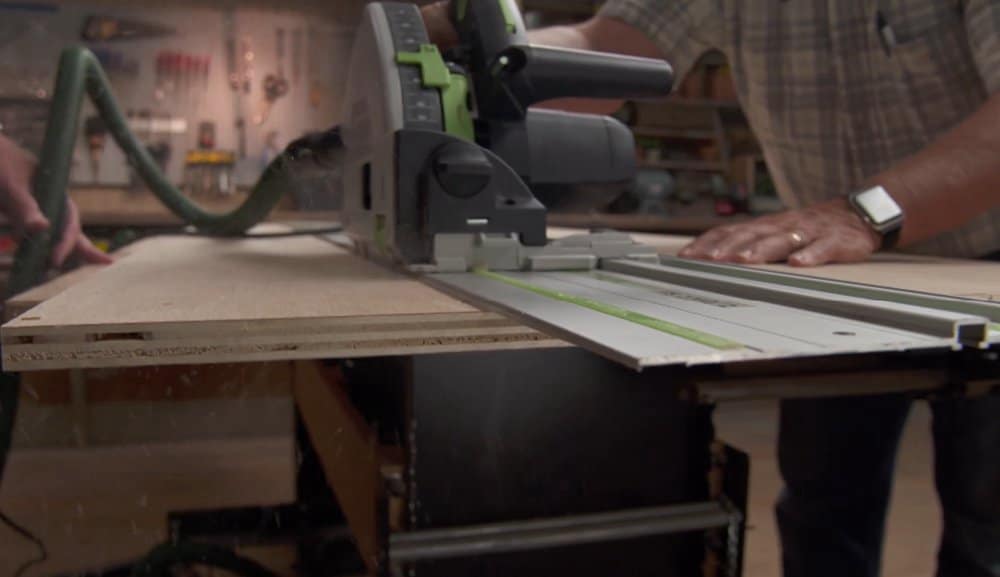
5.Aluminium DIY Track Saw
For this construction, you would only need a circular saw and an aluminium bar. Because of the properties of the aluminium material, you would need to be careful about which types of instruments you use. The designer recommends a chisel instead of a file to make contours on the edges of your aluminium bar.
An aluminium track for your track saw is a great choice because it is stronger for holding your saw in place, and it helps cut larger pieces more smoothly. The video tutorial will show you how.
6.Homemade DIY Track Saw
This is a written tutorial, which has an embedded video tutorial. This is one of the simplest ways to build a DIY track saw, and it is well explained in three clear steps. To make this track saw, you don’t have to be a pro-builder, it’s so easy that a moderately skilled person can do it.
On average, it costs about $10 and can be made within an estimated time of 10 minutes. Quick and simple. For this project, the designer used scrap plywood, extra wood glue, and a circular saw.
7.DIY Track Saw for Trim Saws
You would need a tape measure, pencil, combination square of a chalk line, wood screws, countersink bit, two plywood boards, and a drill bit. This project takes about 30 minutes to make and doesn’t need any professional building skills.
The video tutorial is very instructional, and you can follow it as he teaches. This track is mainly for trim saws, but can also be used for circular saws.
Conclusion
If you’re a professional constructor or you regularly engage in DIY projects, then a track saw is a must-have for you. You can go through the lessons above to have an idea of the different building plans for the different types of tracks. After you have done this, you may then select the most suitable one for you, depending on the type of construction need you want to solve. DIY track saws help you save time and money, and the small price you have to pay is to take a moment to build yours yourself.


Ask Me Anything