
One of the important functions of a drum sander is to sand pieces of wood to fit particular shapes, edges, or corners. It also helps because you can sand large pieces at the same time, which helps to save time and energy. But how can you do all this and more if you have no Drum sander in your workshop?
Building a drum sander for yourself is much easier, you can also make it suit your needs, and it costs way less than a new one. These tutorials are specially handpicked to demonstrate how to build a Drum Sander by yourself, right there in your workshop.
Table of Contents
1.DIY Drum (Thickness) Sander
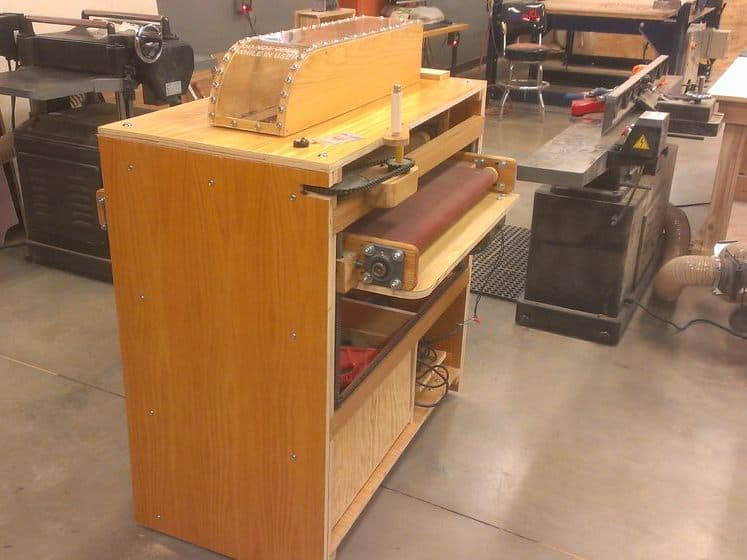
This builder spent about $500 building this sander, where it would cost about five times that if he were to get a new one. This drum sander was created to help with segmented turnings on a lathe. The tutorial is segmented into 17 clear steps. It is a bit tasking, but worth it.
He begins by building the sanding drum and rollers; he includes a link on how to do this within the tutorial. He then proceeds to glue the patten, make the holder for the acme nuts, and then modify the acme screws to accept bushings.
Afterwards, he cuts the main supports, mills the drum supports, grinds and assembles the bearings and drum supports, assembles the platen, and fixes the chain on the sprockets. The rest of the steps include piecing the parts together and some installations.
The written tutorial has helpful links and pictures to guide you.
2.Quick DIY Drum Sander
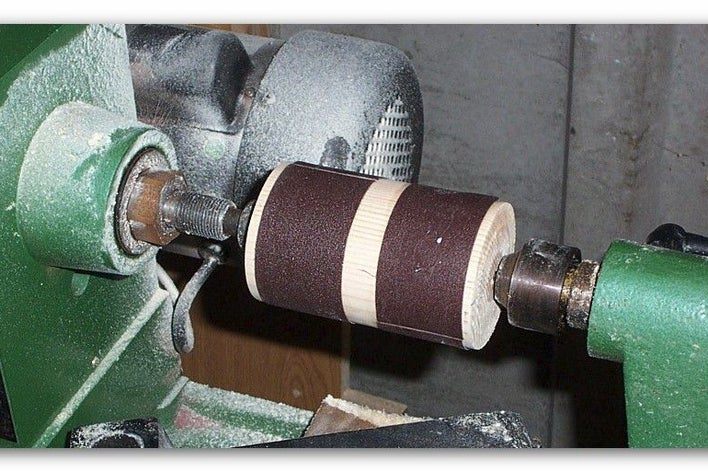
This sander was built to sand corners or edges to fit square to the sides of another piece of wood. It is a single drum sander design and can work well on a bench drill or lathe.
You should, however, note that to use drum sanders on a bench drill, you must first check the capability of the drill. It should not be as large as it should be if you were using a lathe. You would start by turning scrap wood into a drum. After this is done, get some glue and stick sandpaper unto the drum.
The written tutorial shows you in a more detailed way how to get all of this done. It is short, simple, and has pictures.
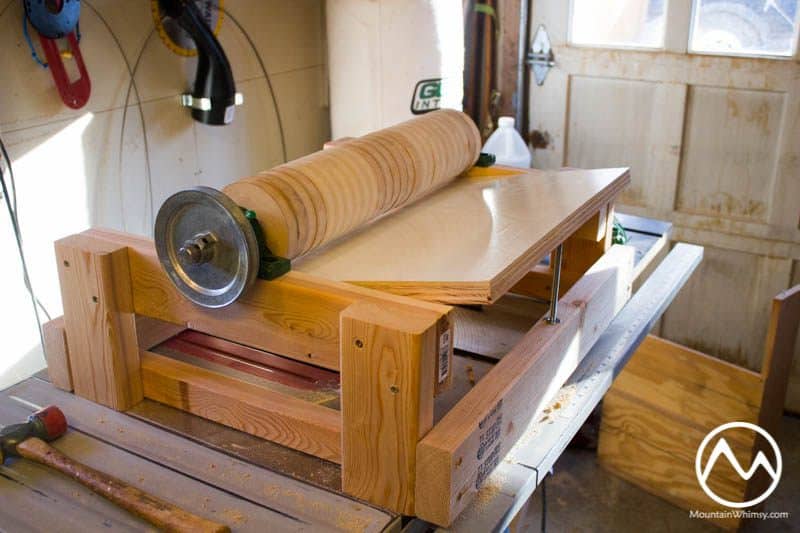
3.Homemade Drum/Thickness Sander
This sander was designed to help with making segmented turnings on a lathe. It is a 24” thickness sander. In this video tutorial, the instructor gives an overview of his already built DIY drum sander. In this video, he provides instructions coupled with the dimensions he used in building.
You may need to take notes while you watch to help you remember the measurements used. The drum was made with a drill rod, MDF cylinders, and some PVC plumbing. You would need some Velcro, bolts, pulleys, and other materials within the video.
The tutorial is clear, but you may need to create a plan to follow yourself, as there is no building plan within the video.
4.DIY Drum Sander
This is merely an overview tutorial of how to build your drum sander; you can get the real construction video here. In this overview, the builder gives you the dimensions and all the information you need to build your sander.
Her sander sits on top of a stand that contains the dust extractor. According to her, you may have to make a few modifications to your sander because of some scrap parts she used, which she’s not quite sure where it came from.
Overall, you would find this a useful video tutorial which would be of great benefit when you want to build yours.
5.DIY Bench Grinder Powered Drum Sander
Inside this tutorial, you would find a link to the pdf that contains the plans’ dimensions in the description box. This video tutorial teaches you how to make a drum sander using a 400W bench grinder for power.
For this build, you would need a table saw; the table saw sled, disc sander, wooden bench vice, angle grinder stand, and a drill guide.This drum sander is not too large, this means that it would be great for a small office or workshop space.
The video is done in a step by step building process so you can note the steps as you watch. You would need some glue, MDF, a drill, table saw, disk sander, and other items which you would find in the tutorial.
6.Best DIY Drum Sander
This is a 25” wide Drum Sander tutorial. It would work well in a workshop with lots of space. Although it took quite a while for the designer to build, it ideally should take a couple of weeks. It’s a pretty lengthy tutorial, so ensure you have enough time before you begin.
For this design, you would need MDF, plywood, angle iron, oil paint, a drive motor, bolts and nuts, and some other tools you would find within the tutorial. It’s a fully instructional video tutorial and would guide you through the process of making yours.
7.DIY Drum Sander (with Pictures)
This is a written tutorial with clear pictures that details each step as you go along. It begins with making and gluing together 26 4” disks for the drum. The drum is powered by table saw motors, a small 4L pulley, and a ¾” rod. You may need to prepare all the materials, tools and equipment you would need before you begin.
Within the tutorial, you would find more instructions and tips on how to build yourself an excellent drum sander.
Conclusion
Typically, drum sanders are just a little complex to build, but with the tutorials above, building it should not be too challenging. Before you begin, try to scan through each of the tutorials to see which one would be good enough for you. This way, building your drum sander will not become a chore, and you can finish it in record time. Good luck!


Ask Me Anything