
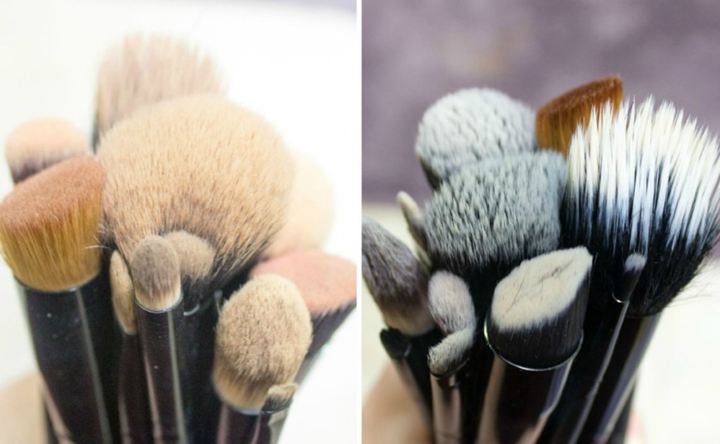
Makeup brush is an integral item for every female to go outside regularly. But when was the last time you cleaned/washed the brush bristles?
Continued contact with sweat, bacteria & oil eventually turns the brush into a microbial abode.
No need to check your purse to invest in expensive commercial cleaners. There are several DIY makeup brush cleaners to choose for disinfection.
Let’s check the enthusiastic solutions to treat your bristles.
Table of Contents
1. Using Dish Soap to Clean the Bristles

You always rely on the dish soaps to clean/wash everyday kitchenware. Why not give the composition a try for your brush? That’s right, you can initiate a quick cleanup with the simple recipe.
Basic Brush Cleaner
- Little Dish Soap
- Clean Warm Water
Wet the bristles under potted warm water. Add the dish soap to deliver a gentle massage. Use a standard dish sponge to rub the bristles thoroughly.
2. Natural Shampoo to Address the Residue
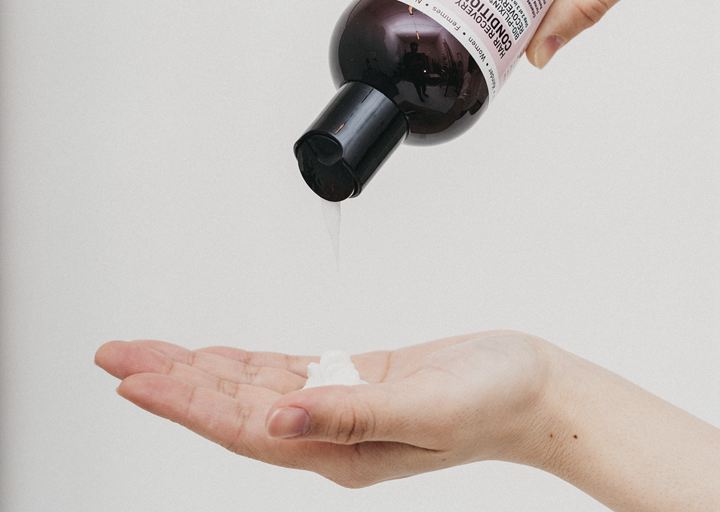
Using all-natural shampoo can effectively treat the residuals. You can have a sparkling outcome with the intended ingredient.
Baby Shampoo Cleaner
- Baby Shampoo
- Warm Water
You can dip the brush into warm water before putting in some shampoo drops. Wait at least 20 minutes to let the residue loose.
Also, you can directly put several drops on the bristles. Rubbing the wet brush in warm water should provide a better effect.
3. Protective Disinfectant from Watery Vinegar
Acidity of vinegar easily cuts the microbes from bristle surfaces. The method is extremely simple without requiring anything special.
White Vinegar Cleaner
- 1 Tablespoon White Vinegar
- Warm Water on Large Bowl
Pour the vinegar into warm water to create the mixed solution. Soak the brush for about 20 minutes. Properly rinse the brush to loosen any liquid drop for drying.
4. Extremely Effective Coconut Essence
Almost no other simple method can surpass its overall efficiency. Its superior anti-bacterial specs work gently on the bristles. And it secures a deep surface cleaning to last long.
Coconut Oil Cleaner
- 2 Tablespoon Coconut Oil
- Sufficient Warm Water
Melt the oil in a bowl to make it completely liquid. Swirl the makeup brush to blot all the free residuals out. Rinse the coconut oil from bristle surfaces using warm water.
5. Brush Cleaner for Daily Application
Keeping your face free from breakout may require frequent cleanups. And you should try the functional combo of everyday items.
Vinegar, Soap & Oil Recipe
- 1 Tablespoon White Vinegar
- 1 Tablespoon Olive/Jojoba/Almond Oil
- 1 Tablespoon Dish Soap
Simply mix everything together to directly apply on the surface. Always give a scoop after shaking well on every use. Rinse the cleaner with warm water for eventual drying.
6. Use soda to Exterminate Oily Residue
Anyone to seat excessively may find the oil-based cleaner ineffective. Also, the surface may hold slight oily sweat/cleaner. And you have a perfect solution to restore the non-stick surface.
Baking Soda Cleaner
- Clean Water at Normal Temp
- ⅔ Teaspoon Baking Soda
Mixing the ingredients in a bowl will require you to swirl the bristles. Thorough rinsing should remove the oily reside alongside the cleaner odor.
7. Naturally Nourishing Brush Cleaner
Nourishing oil to feature anti-microbial properties can suffice the recipe. It’s more like a slight modification of the coconut oil method.
Grapeseed Oil Solution
- Half Cup witch Hazel
- 2 Tablespoon Castile Soap
- 1 Teaspoon Grapeseed Oil
- 1 Cup Distilled Water
Likewise, combine the ingredients in a bowl to swirl the bristles. Simply rinse it using tap water for eventual completion. It should also soften the washed brush from overnight drying.
8. Easy Cleanup with Hardened Disinfectant
The impressive strategy acts more like a dependable beauty blender. Simple scrubbing should save your excessive liquid demands.
Solid Brush Cleaner
- 2oz Melt & Pour Soap
- Essential Oil (Antibacterial/Antifungal)
- 1 Tablespoon Jojoba Oil
- 1 Teaspoon Pink Clay
Combine the clay with jojoba oil to create a smooth mix. Melt the soap to pour into the prepped mix. Add 4-5 drops of essential oil to impart disinfecting power with fragrance.
9. Using the Power of All-Natural Essence
It isn’t exactly the most viable strategy to deal with dirt, grime, oil. But the essence is sure to neutralize loosened particles on the surface. And it can maintain the cleanliness for long enough.
Natural Essential Oil Cleaner
- 6 Drops Tea Tree Oil
- 4 Drops Lavender Oil
- 60mL Warm Water
Mix the items properly to pour the solution into a spray bottle. Apply a generous amount directly on the bristles. Wipe the surface using tissue paper to remove the loosened residuals.
10. Almost Instant but No-Waste Recipe
No need to create a mess in your kitchen with too many ingredients. The method lets you save everything for a decent outcome. You can also use household olive oil instead of sweet almond.
No-Residue Brush Cleaner
- 2 Tablespoon Dish Soap
- 1 Tablespoon Almond Oil
Pouring the oil into liquid soap will set the swirling base. Use hands to agitate the submerged brush’s cleaning. Rinse the treated bristles in cold (normal temp) water to enable drying.
11. Universal Solution to Colored Makeup
Changing the color in one session will require continued cleaning. But you can’t afford the time for regular DIY methods. You should consider the no-water strategy for basic cleaning.
No-Rinse Brush Cleaner
- 200mL Cup or Glass
- Usable Microfiber
Fold the microfiber to tuck it inside the cup/glass surface. Give the brush a gentle swirl every time you need to change colors.
12. Use Exclusive Solution for Heavy Cleanups
It may take multiple attempts to clean an extremely dirty brush. And you must take steps to eliminate the chances of microbial breeding/breakout.
One to DIY Cleansing Mix
- Slightly Distilled White Vinegar
- 1 Teaspoon Extra-Virgin Olive Oil
- Sufficient Liquid Castile Soap
- Warm Water on Large Bowl
Saturate the bristles with olive oil using back and forth rubbing through a towel/cloth. Combine castile soap with warm water to treat the surface. Use the vinegar to neutralize the residual microorganisms.
Rinse the brush thoroughly in warm water to allow natural drying. Don’t involve your hands directly in any step.
Tips for DIY Makeup Brush Cleaning
- Always wash your brush with normal/warm water to wipe residuals.
- Keep the bristles downward while cleaning, regardless of your recipe.
- Use your hands gently to restore the bristle order/shape before drying.
- Pay attention to keep the brush-bristle joint dry to avoid loosening.
- Don’t ever use extremely hot or boiling water directly on the bristles.
- Try to swirl the brush into cleaner without involving your bare hands.
- Makeup sponge or beauty blender may harbor microbials with time.
- Don’t start using the bristles without confirming its absolute drying.
- Skip storing the prepared cleaner for long-term future applications.
- No need to clean every day unless it’s used commercially/frequently.
- Utilize some drops from lemon slices to eliminate any residual smell.
- Don’t miss cleaning the brush container alongside the bristle surface.
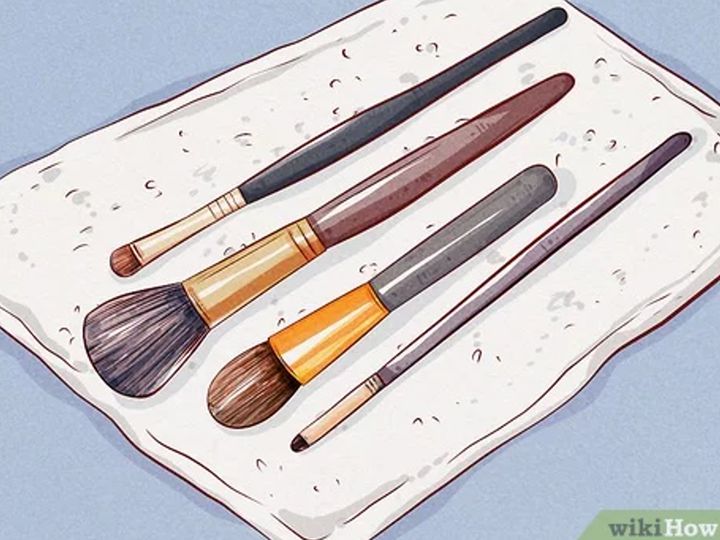
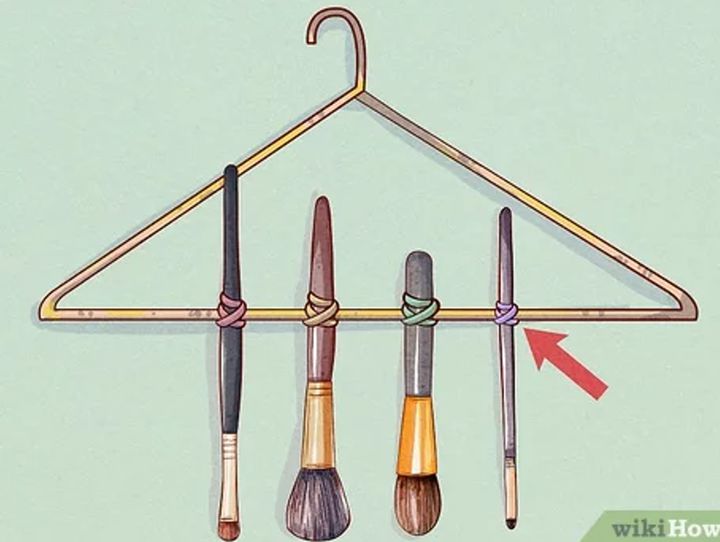
How to Dry the Makeup Brushes?
Downward drying has to follow the downward cleaning after proper rinse. There are many special ways to allow natural drying. But you’re to check the DIY drying strategies without damaging the order.
Rolled Dish Towel – It’s the simplest one to support any household condition without any effort. Roll a dish or hand towel halfway to set the sides down. Gently prop the brush handles from the top to maintain an inclined position.
Clips/Clothespins with Hanger – It’s arguably one of the most creative techniques to consider. You just need to attach the pins/clips to the handle for hanging. Not to mention, the method remains useful enough for many DIY projects.
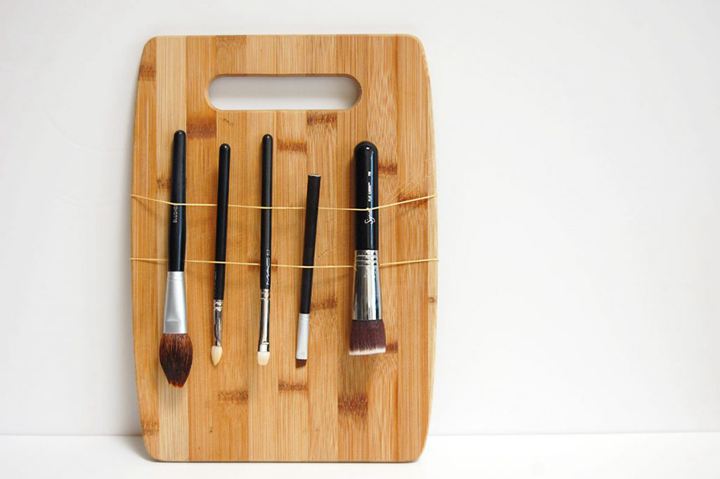
Rubber Banding – The true upside-down strategy will require some bands on a flat board. Attaching the wet brushes to the board using bands should do the trick. However, you must account for practical boards to possess no harm.
How Often to Clean Makeup Brushes?
Of course, you may want to know your next cleaning session to allocate your schedule. Well, there are different brushes available to meet your makeup requirements. And that’s where the cleaning interval changes alongside several interdependent facts.
Brushes for regular skin makeup require cleaning once or twice a week. You’re to consider blush, bronzer, concealer, foundation under the category. However, somewhat less-used eyeing brushes should remain okay with one/two sessions per month.
But you can’t skip your skin condition, outdoor time, weather, or special needs. Anything not to suffice standard recommendation may induce eventual breakouts. Consult a dermatologist to know the skin sensitivity where a beautician can suggest brush uses.
When to Replace Makeup Brushes?
Even the most effective commercial cleaning may not resolve the problem. And that’s where you should get rid of the current brushes.
Damaged, uneven, slightly torn bristles can give you any service. Don’t forget to confirm the exact bristle density & softness on evaluation.
Final Words
Negligence on makeup brush cleanliness may lead to nasty facial breakouts. And you obviously don’t want to face the disgusting/embarrassing trouble. Check your current resources first to enlist the methods ready to make your day.


Ask Me Anything